Food Hunt Level 969 Walkthrough
ExpertGreen Snake and the Grey Mouse
Stuck on Food Hunt level 969? Follow the full 44-block clear of the board: a five-block opening, two blocks frozen for over a minute each, seven hidden same-color refills, and a green finish that empties the board at 4:28.
Level board
Step-by-step walkthrough
Prefer screenshots to video? Every phase of the clear is below in order, with the block counts and the frames they were taken from — keep it open next to the game and follow along tap by tap.
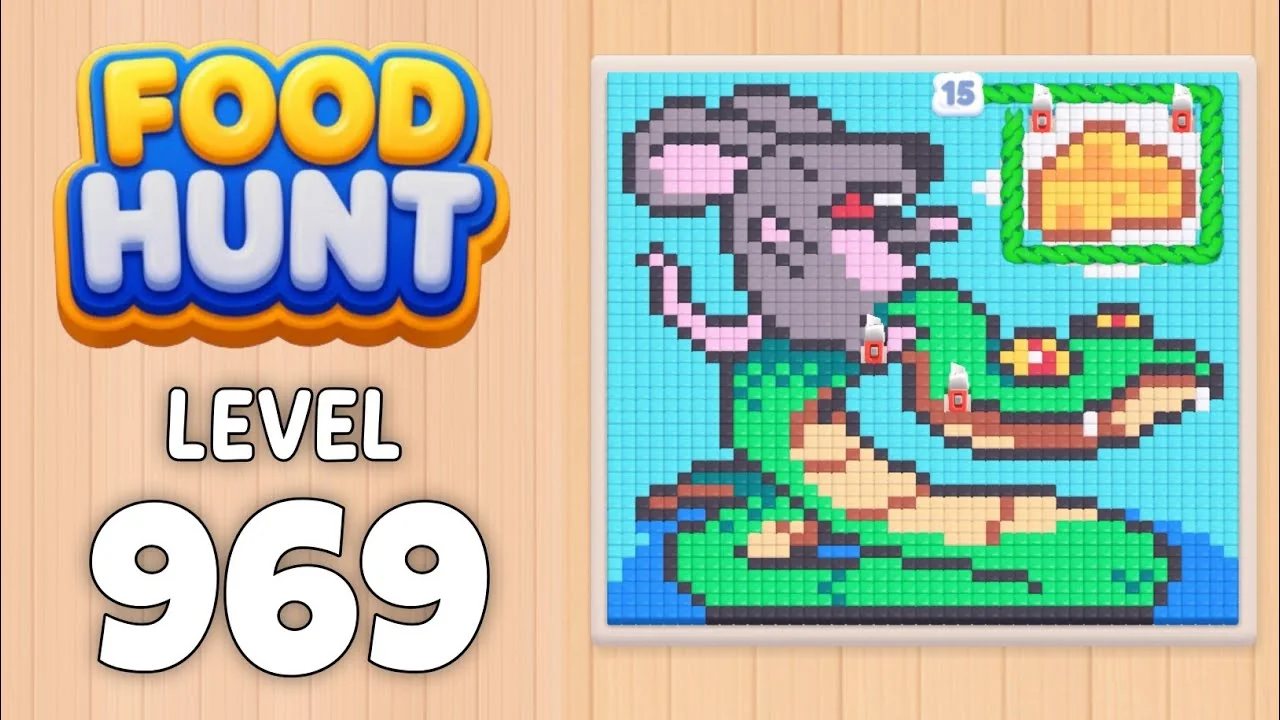
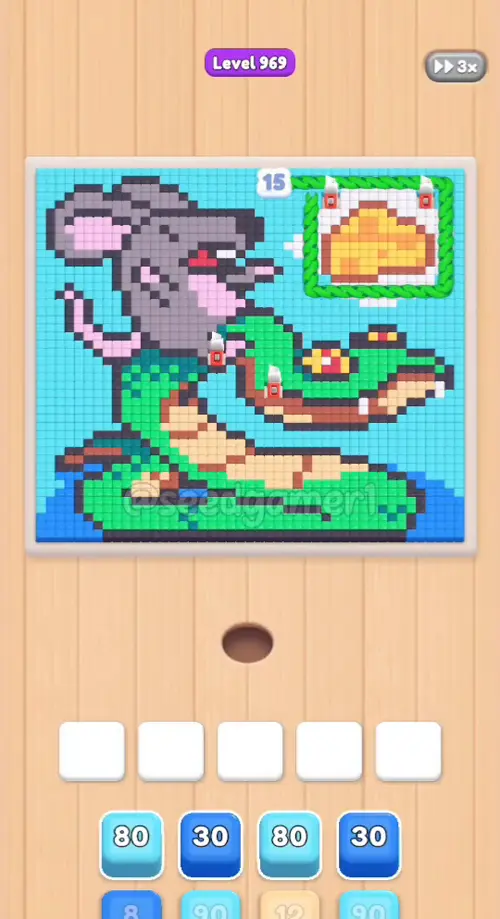
Level: 969 — pixel art of a bright-green snake coiled around a grey mouse, a cheese sandwich in a green leaf badge at the top right, a pale blue checkered backdrop and dark blue water along the bottom
Source: frame-by-frame analysis of the
foodhunt-level-969recording (545 frames @ 2 fps, 4:32 of footage, one clean run; the recording carries the game's3xspeed badge)Blocks fed: 44 | Cells eaten: ~2,029 as printed across those blocks (the art grid is roughly 45 × 47 ≈ 2,100 cells) | Move limit: none — the order only decides how fast you finish
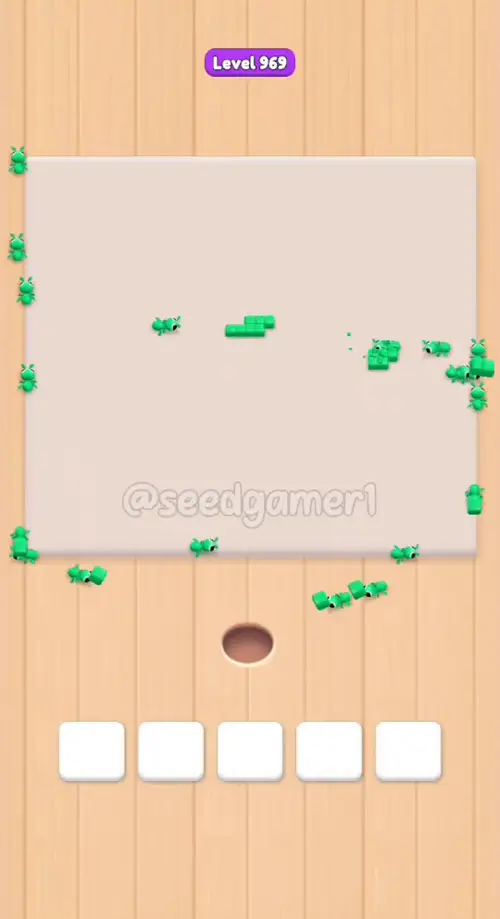
Clear time: board empty at 4:28 (frame 538) — the last block still running is a green one, so the very last pixels to fall are green
How the Level Works
1. Tap a color block in the bottom queue. Four columns are visible and only the bright top block of each column can be tapped. The block flies into one of the five slots and an ant of that color starts eating. 2. Five slots sit above the queue and all five work from the start — nothing is chained shut. The first five taps go in inside four seconds, one per slot. 3. A block eats every reachable cell of its own color; the number printed on it counts down as it eats. At 0 the block vanishes and its slot frees — refill the slot immediately, an empty slot is dead time. 4. Blocks get stuck, and this level is built around it. A block whose remaining cells are buried under another color freezes on its number for minutes. Two blocks here sit frozen for over a minute each — 105 seconds and 89 seconds (see the stall list in Pro Tips). Do not tap extra blocks hoping to hurry them along. 5. Blocks are eaten in layers. The colors that cover large areas — pale blue (backdrop), green (snake body), sand (belly stripes), grey-violet (mouse), charcoal (outline) — come back several times as separate blocks. The first pass takes the cells that are exposed; the next pass takes what the first ant could not reach. 6. Watch the number, not the color, when a slot is refilled. Seven times here a finished block was replaced by a block of the *same* color with an empty gap of only one or two frames at 2 fps — short enough that a color track reads the whole stretch as one long block. The only cue is the tray number jumping back up (slot 1 at 0:11, slot 3 at 0:24, slot 4 at 0:42, slot 3 at 1:19, slot 2 at 2:05, slot 1 at 4:16, slot 1 at 4:24). 7. Two slots sit idle for long stretches, and that is normal. Slot 5 is empty from 2:03 to 2:32 (29 s) and slot 4 from 2:42 to 3:16 (34 s) — the queue simply has nothing useful left to send, and the colors the other ants would eat are still buried. 8. The very end is a flood. From 4:24 the board is down to a single green block and the last 46 cells go in four and a half seconds. 9. Eat the whole picture to win. No move limit, no fail state — ordering is about speed, nothing else.
Colors in this level: 🩵 Sky blue (the pale checkered backdrop) · 🟩 Green (the snake's body) · 🟦 Blue (the dark water along the bottom and the snake's deep coils) · 🟨 Sand (a pale yellow-beige — the belly stripes and the sandwich bread) · 🟨 Yellow (the bright pattern along the snake's back and the cheese) · 🟫 Rust (the sandwich crust and the snake's dark trim) · 🟧 Orange (a small warm patch) · 🩷 Pink (the mouse's ears and the snake's mouth) · 🩷 Rose (a deep pink detail) · 🟪 Mauve (the grey-violet mouse body) · ⬛ Charcoal (the black outline) · ⬜ White (highlights and cream flashes) · 💠 Teal (a dark blue-green shadow)
Complete Block Order (Which Color First, Then Which)
Timestamps are the moment the block lands in its slot, as positions in the footage (t = (frame − 1) / 2). Count = the number printed on the block when it landed. Slot = which of the five slots it took.
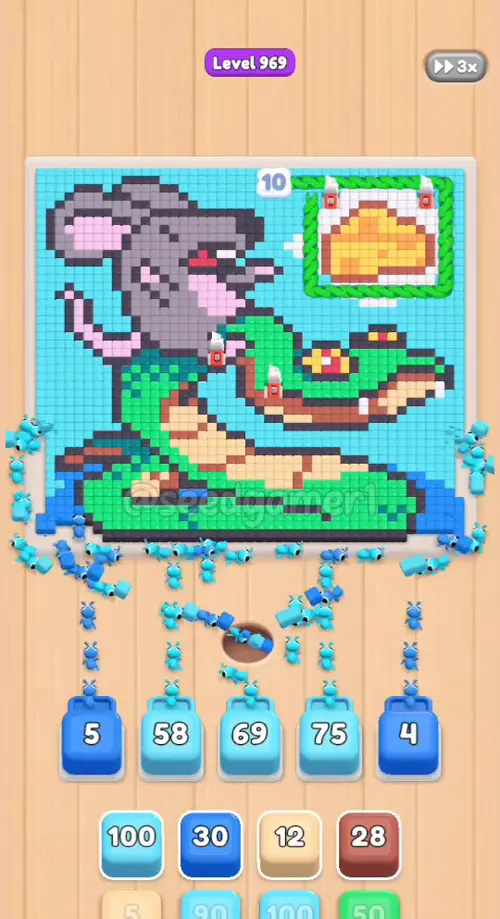
Phase 1 — The Opening Five (0:05 – 0:09)
| # | Time | Slot | Color Block | Count |
|---|---|---|---|---|
| 1 | 0:05 | 1 | 🟦 Blue | ×29 |
| 2 | 0:05 | 2 | 🩵 Sky | ×79 |
| 3 | 0:06 | 3 | 🩵 Sky | ×90 |
| 4 | 0:08 | 4 | 🩵 Sky | ×80 |
| 5 | 0:09 | 5 | 🟦 Blue | ×7 |
Five taps in four seconds, one per slot: slot 1 → 2 → 3 → 4 → 5. Note that at 0:05 a sky-blue block is *passing over* slot 4 on its way to slot 3 — the number you see hovering in slot 4 is not a block seated there.
Phase 2 — The First Replacement (0:11 – 0:16)
| # | Time | Slot | Color Block | Count |
|---|---|---|---|---|
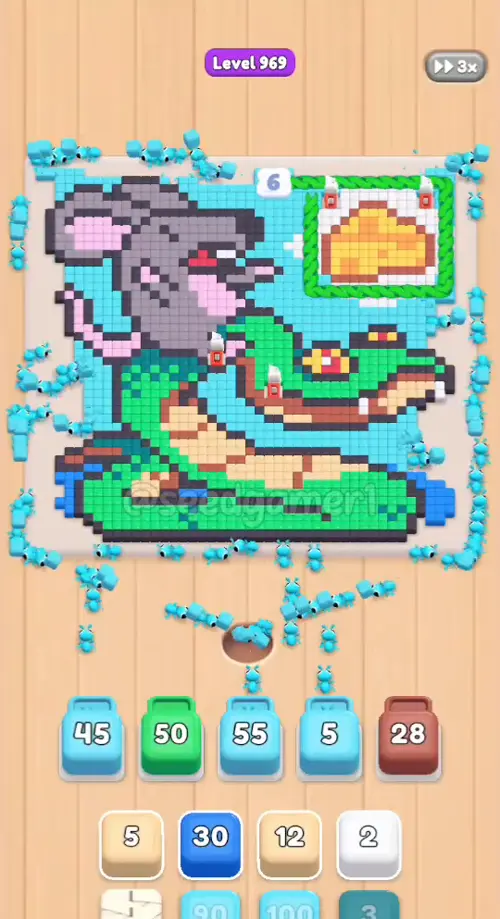
| 6 | 0:11 | 1 | 🩵 Sky | ×100 |
| 7 | 0:15 | 5 | 🟫 Rust | ×28 |
Phase 3 — Green Enters, Sky Comes Back (0:23 – 0:42)
| # | Time | Slot | Color Block | Count |
|---|---|---|---|---|
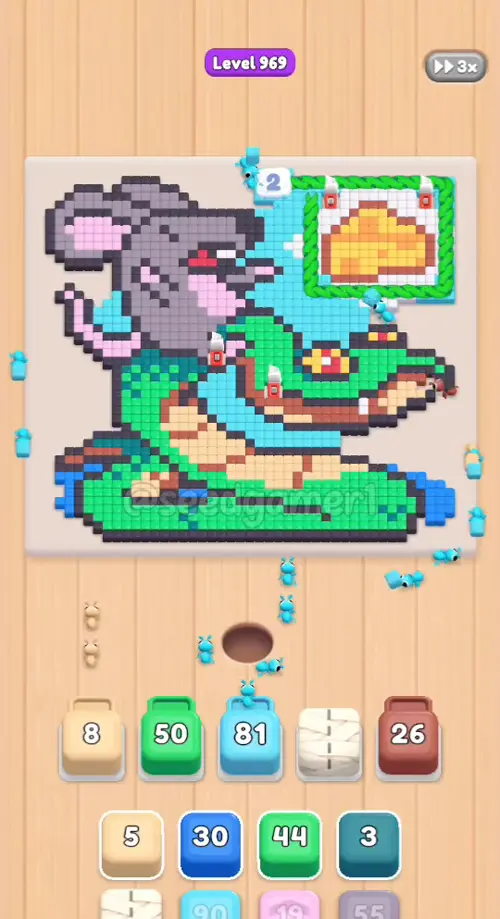
| 8 | 0:23 | 2 | 🟩 Green | ×50 |
| 9 | 0:24 | 3 | 🩵 Sky | ×57 |
| ⬜ White | ×2 | |||
| 10 | 0:41 | 1 | 🟨 Sand | ×12 |
| 11 | 0:42 | 3 | 🩵 Sky | ×100 |
| 12 | 0:42 | 4 | ⬜ White | — |
Phase 4 — Blue Again, Sky Again (1:10 – 1:19)
| # | Time | Slot | Color Block | Count |
|---|---|---|---|---|
| 13 | 1:10 | 1 | 🟦 Blue | ×29 |
| 14 | 1:19 | 3 | 🩵 Sky | ×90 |
Phase 5 — Cream, Sand and the Second Green (1:32 – 2:12)
| # | Time | Slot | Color Block | Count |
|---|---|---|---|---|
| 15 | 1:32 | 4 | ⬜ White | ×20 |
| 16 | 1:51 | 4 | 🟨 Sand | ×5 |
| 18 | 2:11 | 4 | 🟫 Rust | ×9 |
Phase 6 — Teal, Mauve and Charcoal (2:26 – 3:00)
| # | Time | Slot | Color Block | Count |
|---|---|---|---|---|
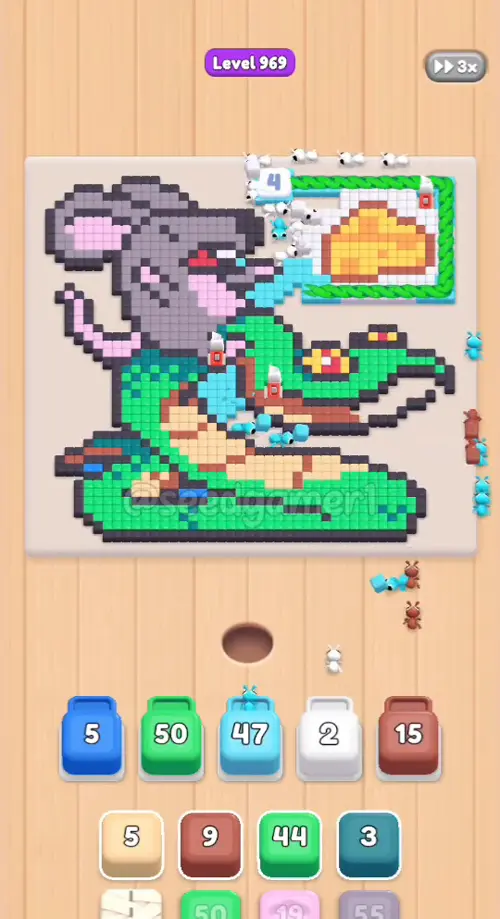
| 19 | 2:26 | 4 | 💠 Teal | ×1 |
| 20 | 2:31 | 4 | 🟪 Mauve | ×55 |
| 21 | 2:32 | 5 | ⬛ Charcoal | ×150 |
| 22 | 2:39 | 2 | ⬜ White | ×37 |
| 23 | 2:55 | 2 | 🟩 Green | ×49 |
| 24 | 2:57 | 3 | 🩵 Sky | ×49 |
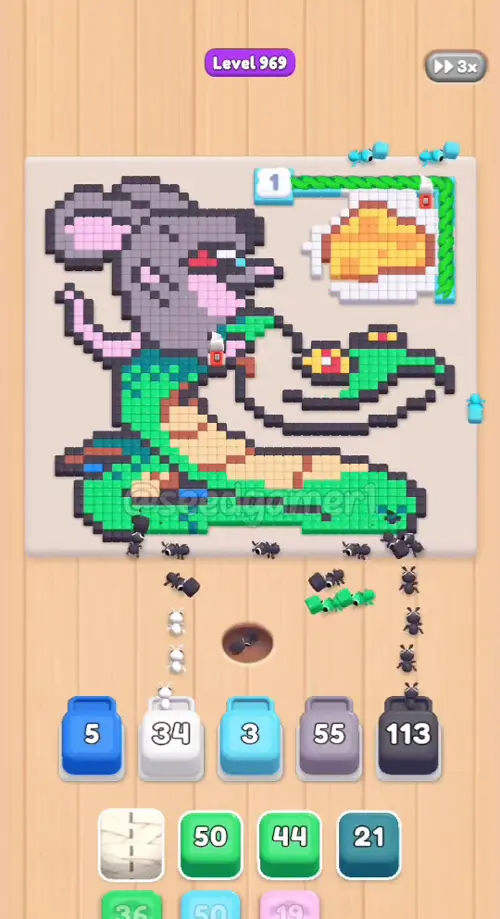
Phase 7 — The Second Charcoal and Pink (3:07 – 3:16)
| # | Time | Slot | Color Block | Count |
|---|---|---|---|---|
| 💠 Teal | ×3 | |||
| 25 | 3:07 | 2 | ⬛ Charcoal | ×150 |
| 26 | 3:09 | 5 | 🟪 Mauve | ×48 |
| 27 | 3:15 | 1 | 🩷 Pink | ×46 |
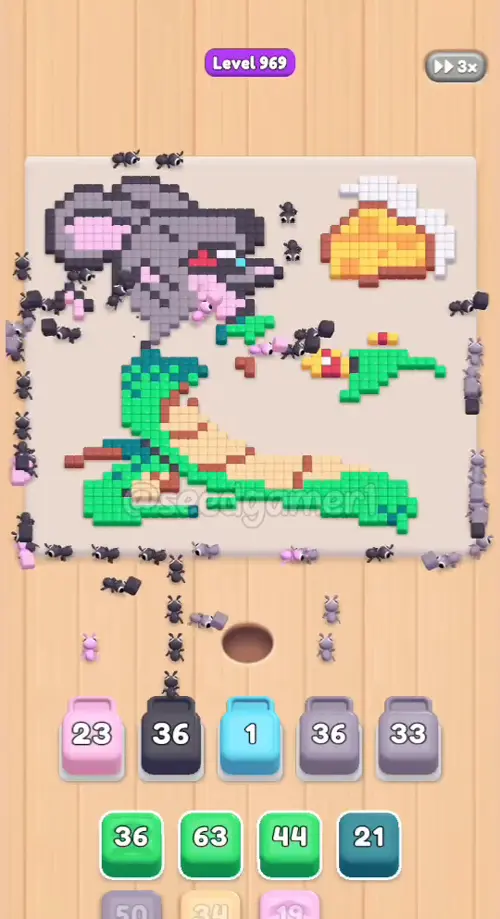
Phase 8 — Green and Pink Refills (3:35 – 3:46)
| # | Time | Slot | Color Block | Count |
|---|---|---|---|---|
| 28 | 3:35 | 3 | 🟩 Green | ×34 |
| 29 | 3:40 | 1 | 🟩 Green | ×41 |
| 30 | 3:40 | 2 | 🩷 Pink | ×17 |
| 31 | 3:42 | 3 | 🟨 Yellow | ×46 |
| 32 | 3:46 | 4 | 🟫 Rust | ×57 |
| 33 | 3:46 | 5 | 🟨 Sand | ×45 |
Phase 9 — The Last Full House (3:51 – 4:02)
| # | Time | Slot | Color Block | Count |
|---|---|---|---|---|
| 34 | 3:51 | 1 | 🟪 Mauve | ×49 |
| 35 | 3:51 | 2 | ⬜ White | ×43 |
| 36 | 3:56 | 5 | 💠 Teal | ×5 |
| 37 | 4:02 | 5 | 🩷 Rose | ×9 |
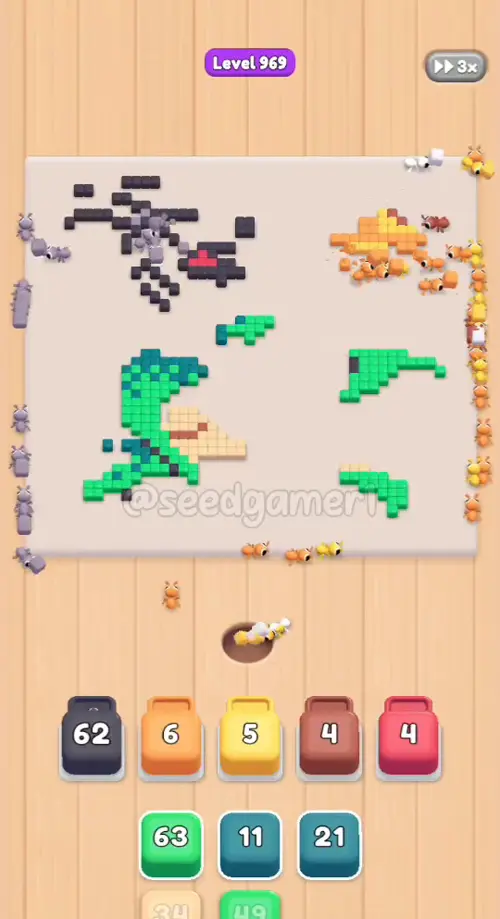
Phase 10 — The Final Run (4:05 – 4:28)
| # | Time | Slot | Color Block | Count |
|---|---|---|---|---|
| 38 | 4:05 | 2 | 🟧 Orange | ×21 |
| 39 | 4:09 | 1 | ⬛ Charcoal | ×62 |
| 40 | 4:14 | 2 | 🟩 Green | ×61 |
| 42 | 4:16 | 3 | 🟨 Sand | ×33 |
| 43 | 4:21 | 5 | 💠 Teal | ×20 |
| 44 | 4:24 | 1 | 🟩 Green | ×46 |
Quick Reference — Copy-Paste Order
Blue 29 · Sky 79 · Sky 90 · Sky 80 · Blue 7 · Sky 99 · Rust 28 · Green 50 · Sky 57 · Sand 11 · Sky 99 · White — · Blue 29 · Sky 90 · White 20 · Sand 5 · Green 48 · Rust 7 · Teal 1 · Mauve 55 · Charcoal 150 · White 37 · Green 49 · Sky 49 · Charcoal 150 · Mauve 48 · Pink 46 · Green 34 · Green 41 · Pink 17 · Yellow 46 · Rust 57 · Sand 45 · Mauve 49 · White 43 · Teal 5 · Rose 9 · Orange 21 · Charcoal 62 · Green 61 · Charcoal 27 · Sand 33 · Teal 20 · Green 46
The very last pixel to fall is green — the final block (a green ×46) empties the board at 4:28.
Pro Tips
- Keep all five slots busy. The only two idle stretches are slot 5 from 2:03 to 2:32 and slot 4 from 2:42 to 3:16; both happen because the queue has nothing to send that the ants could reach. Don't force blocks in during those windows — tap the colors that are still exposed instead.
- Do not mistake the flying blocks for seated ones. At 0:05 a sky-blue block hovers over slot 4 and lands one slot to the left, and at 0:08 a sky block hovers over slot 4 again. Confirm a seat on the *next* frame before deciding a slot is taken.
- Two blocks freeze for over a minute — this is expected. 🟫 Rust ×28 sits in slot 5 from 0:15 and only starts draining at 1:51 (frozen 100 s, released at 2:03, total 106 s in the slot). 🟦 Blue ×29 sits in slot 1 from 1:10, freezes at ×5 from 1:16 and does not move until 2:36 (89 s in the slot). Neither is a bug and neither needs a "helper" tap.
- The 105-second stall. 🟩 Green ×50 lands in slot 2 at 0:23 and its number does not move for 100 seconds — it only starts counting down at 2:05, when the ants that were covering it finish. This is the single longest stall in the level.
- Seven same-color refills are easy to miss. Slot 1 at 0:11, slot 3 at 0:24, slot 4 at 0:42, slot 3 at 1:19, slot 2 at 2:05, slot 1 at 4:16 and slot 1 at 4:24 all swap a finished block for a block of exactly the same color, with only a one or two frame gap. The tray number jumping back up is the only cue.
- The white/cream block prints no number at first. The block that lands in slot 4 at 0:42 arrives showing its blank side (a cracked cream face) and stays that way, so no count can be read for it. Treat it as "one more white/cream tap" and move on.
- Big blocks first. Charcoal shows up twice at ×150 and mauve once at ×55 — those three alone are ~355 cells, more than a sixth of the picture. Sending them early (they go in at 2:31–3:09 naturally) is what keeps the endgame short.
- The finale is green. From 4:24 exactly one block is still running — a green — and it takes the last 46 cells off the board in four and a half seconds.
- One-run clear time. A clean run following this order empties the board at 4:28 of the footage; Level Complete appears at 4:32.
Notes on This Analysis
- Timestamps are footage positions at 2 fps:
t = (frame − 1) / 2. The recording carries the game's 3x speed badge, and the in-game timer reads 05:26 on the final frame. - The count printed on a block is sampled at the frame it lands, so it can be one or two cells lower than the queue showed during the flight.
- Two counts are not recoverable: the cream block at 0:42 lands showing its blank side and never prints a number in the footage. The other 43 counts were read off the block faces.
More expert walkthroughs
View all →
Featured walkthroughs
The levels players search for most - each with a full video guide.