Food Hunt Level 1009 Walkthrough
ExpertStuck on Food Hunt level 1009? Follow the full 60-block clear: a nine-second opening five, a cream block that sits in slot 2 for two minutes forty-five, eleven separate off-white passes, and a charcoal block that carries the board home at 7:25.

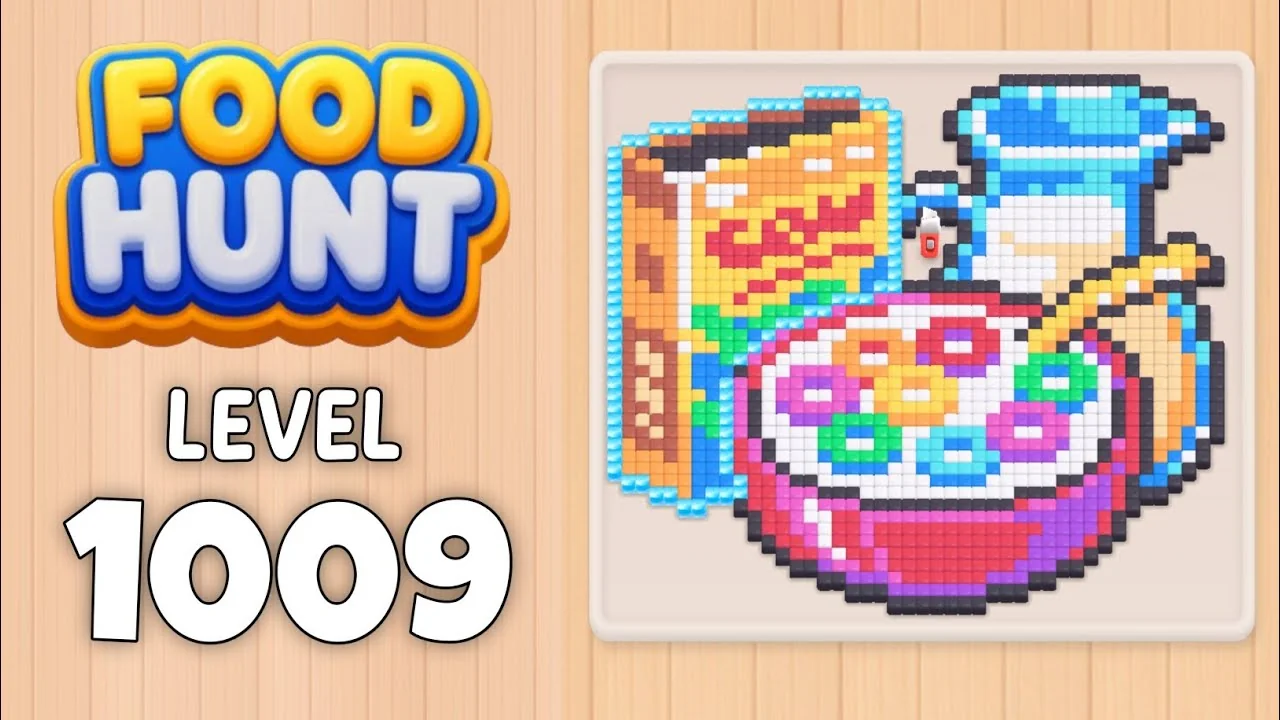
Level board
Step-by-step walkthrough
Prefer screenshots to video? Every phase of the clear is below in order, with the block counts and the frames they were taken from — keep it open next to the game and follow along tap by tap.
Level: 1009 (EXTREME) — pixel-art of a milk drink being made: a dark red glass with a magenta rim, a pale milk surface studded with green, pink, cyan and orange toppings, a blue milk jug pouring into the glass from the top right, a brown-and-yellow recipe card leaning against it on the left, and two orange straws crossing the picture
Source: frame-by-frame analysis of the Level 1009 recording (901 frames @ 2 fps ≈ 7:30; board empty at 7:25 — timestamps below are video time)
Blocks fed: 60 | Total pixels: 1,454 printed across 59 of the 60 blocks | Move limit: none — order only affects speed
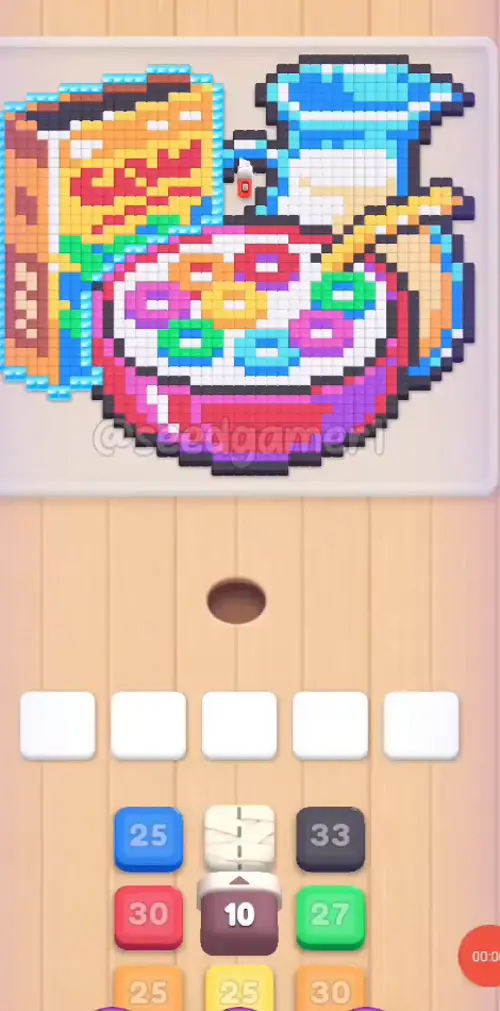
How the Level Works
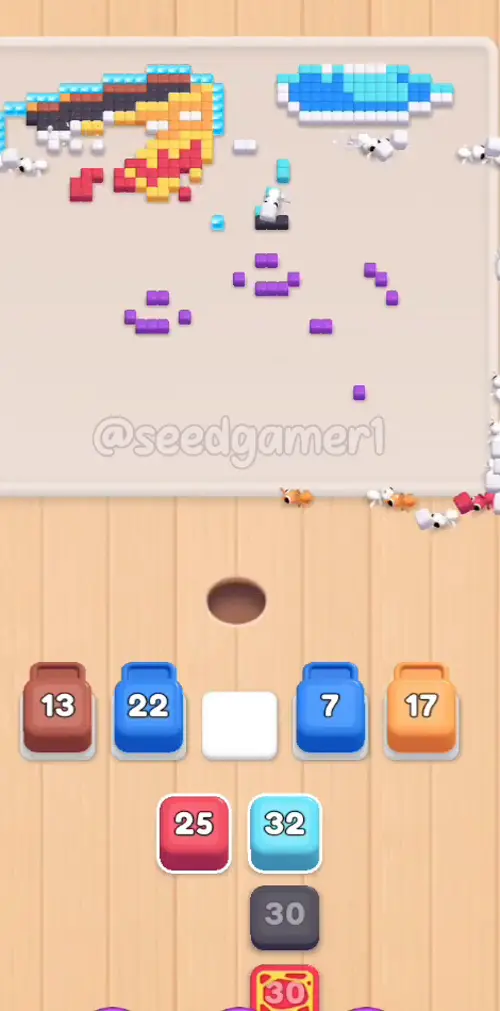
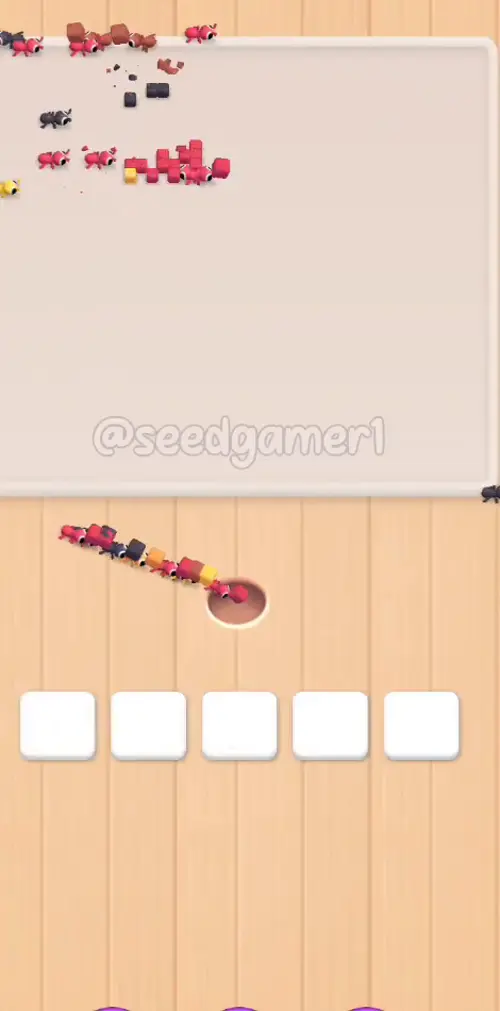
1. Tap a color block in the bottom queue. Three columns are visible and only the bright top block of each column can be tapped. The block flies into one of the five slots and an ant of that color starts eating. 2. Five slots sit above the queue and all five work from the start — nothing is chained shut on this level. The first five taps go in inside ten seconds, one per slot except that slots 4 and 5 fill in the same second. 3. A block eats every reachable cell of its own color; the number printed on it counts down as it eats. At 0 the block vanishes and its slot frees — refill the slot immediately, an empty slot is dead time. 4. Blocks get stuck, and this level is built around it. A block whose remaining cells are buried under another color freezes on its number for minutes — one block here sits frozen for two minutes forty-five, another for over two. Do not tap extra blocks hoping to hurry them along. 5. Blocks are eaten in layers. The colors that cover large areas — charcoal (the whole outline), off-white (the milk), red (the glass and the card artwork), orange and yellow (the card and the straws) — come back again and again as separate blocks. The first pass takes the cells that are exposed; the next pass takes what the first ant could not reach. That is why the same color reappears ten times. 6. Watch the number, not the color, when a slot is refilled. Twelve times here a finished block was replaced by a block of the _same_ color, sometimes with an empty gap of only one frame at 2 fps. The tray number jumping back up is the only cue that a new block has landed. 7. One slot sits idle for very long stretches, and that is normal. Slot 5 is empty from 0:00 to 1:30 (90 s) at the start and again for 2 min 4 s between 4:17 and 6:21. A queue column that only holds colors whose cells are buried is not worth tapping. 8. The very end is a flood. From 6:49 the last seven blocks land inside thirty-five seconds and the remaining cells go in under a minute. 9. Eat the whole picture to win. No move limit, no fail state — ordering is about speed, nothing else.
Colors in this level: ⬛ Charcoal (the dark outline around every shape) · ⬜ Off-white (the milk and its highlights) · 🟥 Red (the glass's dark red and the recipe-card artwork) · 🟧 Orange (the card border and the straws) · 🟨 Yellow (the golden-yellow parts of the card) · 🟫 Brown-red (the dark spine of the recipe card) · ⬜ Cream (pale tan, the card's inner pages) · 🟦 Blue (the milk jug) · 🩵 Cyan (the jug's pale-blue highlights) · 🟣 Purple (the bottom half of the glass) · 🩷 Pink (the glass rim and the round pink toppings) · 🟩 Green (the green toppings) · ⬜ Grey (the mid-grey shading).
Complete Block Order (Which Color First, Then Which)
Timestamps are the moment the block lands in its slot, as positions in the footage (t = (frame − 1) / 2). Count = the number printed on the block when it landed.
Phase 1 — The Opening Five (0:04 – 0:13)
| # | Time | Color Block | Count |
|---|---|---|---|
| 1 | 0:04 | ⬛ Charcoal | ×32 |
| 2 | 0:10 | 🟦 Blue | ×25 |
| 3 | 0:11 | 🟥 Red | ×29 |
| 4 | 0:13 | 🟧 Orange | ×25 |
| 5 | 0:13 | ⬜ Cream | ×29 |
Five taps in nine seconds. Slots 1, 2 and 3 fill one per second, then slots 4 and 5 land together.
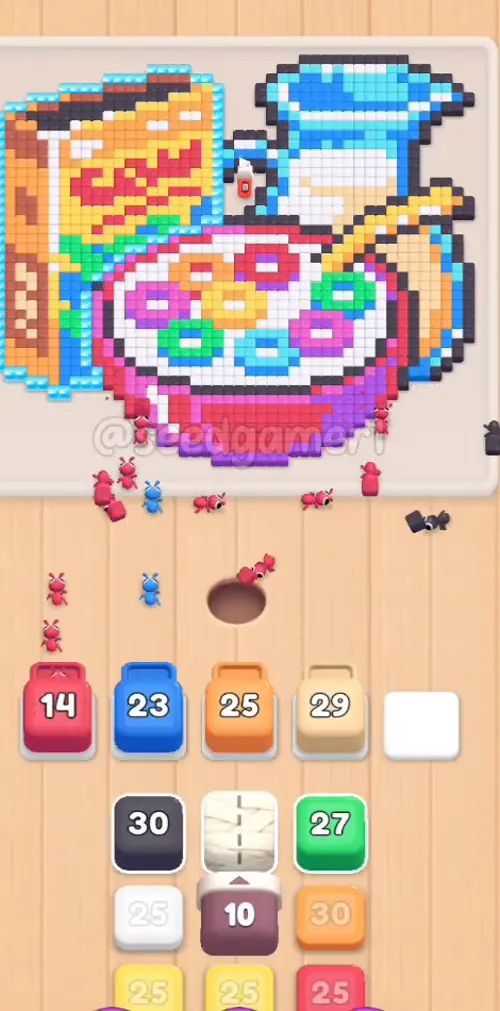
Phase 2 — The Long Silence (1:09 – 1:30)
Nothing lands for fifty-six seconds after step 5. The board barely moves: the charcoal ×32 has finished, the blue ×25 and the orange ×25 are frozen because their remaining cells are under the red and the cream, and only the red ×29 and the cream ×29 are still nibbling.
| # | Time | Color Block | Count |
|---|---|---|---|
| 6 | 1:09 | ⬛ Charcoal | ×29 |
| 7 | 1:29 | ⬜ Off-white | ×23 |
| 8 | 1:29 | 🟨 Yellow | ×24 |
| 9 | 1:30 | 🩵 Cyan | ×24 |
Slot 5 has been empty since the level began and finally gets its first block at 1:30.
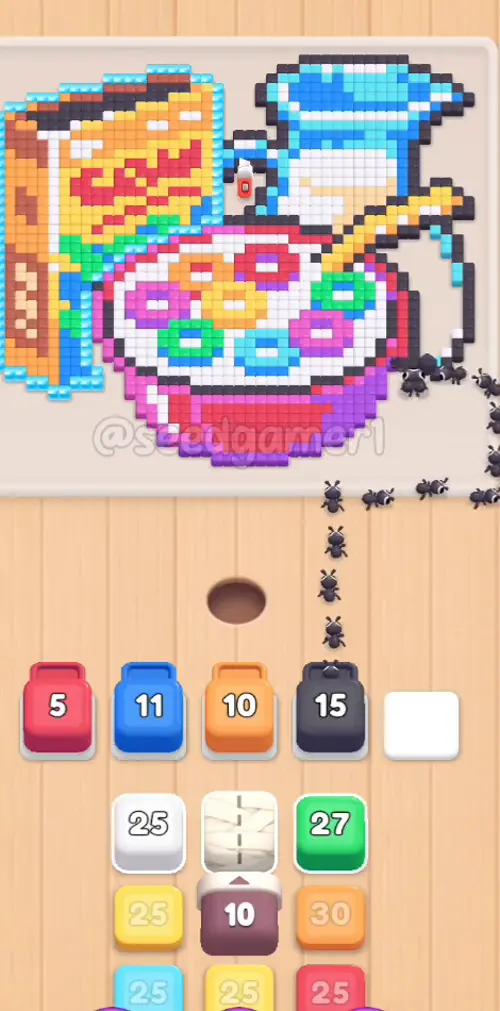
Phase 3 — The Board Wakes Up (2:08 – 2:37)
| # | Time | Color Block | Count |
|---|---|---|---|
| 10 | 2:08 | ⬛ Charcoal | ×25 |
| 11 | 2:14 | 🩷 Pink | ×36 |
| 12 | 2:22 | 🟣 Purple | ×27 |
| 13 | 2:23 | 🟨 Yellow | ×24 |
| 14 | 2:28 | 🟥 Red | ×23 |
| 15 | 2:37 | 🟩 Green | ×29 |
| 16 | 2:37 | ⬛ Charcoal | ×24 |
Seven blocks land in thirty seconds. From here the five slots stay busy: from 2:51 onwards an empty slot is refilled almost immediately.
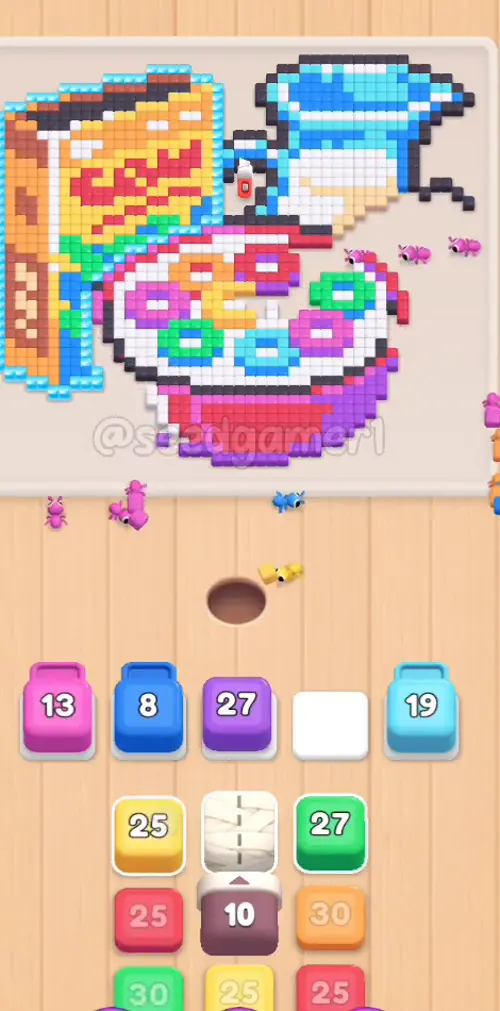
Phase 4 — Fill Every Slot (2:51 – 3:37)
| # | Time | Color Block | Count |
|---|---|---|---|
| 17 | 2:51 | 🟥 Red | ×22 |
| 18 | 2:51 | ⬜ Off-white | ×18 |
| 19 | 2:56 | ⬜ Cream | ×? |
| 20 | 2:56 | 🟦 Blue | ×26 |
| 21 | 3:07 | 🩵 Cyan | ×25 |
| 22 | 3:08 | ⬛ Charcoal | ×24 |
| 23 | 3:10 | 🟫 Brown-red | ×30 |
| 24 | 3:13 | 🟧 Orange | ×24 |
| 25 | 3:20 | 🟩 Green | ×26 |
| 26 | 3:31 | ⬛ Charcoal | ×25 |
| 27 | 3:37 | 🟦 Blue | ×23 |
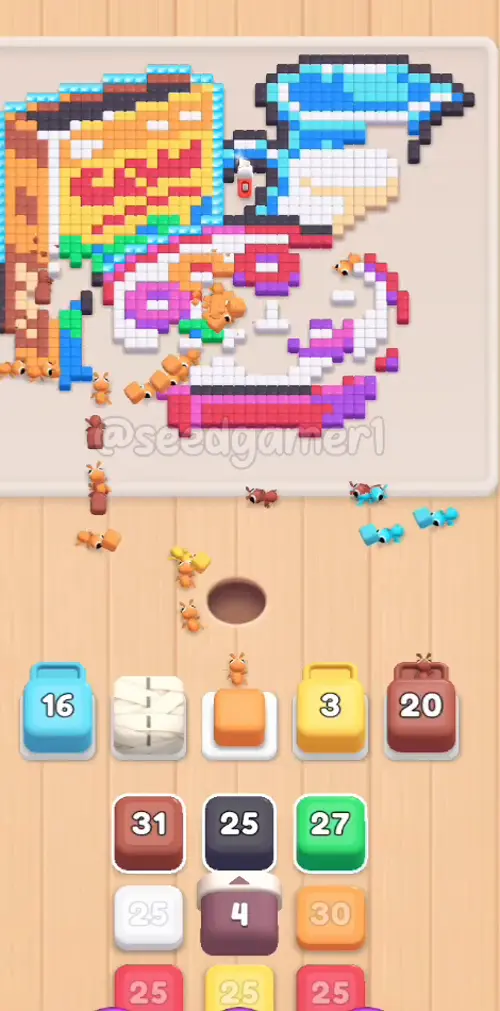
Phase 5 — The Grind (3:50 – 5:02)
| # | Time | Color Block | Count |
|---|---|---|---|
| 28 | 3:50 | 🟥 Red | ×22 |
| 29 | 3:56 | 🟧 Orange | ×27 |
| 30 | 4:09 | ⬜ Off-white | ×26 |
| 31 | 4:13 | 🟨 Yellow | ×24 |
| 32 | 4:17 | ⬜ Cream | ×16 |
| 33 | 4:35 | 🟧 Orange | ×29 |
| 34 | 4:35 | 🟥 Red | ×25 |
| 35 | 4:41 | ⬜ Off-white | ×25 |
| 35 | 4:51 | 🟦 Blue | |
| 36 | 5:02 | 🟨 Yellow | ×23 |
Five blocks land in forty seconds, then the level goes quiet again: for the next minute and a half three slots hold blocks that are all frozen.
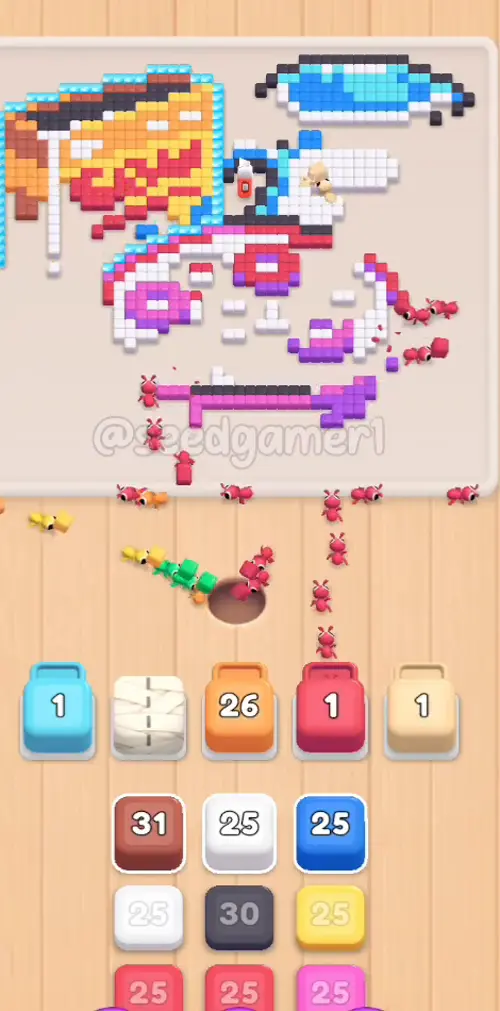
Phase 6 — The Endgame Opens (5:37 – 6:14)
| # | Time | Color Block | Count |
|---|---|---|---|
| 37 | 5:37 | ⬛ Charcoal | ×5 |
| 38 | 5:41 | 🟣 Purple | ×20 |
| 39 | 5:44 | 🟫 Brown-red | ×30 |
| 40 | 5:44 | ⬜ Off-white | ×25 |
| 41 | 5:48 | 🟥 Red | ×23 |
| 42 | 5:51 | ⬜ Off-white | ×22 |
| 43 | 5:56 | 🟥 Red | ×29 |
| 44 | 5:57 | 🩷 Pink | ×24 |
| 45 | 6:06 | ⬜ Off-white | ×24 |
| 46 | 6:13 | 🩷 Pink | ×25 |
| 47 | 6:14 | ⬛ Charcoal | ×20 |
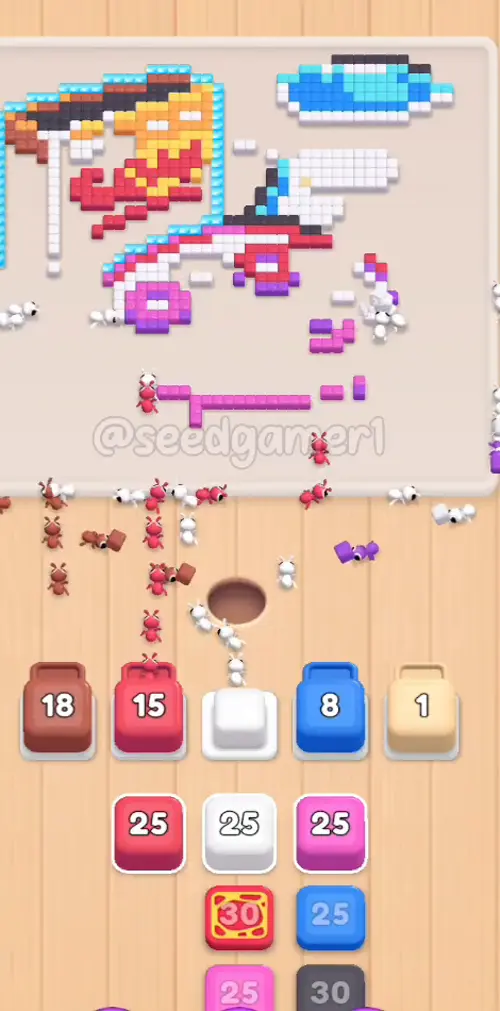
Phase 7 — The Last Sweep (6:21 – 6:33)
| # | Time | Color Block | Count |
|---|---|---|---|
| 48 | 6:21 | 🟦 Blue | ×25 |
| 49 | 6:21 | ⬛ Charcoal | ×30 |
| 50 | 6:22 | ⬜ Off-white | ×29 |
| 51 | 6:28 | 🟥 Red | ×23 |
| 52 | 6:28 | 🟧 Orange | ×28 |
| 53 | 6:33 | ⬜ Off-white | ×23 |
Phase 8 — The Final Flood (6:49 – 7:25)
| # | Time | Color Block | Count |
|---|---|---|---|
| 54 | 6:49 | 🩵 Cyan | ×31 |
| 55 | 6:54 | ⬛ Charcoal | ×27 |
| 56 | 7:03 | 🟥 Red | ×28 |
| 57 | 7:14 | 🟣 Purple | ×13 |
| 58 | 7:14 | 🟨 Yellow | ×26 |
| 59 | 7:20 | ⬜ Off-white | ×11 |
| 60 | 7:22 | ⬛ Charcoal | ×25 |
| 61 | 7:22 | 🟥 Red | ×25 |
The very last pixel to fall is charcoal. Slot 2's pink ×25 empties at 7:25, slot 3 is already empty, and the charcoal ×27 in slot 4 (landed 6:54) is the only block still on screen when the board goes empty at 7:25.
Quick Reference — One-Line Order
Charcoal 32 → Blue 25 → Red 29 → Orange 25 → Cream 29 → Charcoal 29 → Off-white 23 → Yellow 24 → Cyan 24 → Charcoal 25 → Pink 36 → Purple 27 → Yellow 24 → Red 23 → Green 29 → Charcoal 24 → Red 22 → Off-white 18 → Cream — → Blue 26 → Off-white 25 → Charcoal 24 → Brown-red 30 → Orange 24 → Green 26 → Charcoal 25 → Blue 23 → Red 22 → Orange 27 → Off-white 26 → Yellow 24 → Cream 16 → Orange 29 → Pink 25 → Off-white 25 → Yellow 23 → Charcoal 5 → Purple 20 → Brown-red 30 → Off-white 25 → Red 23 → Off-white 22 → Red 29 → Pink 24 → Off-white 24 → Pink 25 → Grey 20 → Blue 25 → Charcoal 30 → Off-white 29 → Red 23 → Orange 28 → Off-white 23 → Cyan 31 → Charcoal 27 → Red 28 → Purple 13 → Yellow 26 → Off-white 11 → Red 25
Pro Tips
1. Fill slots 1 to 5 in the first ten seconds. Steps 1–5 do exactly that: slot 1, slot 2, slot 3, then slots 4 and 5 together. Do not wait for anything to clear. 2. Open with the charcoal and the blue, not with the red. The charcoal ×32 (step 1) is gone in six seconds and frees slot 1 before the second tap; the blue ×25 (step 2) starts the jug immediately. The red ×29 (step 3) is the level's slowest starter — it still shows ×5 sixty seconds later. 3. Expected stalls — do not fight them:
- Cream block in slot 2, 2:56 → 5:41 (2 min 45 s) — the level's longest block. Its counter is drawn in near-white on a cream block and never becomes readable on screen, so this guide cannot give its count. It occupies slot 2 for almost three minutes; while it sits there, tapping a second cream block is wasted.
- Off-white ×25 in slot 1, 3:07 → 5:37 (2 min 30 s) — frozen at ×1 for the last 1 min 48 s.
- Cream ×16 in slot 5, 4:17 → 6:21 (2 min 4 s) — frozen at ×1 for the whole second half; slot 5 is dead for over two minutes because of it.
- Off-white ×25 in slot 4, 4:41 → 6:35 (1 min 54 s) — frozen at ×1 for 2 min 2 s.
- Yellow ×23 in slot 1, 5:02 → 6:30 (1 min 28 s) — frozen at ×14 for 1 min 10 s.
- Red ×22 in slot 2, 2:51 → 4:10 (1 min 19 s) — the card artwork is buried under the brown spine for most of that time.
These six blocks are where the level's minutes go. All of them release on their own once the covering color is eaten. 4. Longest idle slot: slot 5, empty from 0:00 to 1:30 (90 s) and again from 4:17 to 6:21 (2 min 4 s). Across the early stretch the other four slots hold the charcoal, blue, red and cream ants, and the queue simply has nothing useful to send. Nothing you tap there helps: the colors those ants need are still buried. 5. Feed the same color again and again without hesitating. Off-white arrives as 23, 18, 25, 26, 25, 25, 22, 24, 29, 23, 11 — eleven blocks. Red as 29, 23, 22, 22, 23, 29, 28 — seven. Charcoal as 32, 29, 25, 24, 24, 25, 5, 30, 27 — nine. Orange as 25, 24, 27, 29, 28 — five. Each pass digs out the cells the previous ant could not reach; feeding the next block of the same color early is what keeps the board moving. 6. The mid-game is where the level is won or lost. From 2:51 to 3:37 eleven blocks land in forty-six seconds and the picture loses about a third of its cells. Then from 5:37 to 6:14 another eleven land. If you let slots sit empty through those two windows you lose minutes. 7. The endgame blocks drain almost instantly. Purple ×20 (step 38) is gone in six seconds, charcoal ×5 (step 37) in two, red ×22 (step 28) in four, orange ×27 (step 29) in fourteen — because by then their cells are fully exposed. Steps 54–60 clear the last stretch in thirty-five seconds. 8. The last color to finish is charcoal. Hold the charcoal ×27 (step 55, landed 6:54) for the final free slot — it carries the board home at 7:25. 9. No fail state. Nothing can be lost here; one clean run takes 7:25 of footage.
_Compiled from frame-by-frame video analysis: 901 frames (2 fps), per-frame slot tracking with zoom-strip verification of every seat event and its printed count. The seat list is backed by two independent cross-checks: a per-cell "did this cell disappear" trajectory recorded all 1,480 artwork cells leaving the board and grouped them by color, and each color group matches the sum of its blocks (charcoal 263 cells vs 241 printed, blue 96 vs 99, orange 127 vs 133, gold-yellow 140 vs 121, red 189 vs 199, purple 58 vs 60, cyan 67 vs 55); the 59 readable counts sum to 1,454 against an art grid of 1,483 cells measured off the still picture. Twelve same-slot refills of the same color — which leave no empty frame behind — were found by screening every occupancy run for a count that jumps back up._
_One caveat: the cream block in slot 2 (step 19) never shows a readable counter in the recording. Its number is drawn in near-white on a cream block, and a contrast-stretched crop of the block shows only its cloth texture, no digits. Its row carries ×? rather than a made-up value._
More expert walkthroughs
View all →
Featured walkthroughs
The levels players search for most - each with a full video guide.