Food Hunt Level 901 Walkthrough
ExpertPixel-Art Rabbit on a Log
How do you beat level 901? Watch the video or follow the step-by-step picture and text guide to complete it!
Level board
Step-by-step walkthrough
Prefer screenshots to video? Every phase of the clear is below in order, with the block counts and the frames they were taken from — keep it open next to the game and follow along tap by tap.
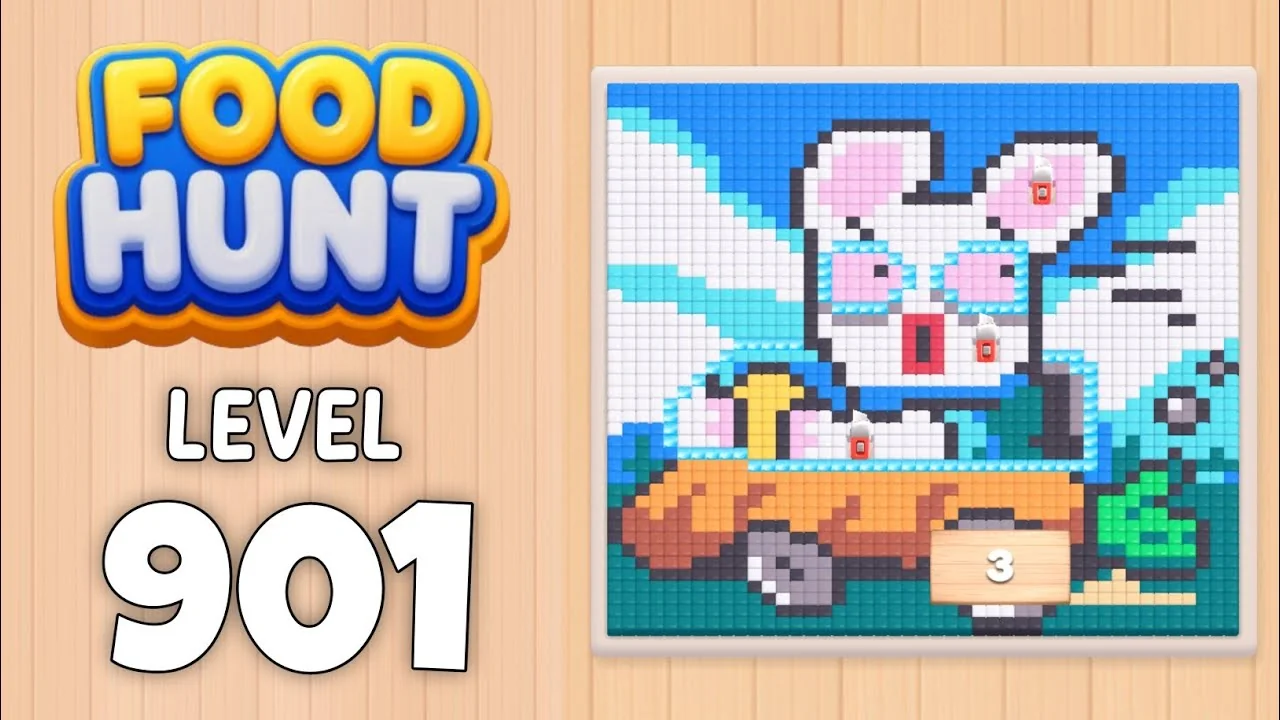
Level: 901 — a pixel-art rabbit: white fur with pink-lined ears, a red nose and mouth, a heavy dark outline, sitting on a brown log under a blue-and-cyan sky with green leaves at the right edge
Source: frame-by-frame analysis of the Level 901 recording (
901.mp4, 585 frames @ 2 fps ≈ 4:52; board empty at 4:50 — timestamps below are video time, recorded at the game's 3x eating speed)Blocks fed: 79 | Total pixels: 1,994 | Move limit: none — order only affects speed
How the Level Works
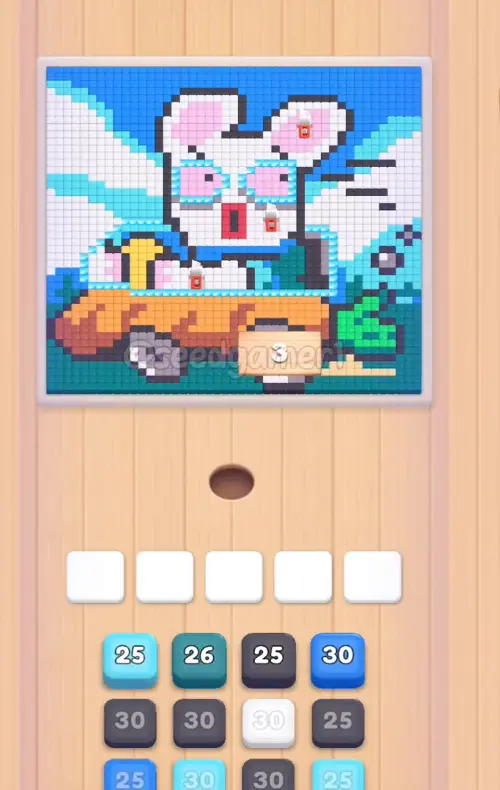
1. Tap a color block in the bottom queue to send it into one of the five slots above. All five slots are open from the start on this level — nothing is chained shut. 2. A tapped block flies to the leftmost free slot, so the slot it lands in is not the order it was tapped; the tables below are in landing order, left to right. 3. Ants of that color pour out and eat every reachable pixel of the matching color on the picture; the number printed on the block counts down as pixels are eaten. At 0 the block vanishes and frees its slot. 4. The board is the whole canvas. The blue-and-cyan sky, the rabbit's white fur, the brown log and the green leaves are all part of the artwork and all have to be eaten too — which is why the level needs sixteen White blocks and fifteen Dark grey ones. 5. A block only eats while its color is reachable. A block whose remaining pixels are walled in behind another colour just sits in its slot. The White ×25 that lands in slot 1 at 0:16 arrives wrapped in cloth and stays frozen and blank there until 2:50 — for the whole first half of the level slot 1 looks dead. 6. The queue shows four columns and its bottom row is clipped by the screen edge; fresh blocks roll up from below it. That is the recording's framing, not a missing row. 7. Eat the entire picture to win. One clean run takes 4:50, and the order below clears it without a single wasted tap.
Colors in this level: ⬜ White (the rabbit's fur and the pale streaks through the sky — the biggest area at 422 pixels) · ⬛ Dark grey (the outline drawn around the whole picture and the shaded fur, 398) · 🟦 Blue (the deep blue band across the top and behind the ears, 307) · 💠 Teal (the dark blue-green foliage and the shaded sky wedges, 191) · 🩵 Cyan (the pale blue sky panels, 162) · 🟧 Orange (the bright grain of the log and the rabbit's nose, 108) · 🩷 Pink (the inner ears and the blush on the cheeks, 106) · 🟪 Mauve (the grey-violet shading under the head and along the log, 86) · 🟥 Red (the mouth and the red accents on the face, 75) · 🟫 Rust (the dark bark tones on the log, 67) · 🟩 Green (the leaves at the right edge, 28) · 🟨 Yellow (a single bright highlight, 19) · 🟨 Peach (the pale tan strip under the log, 13) · 🟥 Salmon (one lighter red block, 12).
Complete Block Order (Which Color First, Then Which)
Timestamps are when the block lands in a slot. Count is the number printed on the block as it lands.
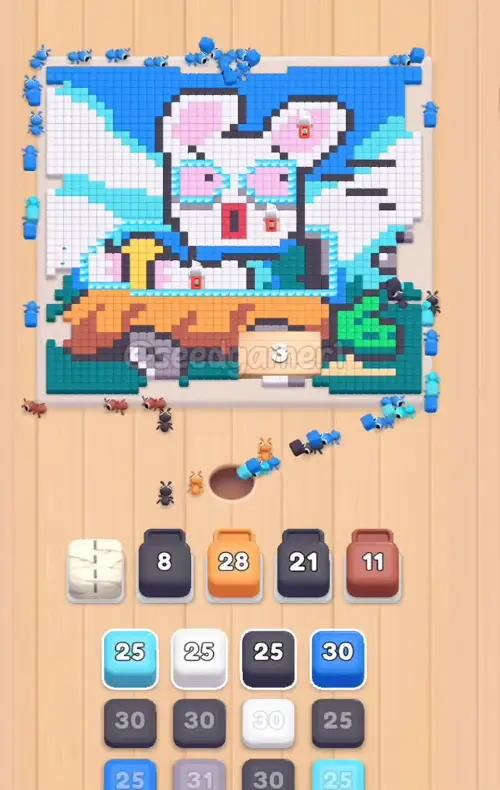
Phase 1 — The Opening Five (0:04 – 0:06)
| # | Time | Color Block | Count |
|---|---|---|---|
| 1 | 0:04 | 💠 Teal | 25 |
| 2 | 0:05 | ⬛ Dark grey | 30 |
| 3 | 0:05 | 🩵 Cyan | 28 |
| 4 | 0:05 | 🟦 Blue | 19 |
| 5 | 0:06 | 🟫 Rust | 20 |
Phase 2 — Refills While the First Five Grind (0:10 – 0:34)
| # | Time | Color Block | Count |
|---|---|---|---|
| 6 | 0:10 | 🟦 Blue | 25 |
| 7 | 0:10 | ⬛ Dark grey | 25 |
| 8 | 0:16 | ⬜ White | 25 |
| 9 | 0:16 | 🟧 Orange | 28 |
| 10 | 0:25 | ⬜ White | 24 |
| 11 | 0:33 | ⬛ Dark grey | 30 |
| 13 | 0:34 | 🟪 Mauve | 29 |
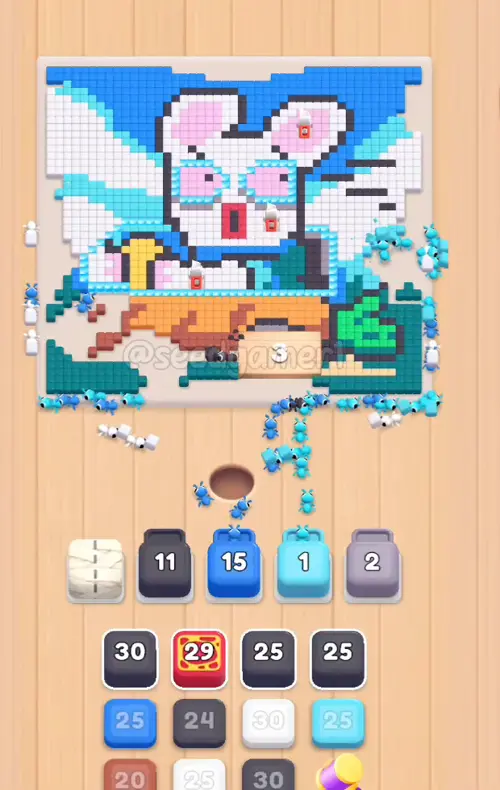
Phase 3 — White Blocks Take Two Slots (0:47 – 1:23)
| # | Time | Color Block | Count |
|---|---|---|---|
| 14 | 0:47 | ⬜ White | 20 |
| 15 | 0:50 | 🩵 Cyan | 25 |
| 16 | 0:52 | 🟦 Blue | 29 |
| 17 | 1:20 | 🟥 Red | 19 |
| 18 | 1:23 | ⬛ Dark grey | 22 |
| 19 | 1:23 | ⬜ White | 24 |
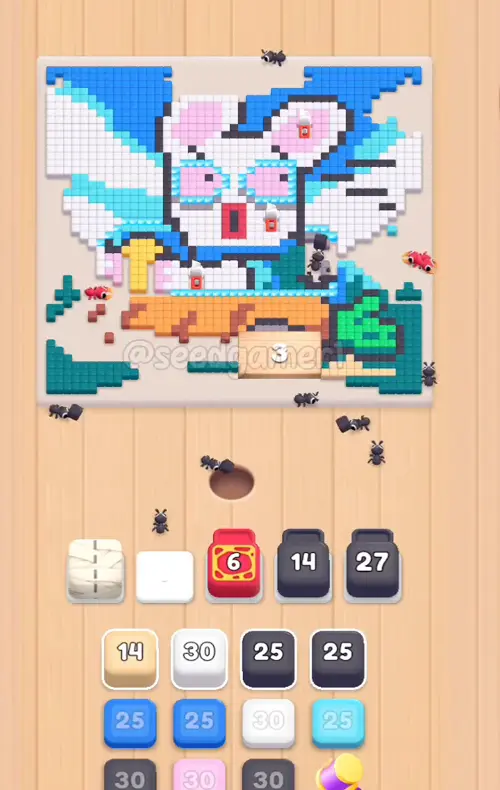
Phase 4 — Dark grey, Blue and the Peach (1:29 – 2:13)
| # | Time | Color Block | Count |
|---|---|---|---|
| 20 | 1:29 | 💠 Teal | 24 |
| 21 | 1:34 | ⬛ Dark grey | 30 |
| 22 | 1:41 | ⬛ Dark grey | 27 |
| 23 | 1:41 | 🟦 Blue | 22 |
| 24 | 1:46 | 🟫 Rust | 19 |
| 25 | 1:51 | ⬛ Dark grey | 29 |
| 26 | 1:55 | 🟨 Peach | 13 |
| 27 | 2:01 | 🟦 Blue | 24 |
| 28 | 2:12 | ⬛ Dark grey | 28 |
| 29 | 2:12 | 🟩 Green | 28 |
| 30 | 2:13 | 🟦 Blue | 24 |
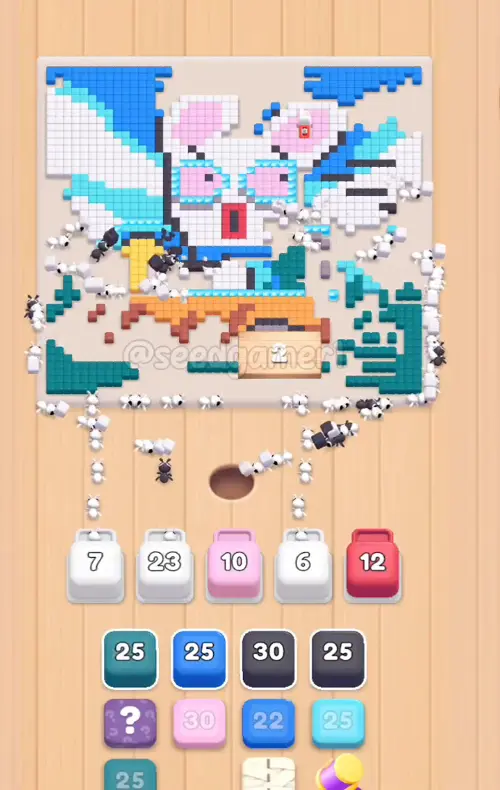
Phase 5 — The Long Middle: Dark grey and White (2:35 – 2:54)
| # | Time | Color Block | Count |
|---|---|---|---|
| 31 | 2:35 | ⬛ Dark grey | 24 |
| 32 | 2:40 | 🩷 Pink | 20 |
| 33 | 2:40 | 🟧 Orange | 24 |
| 34 | 2:46 | ⬜ White | 30 |
| 35 | 2:46 | ⬜ White | 28 |
| 36 | 2:53 | 🟥 Salmon | 12 |
| 37 | 2:54 | ⬜ White | 23 |
Phase 6 — Slot 1 Finally Wakes Up (3:06 – 3:19)
| # | Time | Color Block | Count |
|---|---|---|---|
| 38 | 3:06 | 🟦 Blue | 25 |
| 39 | 3:06 | 🩷 Pink | 30 |
| 40 | 3:08 | ⬛ Dark grey | 30 |
| 41 | 3:12 | 💠 Teal | 25 |
| 42 | 3:18 | ⬜ White | 23 |
| 43 | 3:18 | 💠 Teal | 24 |
| 44 | 3:18 | ⬜ White | 25 |
| 45 | 3:19 | 🟦 Blue | 21 |
Phase 7 — Cyan, Dark grey and the Second Blue Wave (3:25 – 3:36)
| # | Time | Color Block | Count |
|---|---|---|---|
| 46 | 3:25 | 🩵 Cyan | 27 |
| 47 | 3:31 | ⬛ Dark grey | 25 |
| 48 | 3:31 | 🟦 Blue | 18 |
| 49 | 3:32 | 🟪 Mauve | 27 |
| 50 | 3:32 | ⬜ White | 28 |
| 51 | 3:32 | 🟦 Blue | 24 |
| 52 | 3:36 | 🟧 Orange | 28 |
Phase 8 — The Busiest Stretch (3:40 – 3:56)
| # | Time | Color Block | Count |
|---|---|---|---|
| 53 | 3:40 | 🩷 Pink | 26 |
| 54 | 3:42 | ⬜ White | 30 |
| 55 | 3:43 | 🟦 Blue | 28 |
| 56 | 3:47 | 💠 Teal | 24 |
| 57 | 3:49 | ⬜ White | 25 |
| 58 | 3:53 | 💠 Teal | 24 |
| 59 | 3:56 | ⬛ Dark grey | 24 |
| 60 | 3:56 | 🩵 Cyan | 25 |
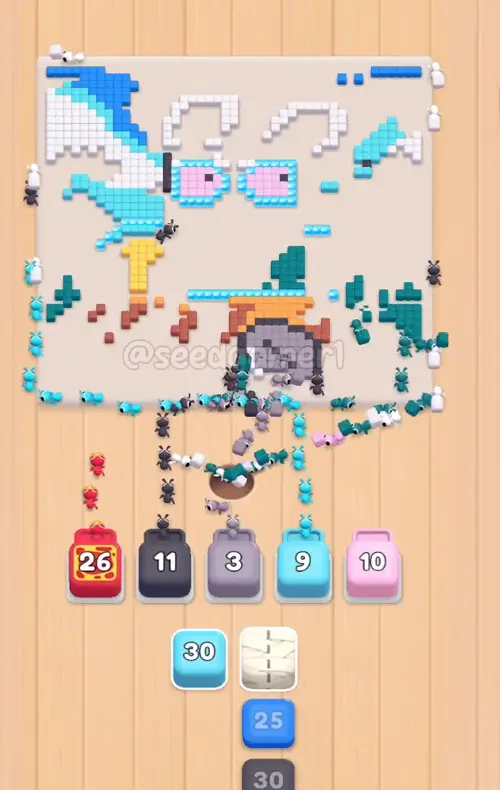
Phase 9 — Red, Rust and a White Refill (3:59 – 4:11)
| # | Time | Color Block | Count |
|---|---|---|---|
| 61 | 3:59 | 🟥 Red | 29 |
| 62 | 4:05 | 🟫 Rust | 28 |
| 63 | 4:06 | 🟦 Blue | 23 |
| 64 | 4:08 | ⬛ Dark grey | 28 |
| 65 | 4:08 | 🟨 Yellow | 19 |
| 66 | 4:11 | ⬜ White | 28 |
Phase 10 — The Last Six Slots Fill Up (4:19 – 4:28)
| # | Time | Color Block | Count |
|---|---|---|---|
| 67 | 4:19 | 🩵 Cyan | 28 |
| 68 | 4:20 | ⬛ Dark grey | 30 |
| 69 | 4:20 | 🟧 Orange | 28 |
| 70 | 4:21 | 🟪 Mauve | 30 |
| 71 | 4:25 | 🩷 Pink | 30 |
| 72 | 4:28 | ⬜ White | 30 |
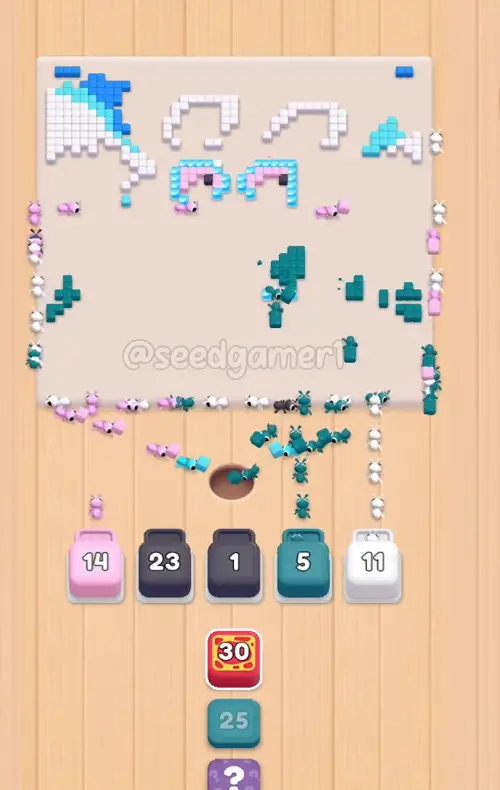
Phase 11 — The Final Seven (4:29 – 4:42)
| # | Time | Color Block | Count |
|---|---|---|---|
| 73 | 4:29 | 💠 Teal | 21 |
| 74 | 4:34 | 🟥 Red | 27 |
| 75 | 4:35 | 💠 Teal | 24 |
| 76 | 4:36 | ⬜ White | 29 |
| 77 | 4:39 | 🩵 Cyan | 29 |
| 78 | 4:41 | ⬜ White | 30 |
| 79 | 4:42 | 🟦 Blue | 25 |
The Endgame
From 4:19 the board is small enough that blocks recycle almost immediately: steps 67–79 land in twenty-three seconds and most of them are gone within seven. Slot 4 carries the level home.
The very last pixel to fall is Cyan — block 77 (Cyan ×29, placed at 4:39) is still running when the White ×30 in slot 1 (step 78) and the Blue ×25 in slot 5 (step 79) empty out ahead of it. The board is completely clear at 4:50.
Quick Reference — One-Line Order
Teal 25 → Dark grey 30 → Cyan 28 → Blue 19 → Rust 20 → Blue 25 → Dark grey 25 → White 25 → Orange 28 → White 24 → Dark grey 30 → Dark grey 16 → Mauve 29 → White 20 → Cyan 25 → Blue 29 → Red 19 → Dark grey 22 → White 24 → Teal 24 → Dark grey 30 → Dark grey 27 → Blue 22 → Rust 19 → Dark grey 29 → Peach 13 → Blue 24 → Dark grey 28 → Green 28 → Blue 24 → Dark grey 24 → Pink 20 → Orange 24 → White 30 → White 28 → Salmon 12 → White 23 → Blue 25 → Pink 30 → Dark grey 30 → Teal 25 → White 23 → Teal 24 → White 25 → Blue 21 → Cyan 27 → Dark grey 25 → Blue 18 → Mauve 27 → White 28 → Blue 24 → Orange 28 → Pink 26 → White 30 → Blue 28 → Teal 24 → White 25 → Teal 24 → Dark grey 24 → Cyan 25 → Red 29 → Rust 28 → Blue 23 → Dark grey 28 → Yellow 19 → White 28 → Cyan 28 → Dark grey 30 → Orange 28 → Mauve 30 → Pink 30 → White 30 → Teal 21 → Red 27 → Teal 24 → White 29 → Cyan 29 → White 30 → Blue 25
Pro Tips
1. Fill all five slots in the first six seconds. Steps 1–5 land between 0:04 and 0:06, one per slot from left to right. Nothing is locked and there is nothing to wait for. 2. The White ×25 in slot 1 is why the level feels slow. It lands at 0:16 wrapped in cloth and does not open until 2:50 — two minutes thirty-four of a slot that shows no number and eats nothing. Slot 1 is effectively dead for the entire first half, and tapping a second white block into it changes nothing. 3. Two more long parks in the first half. Mauve ×29 holds slot 5 from 0:34 to 1:39 (65 s) and Dark grey ×30 holds slot 2 from 0:33 to 1:22 (49 s). With the wrapped white block in slot 1, three of the five slots are barely moving before 1:20. 4. Longest idle slots: slot 5 is empty from 2:11 to 2:46 (35 s), slot 4 from 0:55 to 1:23 (28 s) and again from 2:18 to 2:40 (22 s), slot 3 from 0:58 to 1:18 (20 s). Those windows exist because nothing in the queue can reach its pixels yet — parking a block there just wastes the slot. 5. Feed White and Dark grey relentlessly. White is 422 pixels across sixteen blocks and Dark grey 398 across fifteen — 41% of the picture between them — and neither ever stops being useful. Blue (307 across thirteen) and Teal (191 across eight) are the next two. 6. Same color back to back is normal. Dark grey arrives as 30, 25, 30, 16, 22, 30, 27, 29, 28, 24, 30, 25, 24, 28, 30. White as 25, 24, 20, 24, 30, 28, 23, 23, 25, 28, 30, 25, 28, 30, 29, 30. Each pass digs out the cells the previous block could not reach. 7. The middle is where the level is won. Fourteen blocks land between 1:20 and 2:13, seven more between 2:35 and 2:54, and then twenty-nine between 3:06 and 4:11. If slots sit empty through those three windows you lose minutes. 8. The endgame blocks drain almost instantly. Yellow ×19 (step 65) is gone in seven seconds, Mauve ×30 (step 70) in six, White ×30 (step 72) in six, Red ×27 (step 74) in five — by then every one of their cells is fully exposed. Steps 73–79 clear the last stretch in thirteen seconds.
Food Hunt Level 901 — frequently asked questions
- What colours are on the Food Hunt Level 901 board?
- The board image breaks down into 9 main colours, each covering at least 2% of it: white (#F1F0F7, 25.0% of the board), cyan (#63DDE3, 14.3% of the board), dark grey (#4C4B59, 13.7% of the board), blue (#2A8EEF, 11.6% of the board), orange (#E08959, 11.2% of the board), dark cyan (#1D8290, 6.8% of the board), grey (#9EA2A5, 6.3% of the board), pale pink (#F3C7EA, 6.3% of the board) and pale orange (#F9D5AB, 4.7% of the board).
- Which colour should I clear first in Food Hunt Level 901?
- white covers the most of the board at 25.0%, and cyan is next at 14.3%. The step-by-step walkthrough above is this board's actual tap order; the colour shares here are only what each colour costs to clear.
- What difficulty is Level 901 in Food Hunt: Pixel Puzzle?
- Level 901 is rated Expert difficulty in Food Hunt: Pixel Puzzle.
- Is there a video walkthrough for this Food Hunt level?
- Yes — the walkthrough video on this page plays the full clear of this board, so you can follow the tap order block by block. The board image next to it shows what the finished picture is made of.
More expert walkthroughs
View all →
Featured walkthroughs
The levels players search for most - each with a full video guide.