Food Hunt Level 216 Walkthrough
IntermediateHow do you beat level 216? Watch the video or follow the step-by-step picture and text guide to complete it!
Level board
Step-by-step walkthrough
Prefer screenshots to video? Every phase of the clear is below in order, with the block counts and the frames they were taken from — keep it open next to the game and follow along tap by tap.
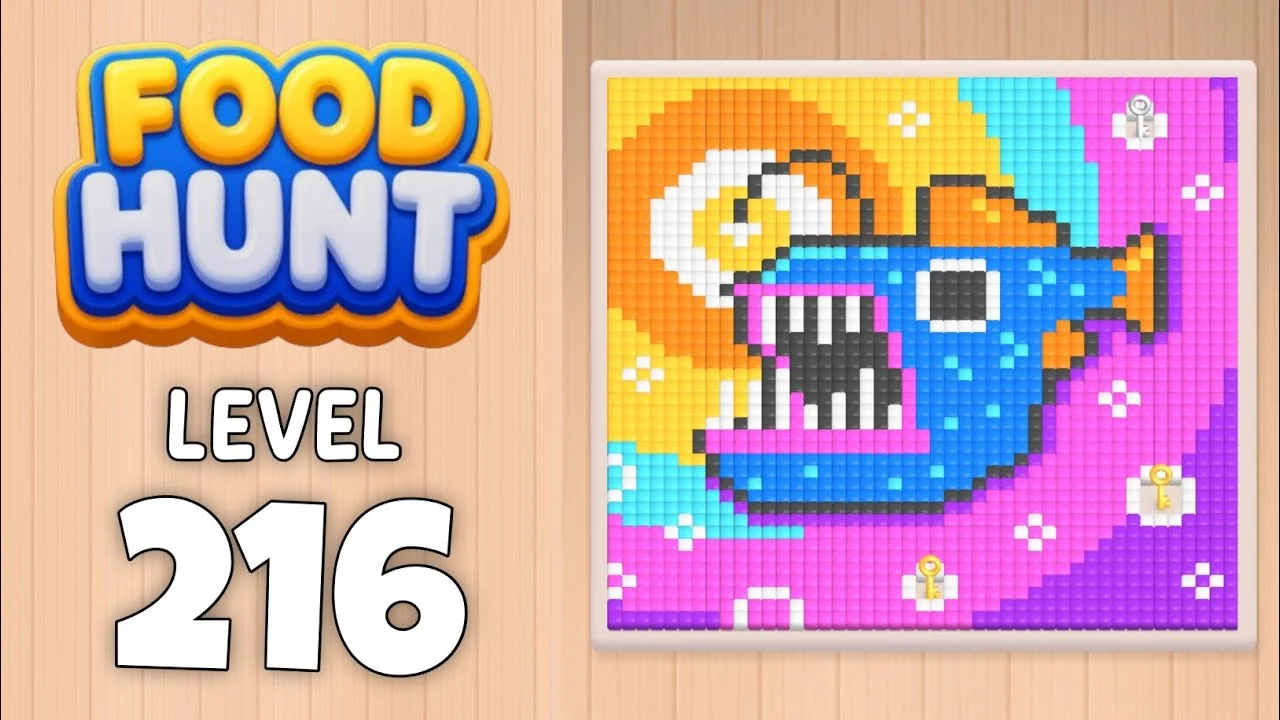
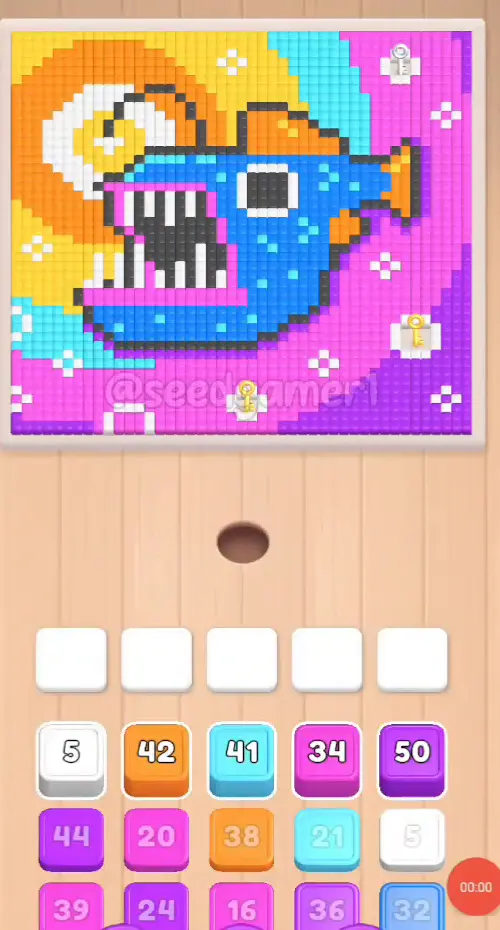
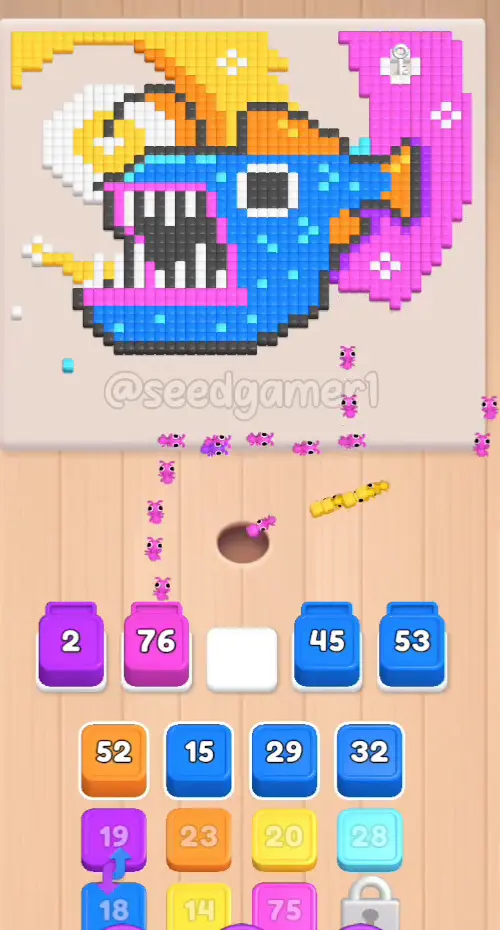
Level: 216 — a big blue toothy sea-monster, mouth wide open, on a hot-pink and violet background; an orange spiral sun with a yellow halo fills the top-left corner, a cyan diagonal band runs across the top-right, cyan patches sit in the bottom-left, and white sparkle stars and three white key tiles are scattered over the pink field
Source: frame-by-frame analysis of the Level 216 recording (931 frames @ 2 fps ≈ 7:46; board empty at 7:41 — timestamps below are video time, recorded at the game's 2x eating speed)
Blocks fed: 55 | Total pixels: ~2,000 | Move limit: none — order only affects speed
How the Level Works
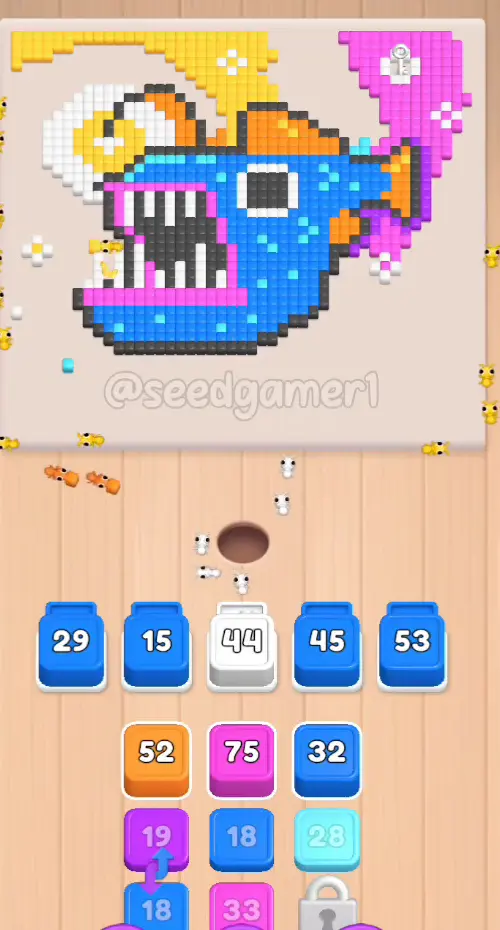
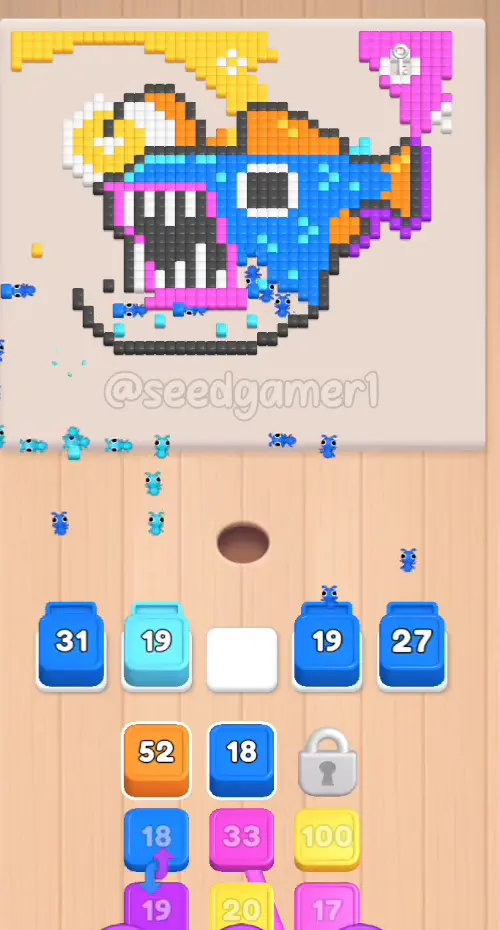
1. Tap a color block in the bottom queue to send it into one of the five slots above. All five slots are open from the start on this level — there is nothing chained shut. 2. Ants of that color pour out and eat every reachable pixel of the matching color on the picture; the number printed on the block counts down as pixels are eaten. At 0 the block vanishes and frees its slot. 3. Colors are eaten in layers. Blue arrives eight times (45, 53, 29, 15, 32, 18, 18, 22), magenta twelve times (34, 20, 16, 79, 70, 38, 45, 89, 73, 55, 16, 31), orange seven times and yellow eight times: the first pass takes whatever is exposed, and the next pass digs out the cells the earlier ants could not reach. 4. Four blue blocks freeze for minutes. The monster's body is walled in by its own dark outline, its white teeth and the orange fins, so blue ×45, ×53, ×29 and ×15 sit in their slots with the counter barely moving. This is normal — do not feed extra blues hoping to speed them up. 5. Eat the entire picture to win. One clean run takes 7:41 of footage, and most of that is waiting on the frozen blues rather than tapping.
Colors in this level: Dark grey (the outline around the monster, its teeth and its eye), White (the monster's square teeth, its eye, the sparkle stars and the three key tiles), Blue (the monster's head, snout and body), Cyan (the diagonal band in the top-right corner, the patch in the bottom-left and the blue-green dots on the monster's body), Magenta (the bright pink background — the largest single area, plus the inside of the mouth), Purple (the deep violet background band across the bottom-right corner), Orange (the big spiral sun in the top-left and the monster's fins and tail), Yellow (the sun's outer ring and the top-left corner of the sky).
Complete Block Order (Which Color First, Then Which)
Timestamps are when the block lands in a slot. Count is the number printed on the block as it lands.
Phase 1 — Opening: Fill All Five Slots (0:03 – 0:23)
| # | Time | Color Block | Count |
|---|---|---|---|
| 1 | 0:03 | 🟣 Purple | 50 |
| 2 | 0:04 | 🟪 Magenta | 34 |
| 3 | 0:06 | 🩵 Cyan | 39 |
| 4 | 0:06 | 🩵 Cyan | 20 |
| 5 | 0:07 | 🟣 Purple | 34 |
| 6 | 0:12 | 🟧 Orange | 42 |
| 7 | 0:14 | 🟪 Magenta | 20 |
| 8 | 0:15 | 🟣 Purple | 22 |
| 9 | 0:19 | 🟧 Orange | 38 |
| 10 | 0:23 | 🟪 Magenta | 16 |
| 11 | 0:23 | 🟣 Purple | 30 |
The first five taps land inside four seconds — purple ×50, magenta ×34, two cyans (39 and 20) and purple ×34 take all five slots before the level is ten seconds old, and there is no reason to hold any of them back. Six more blocks follow over the next sixteen seconds, keeping every slot busy.
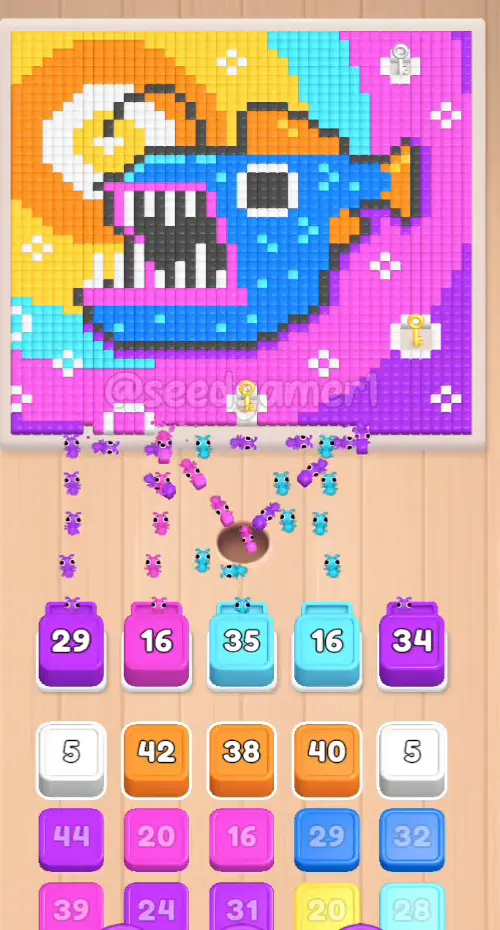
Phase 2 — Two Tiny White Chips and the First Big Blue (0:30 – 0:37)
| # | Time | Color Block | Count |
|---|---|---|---|
| 12 | 0:30 | 🟧 Orange | 40 |
| 13 | 0:31 | ⬜ White | 3 |
| 14 | 0:31 | ⬜ White | 4 |
| 15 | 0:35 | 🩵 Cyan | 35 |
| 16 | 0:36 | 🟦 Blue | 45 |
| 17 | 0:37 | 🟨 Yellow | 30 |
White ×3 and white ×4 are the two smallest blocks in the level — sparkle stars mostly covered by pink. They clear in about a second each, which makes them ideal fillers when a slot would otherwise sit empty.
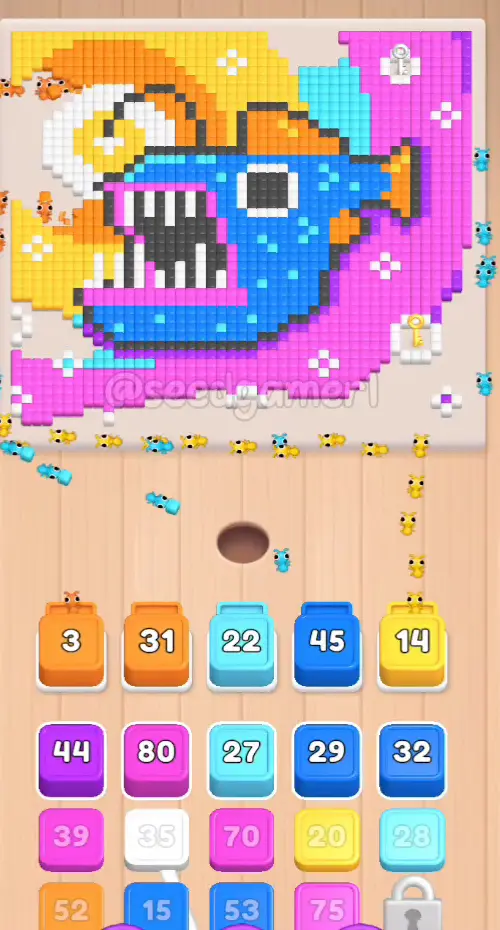
Phase 3 — Slot 3 Starts Cycling (0:54 – 1:17)
| # | Time | Color Block | Count |
|---|---|---|---|
| 18 | 0:54 | 🟪 Magenta | 79 |
| 19 | 1:00 | 🩵 Cyan | 27 |
| 20 | 1:01 | 🟪 Magenta | 70 |
| 21 | 1:01 | 🟦 Blue | 53 |
| 22 | 1:17 | 🟣 Purple | 43 |
Blue ×53 is the first of the long freezes: it lands at 1:01 and stays in its slot until the endgame at about 5:32.
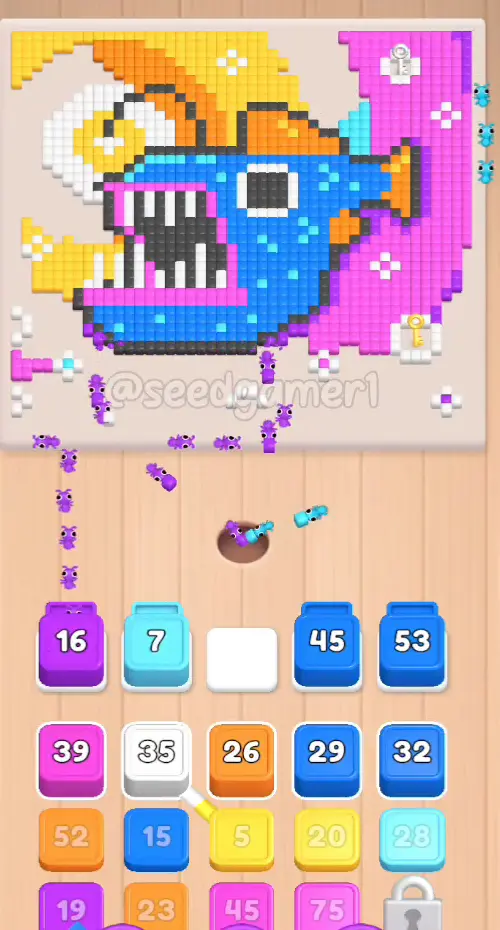
Phase 4 — Refilling Around the Stuck Blues (1:32 – 2:14)
| # | Time | Color Block | Count |
|---|---|---|---|
| 23 | 1:32 | 🟪 Magenta | 38 |
| 24 | 1:45 | 🟧 Orange | 26 |
| 25 | 2:04 | ⬜ White | 35 |
| 26 | 2:04 | 🟨 Yellow | 5 |
| 27 | 2:13 | 🟪 Magenta | 45 |
| 28 | 2:14 | 🟨 Yellow | 31 |
Phase 5 — The Second Wave of Blues (2:25 – 3:01)
| # | Time | Color Block | Count |
|---|---|---|---|
| 29 | 2:25 | 🟪 Magenta | 89 |
| 30 | 2:37 | 🟦 Blue | 29 |
| 31 | 2:37 | 🟨 Yellow | 20 |
| 32 | 3:00 | 🟦 Blue | 15 |
| 33 | 3:01 | 🟧 Orange | 22 |
Magenta ×89 is the largest pink block of the level — the whole pink field to the right of the monster.
Phase 6 — The Long Wait: Everything Frozen (3:51 – 4:06)
| # | Time | Color Block | Count |
|---|---|---|---|
| 34 | 3:51 | 🟨 Yellow | 13 |
| 35 | 3:54 | ⬜ White | 49 |
| 36 | 4:06 | 🟪 Magenta | 73 |
This is the dead stretch of the level. Every slot holds a blue block whose pixels are walled in, the counters barely move, and there is nothing useful to feed. After these three taps the board stalls for roughly 90 seconds until the blues break free.
Phase 7 — The Frozen Blues Release (5:32 – 6:19)
| # | Time | Color Block | Count |
|---|---|---|---|
| 37 | 5:32 | 🟦 Blue | 32 |
| 38 | 5:33 | 🩵 Cyan | 27 |
| 39 | 5:57 | 🟦 Blue | 18 |
| 40 | 6:19 | 🟧 Orange | 52 |
Phase 8 — Final Sweep (6:39 – 7:29)
| # | Time | Color Block | Count |
|---|---|---|---|
| 41 | 6:39 | 🟦 Blue | 18 |
| 42 | 6:40 | 🟣 Purple | 19 |
| 43 | 6:45 | ⬜ White | 49 |
| 44 | 6:49 | ⬛ Dark grey | 48 |
| 45 | 6:53 | 🟪 Magenta | 55 |
| 46 | 7:00 | 🟦 Blue | 22 |
| 47 | 7:04 | ⬜ White | 50 |
| 48 | 7:04 | ⬛ Dark grey | 89 |
| 49 | 7:10 | 🟨 Yellow | 99 |
| 50 | 7:11 | 🟪 Magenta | 16 |
| 51 | 7:14 | 🟧 Orange | 21 |
| 52 | 7:23 | 🟨 Yellow | 33 |
| 53 | 7:23 | 🟪 Magenta | 31 |
| 54 | 7:23 | ⬛ Dark grey | 48 |
| 55 | 7:29 | 🟨 Yellow | 20 |
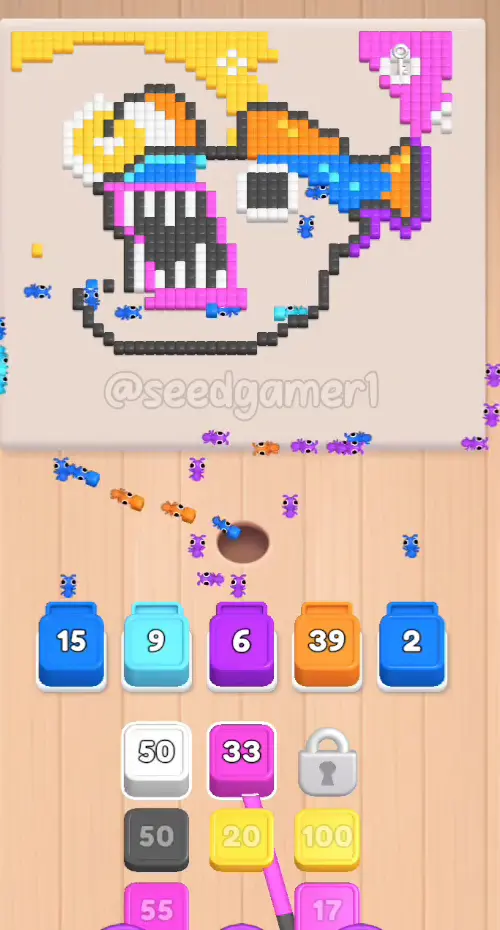
The endgame runs fast: the four long-frozen blues finish together, then the outline comes off in one burst. Dark grey ×89 is the single biggest block of the level — the monster's whole outline — and yellow ×99 clears every remaining yellow pixel on the board.
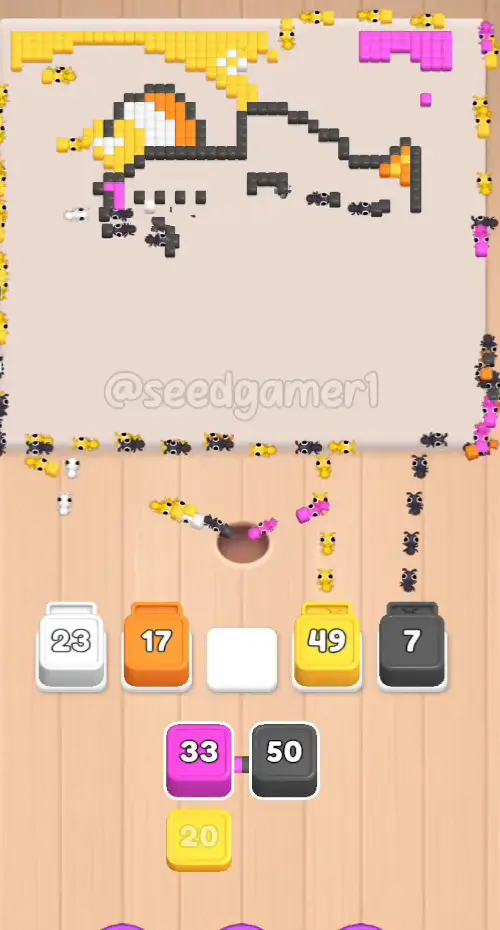
Watch step 55: the yellow block drops into a slot that already holds a yellow block, so instead of the slot going blank the counter jumps back up to ×20. If you expect an empty gap you will think you missed a tap.
The very last pixel to fall is Orange — at 7:36 the orange counter still shows ×1 while every other slot has emptied, and the board clears a second later.
Quick Reference (copy-paste order)
Purple 50 → Magenta 34 → Cyan 39 → Cyan 20 → Purple 34 → Orange 42 → Magenta 20 → Purple 22 → Orange 38 → Magenta 16 → Purple 30 → Orange 40 → White 3 → White 4 → Cyan 35 → Blue 45 → Yellow 30 → Magenta 79 → Cyan 27 → Magenta 70 → Blue 53 → Purple 43 → Magenta 38 → Orange 26 → White 35 → Yellow 5 → Magenta 45 → Yellow 31 → Magenta 89 → Blue 29 → Yellow 20 → Blue 15 → Orange 22 → Yellow 13 → White 49 → Magenta 73 → Blue 32 → Cyan 27 → Blue 18 → Orange 52 → Blue 18 → Purple 19 → White 49 → Dark grey 48 → Magenta 55 → Blue 22 → White 50 → Dark grey 89 → Yellow 99 → Magenta 16 → Orange 21 → Yellow 33 → Magenta 31 → Dark grey 48 → Yellow 20
Pro Tips
1. Fill all five slots in the first ten seconds. Steps 1–5 land between 0:03 and 0:07 and every one of them is a big block that will not stall early. There is no locked slot to work around on this level.
2. The four blue blocks are supposed to freeze. Steps 21, 30, 32 and the blue fed at 5:32 sit in their slots for two to six minutes with the counter barely moving. Their pixels are walled in by the dark outline, the white teeth and the orange fins, and they only come free once those colors are eaten.
3. Keep the tiny whites and the small yellow for idle moments. White ×3, white ×4 (steps 13–14) and yellow ×5 (step 26) clear in a second or two. Feeding them early burns a slot for almost no progress; feeding them while a big block drains costs nothing.
4. Save the two big dark greys for the endgame. Dark grey ×48 and dark grey ×89 (steps 44 and 48) are the jaw outline and the full monster outline, worth more than a third of the board between them. They are not reachable until the blues and pinks around them are gone, so they naturally land in the last minute.
5. Watch for the counter going up, not the slot going empty. The level ends with a same-color replacement at 7:29 — a second yellow block joins a slot that already holds yellow, and the number rises back to ×20 instead of resetting to blank.
6. No fail state. Nothing can be lost here. One clean run takes 7:46 of footage at the game's ▶2× eating speed (~3:53 of real time), and most of it is the frozen-blue waiting in Phase 6, not taps.
Compiled from frame-by-frame video analysis: 931 frames (2 fps). Every seat was located by tracking each slot's block colour programmatically across all 931 frames, then re-reading the landing frame to confirm the colour and the printed count. The final same-color replacement was found with a per-slot pixel-difference scan, not by eye.
Food Hunt Level 216 — frequently asked questions
- What colours are on the Food Hunt Level 216 board?
- The board image breaks down into 9 main colours, each covering at least 2% of it: pink (#F762E8, 26.3% of the board), orange (#F9B035, 19.3% of the board), blue (#238BF7, 13.3% of the board), dark grey (#514F54, 10.2% of the board), white (#F3EAEE, 10.1% of the board), purple (#B23CEF, 6.7% of the board), cyan (#56E3F3, 6.6% of the board), pale orange (#C2AB77, 4.7% of the board) and light purple (#8E6BD2, 2.7% of the board).
- Which colour should I clear first in Food Hunt Level 216?
- pink covers the most of the board at 26.3%, and orange is next at 19.3%. The step-by-step walkthrough above is this board's actual tap order; the colour shares here are only what each colour costs to clear.
- What difficulty is Level 216 in Food Hunt: Pixel Puzzle?
- Level 216 is rated Intermediate difficulty in Food Hunt: Pixel Puzzle.
- Is there a video walkthrough for this Food Hunt level?
- Yes — the walkthrough video on this page plays the full clear of this board, so you can follow the tap order block by block. The board image next to it shows what the finished picture is made of.
More intermediate walkthroughs
View all →
Featured walkthroughs
The levels players search for most - each with a full video guide.