Food Hunt Level 1177 Walkthrough & Answers
ExpertLevel 1177 video solution · published October 2, 2026
Watch on YouTube →- Difficulty
- Expert
- Colours on the board
- 8
- Biggest colour
- white 23.0%
- Clear from the start
- 0 - all walled off
- This page has
- Video + step-by-step
Pixel-Art Road Signs
How do you beat level 1177? Watch the video or follow the step-by-step picture and text guide to complete it!

Level board
Step-by-step walkthrough
Note: every count in the tables below is read off a screen recording, and each can sit 1–3 below the number the block actually carried — add 1–3 to a count before you compare it with your own queue. The block order, the slots and the timings are unaffected.
Prefer screenshots to video? Every phase of the clear is below in order, with the block counts and the frames they were taken from — keep it open next to the game and follow along tap by tap.
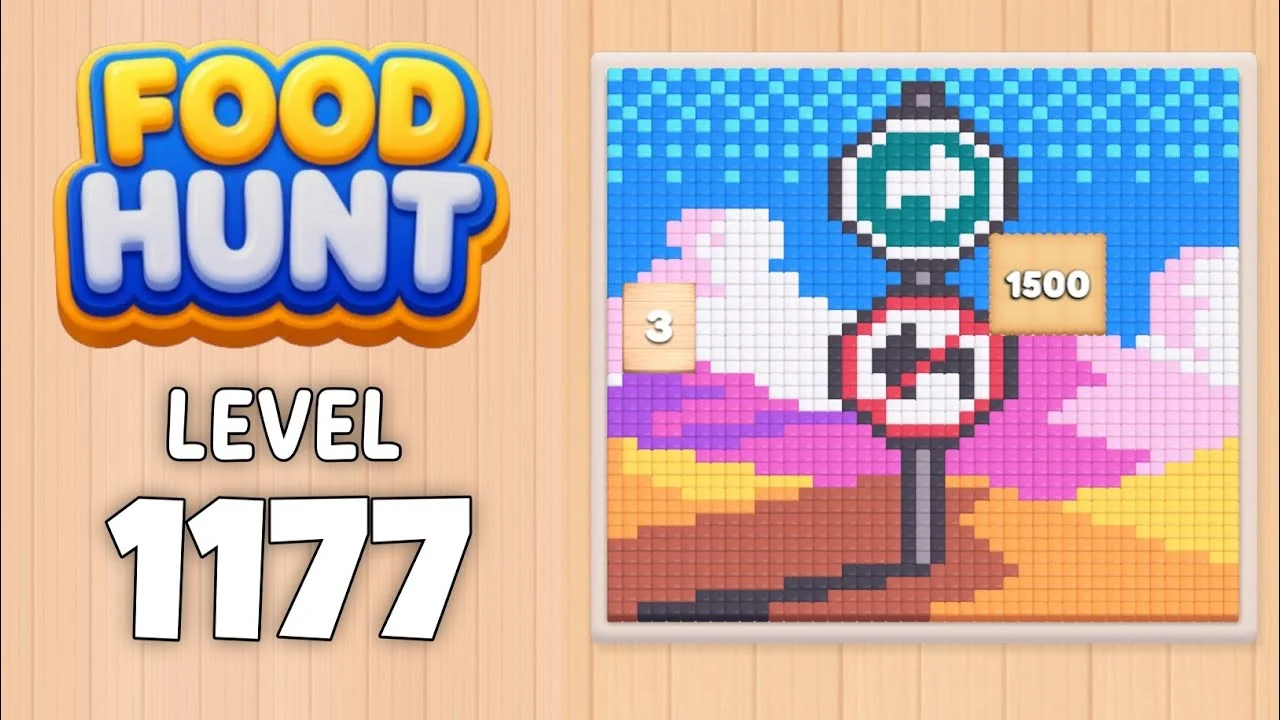
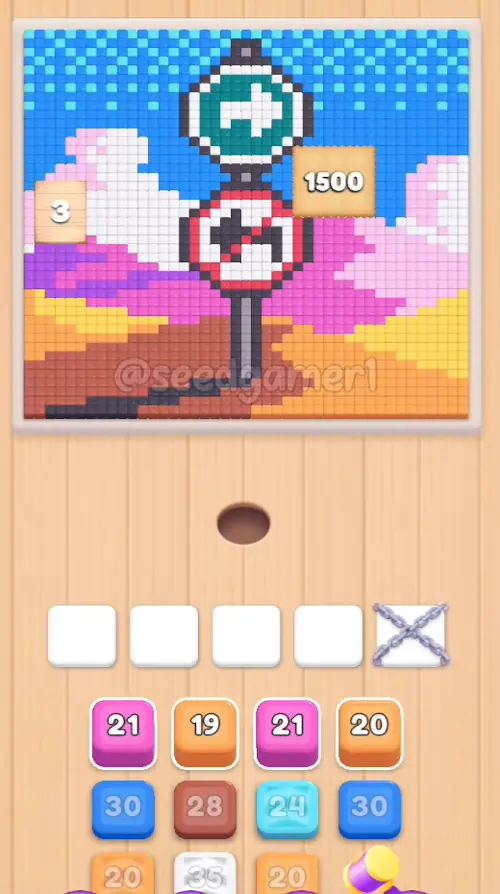
Level: 1177 — a pixel-art road scene: a green-and-white arrow sign above a red-and-white “no entry” sign, on a post against a blue sky, white clouds, pink-purple mountains, yellow fields and brown ground. The “EXTREME Level” banner clears after the opening seconds.
Blocks fed: 72 | Sum of printed counts: 1,783 | Move limit: none — the order only changes how fast you finish
Colors in this level: 🟪 Magenta · 🟦 Blue · 🟧 Orange · 🩵 Cyan · 🩷 Pale pink · 🟪 Mauve · 🟥 Red · ⬛ Dark grey · ⬜ White · 🟣 Purple · 🟫 Brown · 🟨 Yellow · 💠 Teal
How the Level Works
1. Tap a color block in the bottom queue to send it into the leftmost free slot above the queue. You cannot aim it, and the row stays packed against the left edge.
2. Ants of that color eat every reachable pixel of the matching color on the picture. The number on the block counts down as those pixels disappear. At 0 the block vanishes and frees its slot.
3. The fifth slot starts chained. The chain disappears at about 0:17, and Pale pink 28 is the first block to use it at 0:18.
4. Some blocks are extremely slow. Magenta 21 holds slot 1 from 0:03 to about 1:40; Red 5 holds slot 2 from 0:16 to about 2:44; Mauve 3 holds slot 4 from 0:11 to about 2:39. Do not wait for them — keep the other slots working.
5. The next block can arrive with no gap. A replacement can appear in the same slot without the slot ever showing empty. The timestamp marks the first frame the new block is fully seated.
6. Eat the entire picture to win. There is no move limit. The last block is seated at 4:34, the board is bare at 4:39, and the Level Complete screen appears at 4:41.
Complete Block Order
Timestamps are video time at 3x speed. Count is the number printed on the first frame where the block is fully seated. Because the ants start eating immediately, the same block can be 1–3 lower on the next frame; the landing value is used here.
Phase 1 — Opening and the Fifth Slot (0:03–0:32)
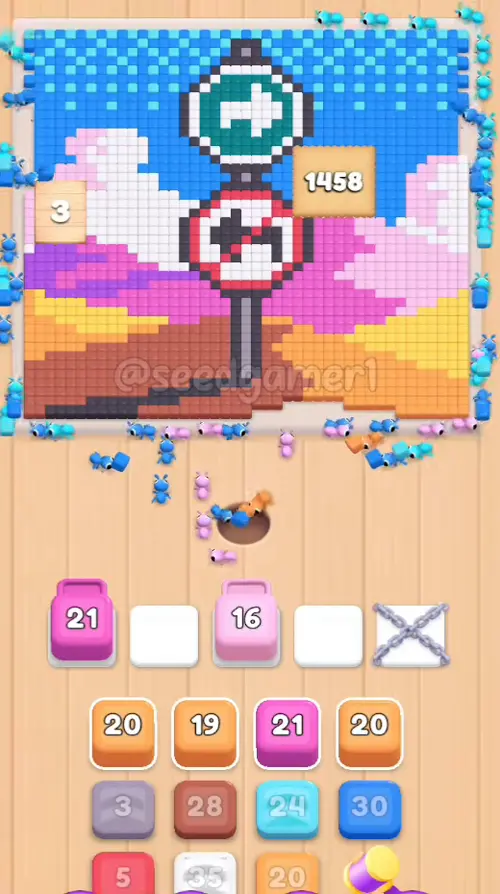
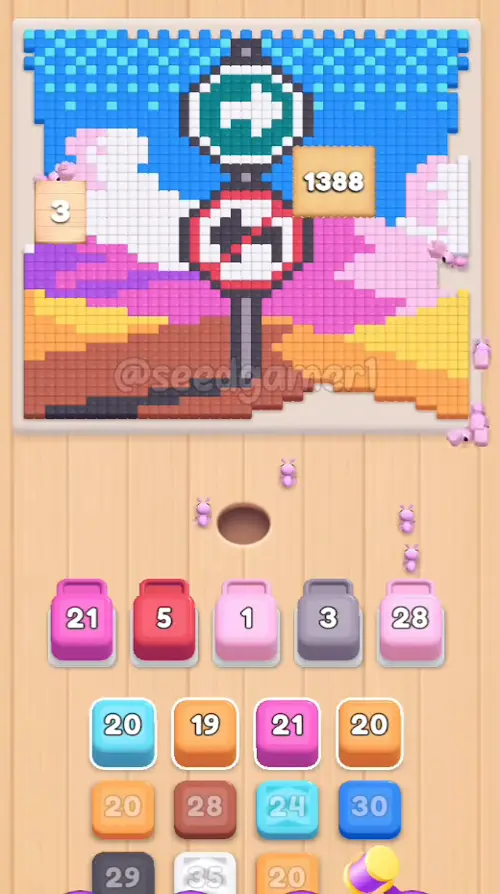
Four instant taps fill slots 1–4: Magenta 21, Blue 29, Orange 20 and Cyan 20. The fifth slot is still chained. Pale pink 24 replaces the Orange in slot 3 at 0:08, then Orange 19 and Mauve 3 take slots 2 and 4. Red 5 lands in slot 2 at 0:16. The chain on slot 5 disappears at about 0:17, and Pale pink 28 is the first block to use it at 0:18. Cyan 18, Orange 18 and Dark grey 27 follow. Mauve 3 and Red 5 are not going anywhere: they will hold their slots for more than two minutes.
| # | Time | Color Block | Count |
|---|---|---|---|
| 1 | 0:03 | 🟪 Magenta | 21 |
| 2 | 0:04 | 🟦 Blue | 29 |
| 3 | 0:04 | 🟧 Orange | 20 |
| 4 | 0:04 | 🩵 Cyan | 20 |
| 5 | 0:08 | 🩷 Pale pink | 24 |
| 6 | 0:11 | 🟧 Orange | 19 |
| 7 | 0:11 | 🟪 Mauve | 3 |
| 8 | 0:16 | 🟥 Red | 5 |
| 9 | 0:18 | 🩷 Pale pink | 28 |
| 10 | 0:24 | 🩵 Cyan | 18 |
| 11 | 0:27 | 🟧 Orange | 18 |
| 12 | 0:32 | ⬛ Dark grey | 27 |
Phase 2 — One Working Slot (0:51–1:23)
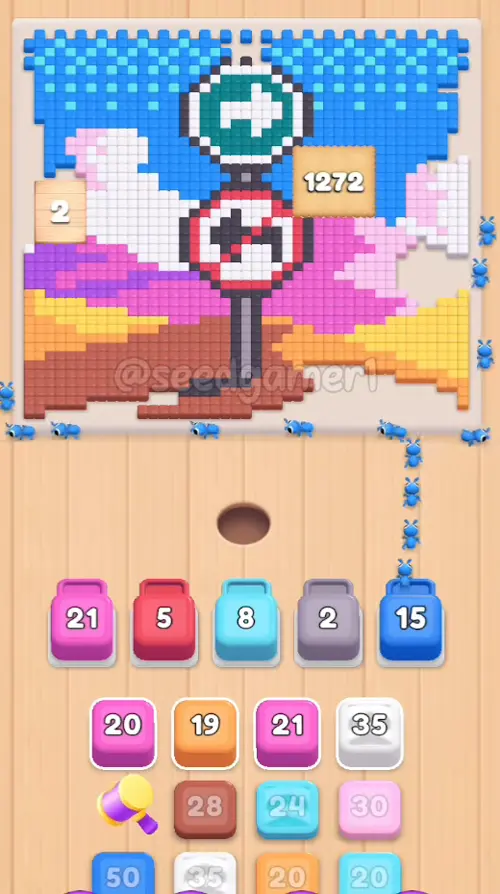
Slots 1–4 are now held by slow blocks, so almost all progress comes from slot 5. Orange 20, Blue 28, White 34, Pale pink 30 and Magenta 20 cycle through it between 0:51 and 1:23. Do not wait for the frozen blocks; keep tapping the free slot.
| # | Time | Color Block | Count |
|---|---|---|---|
| 13 | 0:51 | 🟧 Orange | 20 |
| 14 | 0:57 | 🟦 Blue | 28 |
| 15 | 1:02 | ⬜ White | 34 |
| 16 | 1:10 | 🩷 Pale pink | 30 |
| 17 | 1:23 | 🟪 Magenta | 20 |
Phase 3 — The First Big Unlock (1:40–2:13)
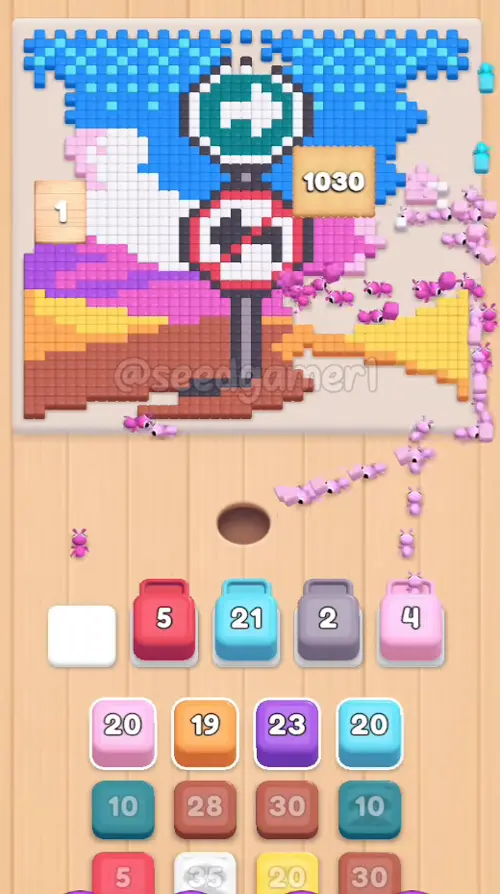
Magenta 21 finally clears slot 1 at about 1:40. Blue 50 takes it, and the board opens up. Cyan 24, Orange 19, Pale pink 28, Purple 23, Brown 30, Yellow 19, White 30 and Teal 7 follow in quick succession. This is the busiest stretch before the endgame.
| # | Time | Color Block | Count |
|---|---|---|---|
| 18 | 1:40 | 🟦 Blue | 50 |
| 19 | 1:50 | 🟪 Magenta | 20 |
| 20 | 1:50 | 🩵 Cyan | 24 |
| 21 | 1:51 | 🟧 Orange | 19 |
| 22 | 1:55 | 🩷 Pale pink | 28 |
| 23 | 2:00 | 🟣 Purple | 23 |
| 24 | 2:02 | 🟫 Brown | 30 |
| 25 | 2:08 | 🟨 Yellow | 19 |
| 26 | 2:12 | ⬜ White | 30 |
| 27 | 2:13 | 💠 Teal | 7 |
Phase 4 — The Long Holds Break (2:24–2:51)
The two long holds break: Red 5 leaves slot 2 at about 2:44 and Mauve 3 leaves slot 4 at about 2:45. Brown 28, Cyan 15, Yellow 18, Dark grey 29, Orange 19, Brown 26, White 33, Red 10 and Blue 48 fill the freed slots. From here the board drains much faster.
| # | Time | Color Block | Count |
|---|---|---|---|
| 28 | 2:24 | 🟫 Brown | 28 |
| 29 | 2:26 | 🩵 Cyan | 15 |
| 30 | 2:30 | 🟨 Yellow | 18 |
| 31 | 2:34 | ⬛ Dark grey | 29 |
| 32 | 2:44 | 🟧 Orange | 19 |
| 33 | 2:45 | 🟫 Brown | 26 |
| 34 | 2:45 | ⬜ White | 33 |
| 35 | 2:50 | 🟥 Red | 10 |
| 36 | 2:51 | 🟦 Blue | 48 |
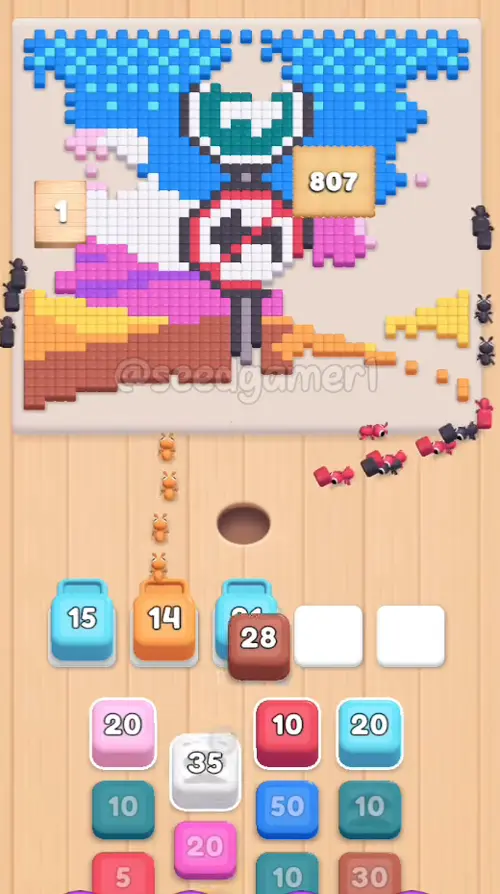
Phase 5 — The First 98 (2:59–3:25)
Magenta 18, Orange 18, Yellow 23, Brown 29, Blue 39, Red 10, White 27 and the first giant, Blue 98 at 3:25. The 98 block does most of the remaining blue sky and edge work.
| # | Time | Color Block | Count |
|---|---|---|---|
| 37 | 2:59 | 🟪 Magenta | 18 |
| 38 | 3:04 | 🟧 Orange | 18 |
| 39 | 3:04 | 🟨 Yellow | 23 |
| 40 | 3:09 | 🟫 Brown | 29 |
| 41 | 3:10 | 🟦 Blue | 39 |
| 42 | 3:16 | 🟥 Red | 10 |
| 43 | 3:18 | ⬜ White | 27 |
| 44 | 3:25 | 🟦 Blue | 98 |
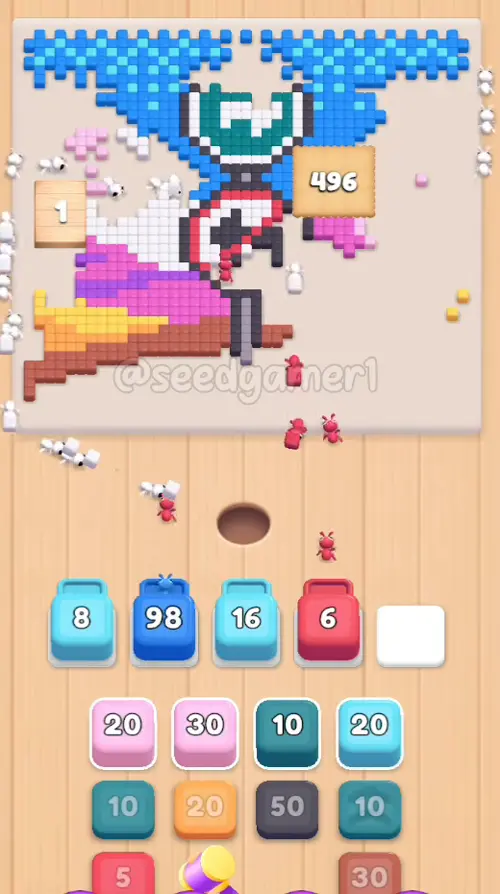
Phase 6 — Outline and Small Patches (3:34–3:58)
Teal 9, Dark grey 48, Pale pink 29, Orange 18, Brown 27, Yellow 28, Magenta 27, Mauve 6, White 28 and Blue 49. Keep every slot busy; the board is mostly outline and small colour patches now.
| # | Time | Color Block | Count |
|---|---|---|---|
| 45 | 3:34 | 💠 Teal | 9 |
| 46 | 3:40 | ⬛ Dark grey | 48 |
| 47 | 3:44 | 🩷 Pale pink | 29 |
| 48 | 3:45 | 🟧 Orange | 18 |
| 49 | 3:50 | 🟫 Brown | 27 |
| 50 | 3:53 | 🟨 Yellow | 28 |
| 51 | 3:54 | 🟪 Magenta | 27 |
| 52 | 3:55 | 🟪 Mauve | 6 |
| 53 | 3:56 | ⬜ White | 28 |
| 54 | 3:58 | 🟦 Blue | 49 |
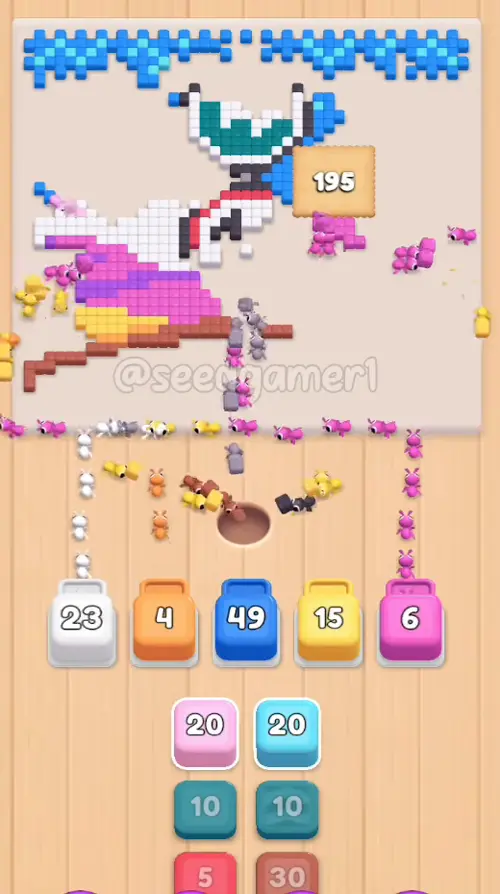
Phase 7 — The Endgame (4:10–4:34)
The endgame is a rapid cycle of small and medium blocks: Cyan 19, Teal 10, Brown 30, White 29, Red 4, Blue 37, White 29, Magenta 50, Dark grey 28, Pale pink 19, Dark grey 12, Teal 10, Red 4, Purple 21, Blue 50, White 45, Cyan 5 and Teal 10. The last three blocks are White 45 at 4:30, Cyan 5 at 4:31 and Teal 10 at 4:34. The board is bare at 4:39.
| # | Time | Color Block | Count |
|---|---|---|---|
| 55 | 4:10 | 🩵 Cyan | 19 |
| 56 | 4:10 | 💠 Teal | 10 |
| 57 | 4:10 | 🟫 Brown | 30 |
| 58 | 4:11 | ⬜ White | 29 |
| 59 | 4:11 | 🟥 Red | 4 |
| 60 | 4:14 | 🟦 Blue | 37 |
| 61 | 4:18 | ⬜ White | 29 |
| 62 | 4:19 | 🟪 Magenta | 50 |
| 63 | 4:21 | ⬛ Dark grey | 28 |
| 64 | 4:23 | 🩷 Pale pink | 19 |
| 65 | 4:24 | ⬛ Dark grey | 12 |
| 66 | 4:24 | 💠 Teal | 10 |
| 67 | 4:25 | 🟥 Red | 4 |
| 68 | 4:26 | 🟣 Purple | 21 |
| 69 | 4:28 | 🟦 Blue | 50 |
| 70 | 4:30 | ⬜ White | 45 |
| 71 | 4:31 | 🩵 Cyan | 5 |
| 72 | 4:34 | 💠 Teal | 10 |
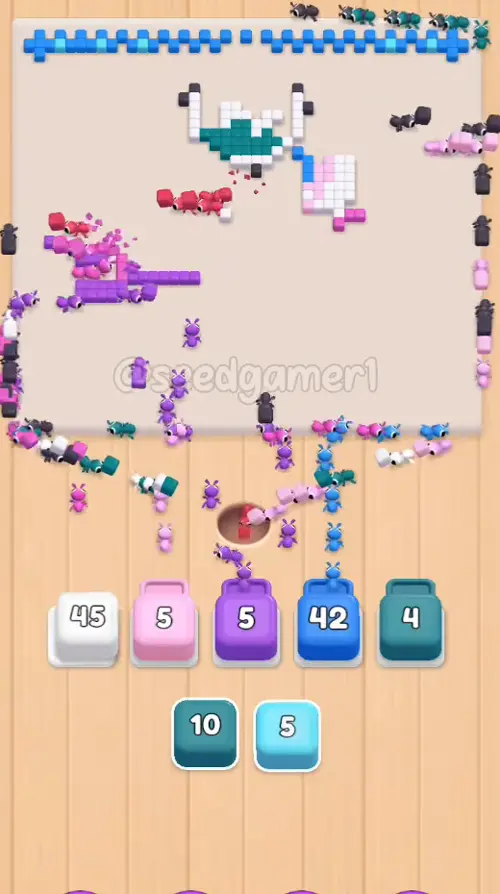
Finale — The Last Pixel
The last block is Teal 10, seated in slot 3 at 4:34. It counts down to 0, the board is completely bare at 4:39, and the Level Complete screen appears at 4:41.
The very last pixel to fall is Teal.
Quick Reference (Plain Names and Counts)
Magenta 21 → Blue 29 → Orange 20 → Cyan 20 → Pale pink 24 → Orange 19 → Mauve 3 → Red 5 → Pale pink 28 → Cyan 18 → Orange 18 → Dark grey 27 → Orange 20 → Blue 28 → White 34 → Pale pink 30 → Magenta 20 → Blue 50 → Magenta 20 → Cyan 24 → Orange 19 → Pale pink 28 → Purple 23 → Brown 30 → Yellow 19 → White 30 → Teal 7 → Brown 28 → Cyan 15 → Yellow 18 → Dark grey 29 → Orange 19 → Brown 26 → White 33 → Red 10 → Blue 48 → Magenta 18 → Orange 18 → Yellow 23 → Brown 29 → Blue 39 → Red 10 → White 27 → Blue 98 → Teal 9 → Dark grey 48 → Pale pink 29 → Orange 18 → Brown 27 → Yellow 28 → Magenta 27 → Mauve 6 → White 28 → Blue 49 → Cyan 19 → Teal 10 → Brown 30 → White 29 → Red 4 → Blue 37 → White 29 → Magenta 50 → Dark grey 28 → Pale pink 19 → Dark grey 12 → Teal 10 → Red 4 → Purple 21 → Blue 50 → White 45 → Cyan 5 → Teal 10
Pro Tips
1. Keep all five slots loaded after 0:17. The chain on slot 5 is the only early restriction; once it is gone, an empty slot is wasted time.
2. Do not wait for the frozen blocks. Magenta 21 (slot 1), Red 5 (slot 2) and Mauve 3 (slot 4) sit for more than two minutes. Feed whichever slot is free and let them resolve on their own.
3. Slot 5 carries the opening. From 0:18 to 1:23 the other four slots are held, so the level is effectively a one-slot game. Keep slot 5 cycling through Orange 20, Blue 28, White 34, Pale pink 30 and Magenta 20.
4. The first big sweep is Blue 98 at 3:25. It clears much of the remaining blue sky and the right edge. The second big sweep is Blue 50 at 4:28.
5. The final three blocks are White 45, Cyan 5 and Teal 10. Teal 10 is the last block and the last pixel to fall.
6. All timestamps are video time at 3x speed. If you play at normal speed, multiply the intervals by three.
Food Hunt Level 1177 — frequently asked questions
- What colours are on the Food Hunt Level 1177 board?
- The board image breaks down into 8 main colours, each covering at least 2% of it: white (#F8E5F3, 23.0% of the board), blue (#3096FA, 21.2% of the board), orange (#FBC26C, 14.8% of the board), red (#CB675F, 12.4% of the board), deep cyan (#405D69, 11.0% of the board), pink (#F26DD2, 10.3% of the board), cyan (#66E4FB, 4.1% of the board) and purple (#B16DD8, 3.1% of the board).
- Which colour should I clear first in Food Hunt Level 1177?
- white covers the most of the board at 23.0%, and blue is next at 21.2%. The step-by-step walkthrough above is this board's actual tap order; the colour shares here are only what each colour costs to clear.
- What difficulty is Level 1177 in Food Hunt: Pixel Puzzle?
- Level 1177 is rated Expert difficulty in Food Hunt: Pixel Puzzle.
- Is there a video walkthrough for this Food Hunt level?
- Yes — the walkthrough video on this page plays the full clear of this board, so you can follow the tap order block by block. The board image next to it shows what the finished picture is made of.
More expert walkthroughs
View all →
Featured walkthroughs
The levels players search for most - each with a full video guide.