Food Hunt Level 1148 Walkthrough & Answers
ExpertLevel 1148 video solution · published September 23, 2026
Watch on YouTube →- Difficulty
- Expert
- Colours on the board
- 9
- Biggest colour
- pale orange 20.0%
- Clear from the start
- 0 - all walled off
- This page has
- Video + step-by-step
Crying Baby at the Dinner Table
How do you beat level 1148? Watch the video or follow the step-by-step picture and text guide to complete it!
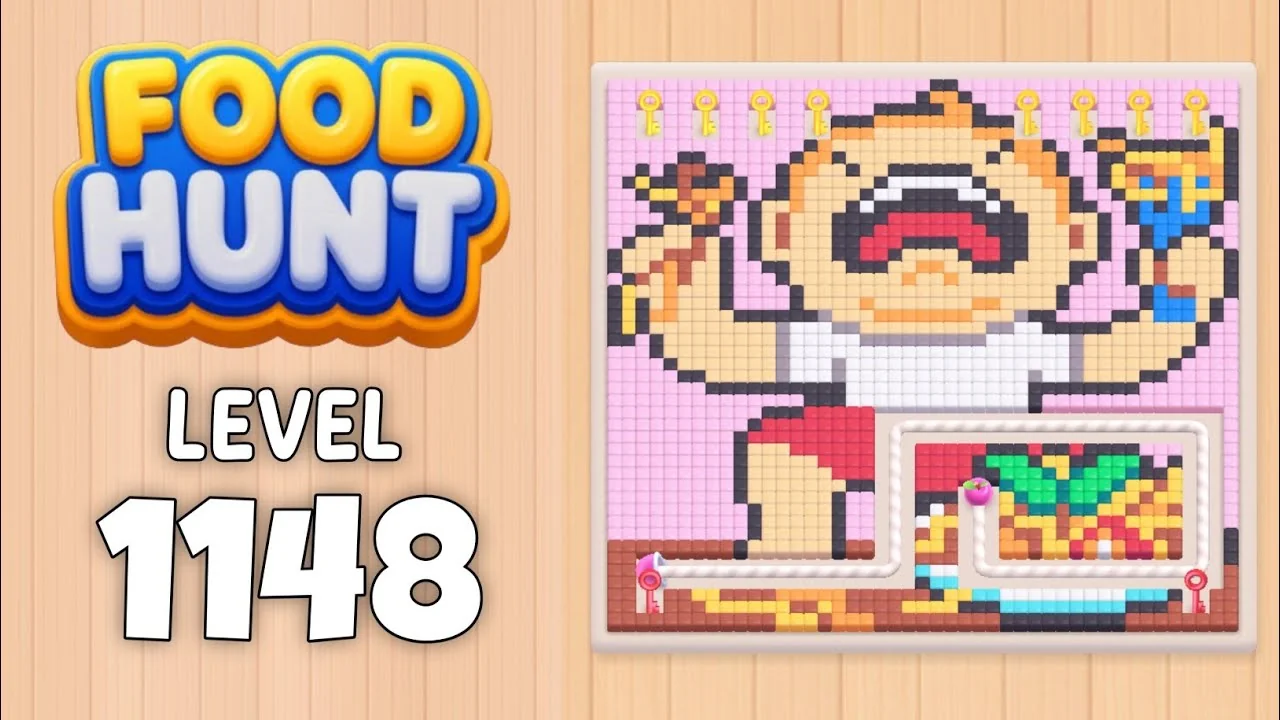
Level board
Step-by-step walkthrough
Note: every count in the tables below is read off a screen recording, and each can sit 1–3 below the number the block actually carried — add 1–3 to a count before you compare it with your own queue. The block order, the slots and the timings are unaffected.
Prefer screenshots to video? Every phase of the clear is below in order, with the block counts and the frames they were taken from — keep it open next to the game and follow along tap by tap.
Level: 1148 — a wailing pixel-art baby in a high chair, both arms raised, a fork in one hand and a blue cup in the other. The baby wears a white bib, sits on a red chair at a wooden table, and has a burger-and-fries picture framed at the bottom right. Four keys hang on the wall to the left and three to the right.
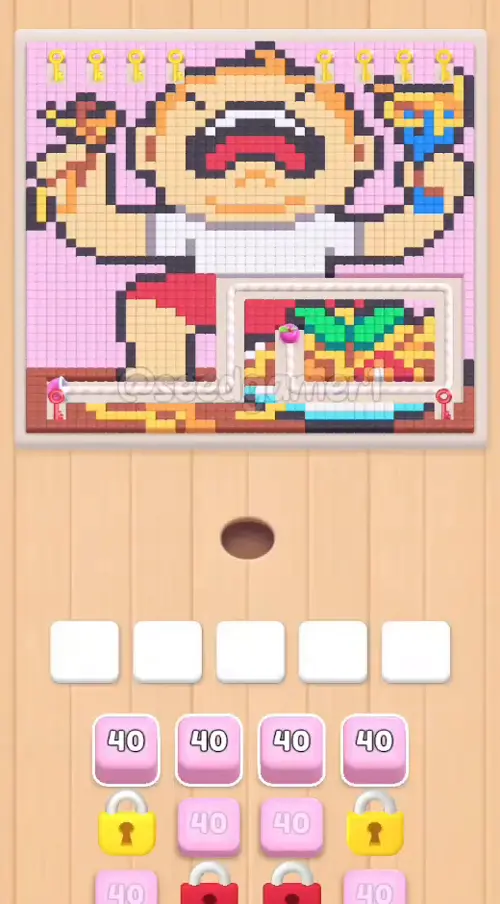
Colors in this level: 🩷 Pink · ⬛ Dark grey · 🟤 Tan · 🟫 Rust · 🟪 Magenta · 🟪 Mauve · ⬜ Off-white · 🟥 Red · 🟧 Orange · 🟨 Yellow · 🟩 Green · 🟦 Blue · 🩵 Cyan · 💠 Teal
How the Level Works
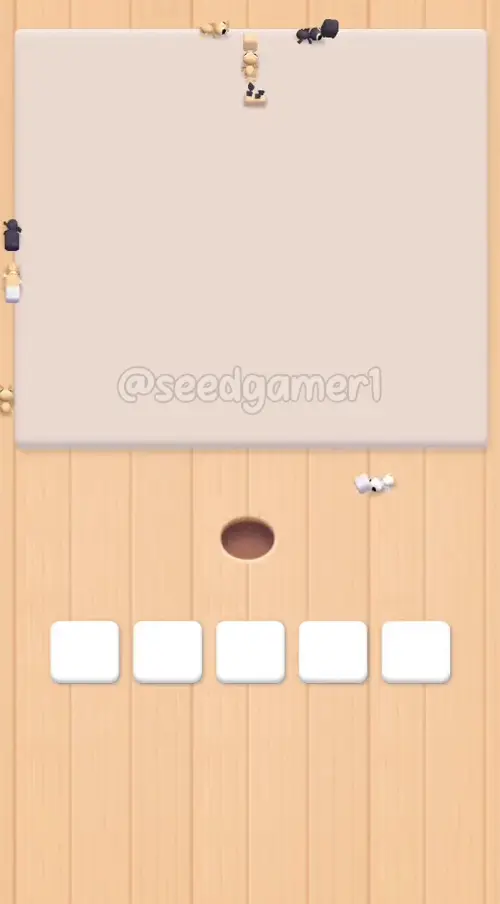
1. Tap a color block in the bottom queue to send it flying into one of the five slots above the queue. You cannot aim it — the block drops into a free slot and the row stays packed against the left edge, so the order you tap is the only thing you control.
2. Ants of that color pour out and eat every reachable pixel of the matching color on the picture; the number printed on the block counts down as those pixels disappear. At 0 the block vanishes and frees its slot.
3. Pixels can be walled in. A block that has run out of reachable pixels freezes at its current number, sometimes for minutes. This is normal for level 1148: four blocks in the opening lock-up freeze for between 1:32 and 3:07.
4. A block at 0 shows no number. It stays parked in the slot with a blank face until the picture opens up again, so a blank block is not a bug.
5. The next block can arrive with no gap. If you tap as the old block finishes, the replacement can appear in the same slot without the slot ever showing empty. The timestamps below mark the first frame the new block is visible.
6. Eat the entire picture to win. There is no move limit, so you can never lose — only take longer. A clean run seats 66 blocks between 0:01 and 4:26, the picture is bare at 4:34, and the Level Complete screen appears at 4:37.
Complete Block Order (Which Color First, Then Which)
Timestamps are when the block first appears in its slot (video time — the recording runs at 3x). Count is the number printed at that first visible frame. Because the ants start eating immediately, this can be 1–3 lower than the number on the same block while it is still in the queue.
Phase 1 — The Opening Pink Wave (0:00 – 0:10)
Five taps inside four seconds fill all five slots with Pink. The four small blocks clear between 0:12 and 0:14; the slot-1 Pink is replaced at 0:10 while the old block is down to 2, so the slot never shows empty.
| # | Time | Color Block | Count |
|---|---|---|---|
| 1 | 0:01 | 🩷 Pink | 39 |
| 2 | 0:03 | 🩷 Pink | 38 |
| 3 | 0:03 | 🩷 Pink | 39 |
| 4 | 0:04 | 🩷 Pink | 40 |
| 5 | 0:04 | 🩷 Pink | 40 |
| 6 | 0:10 | 🩷 Pink | 40 |
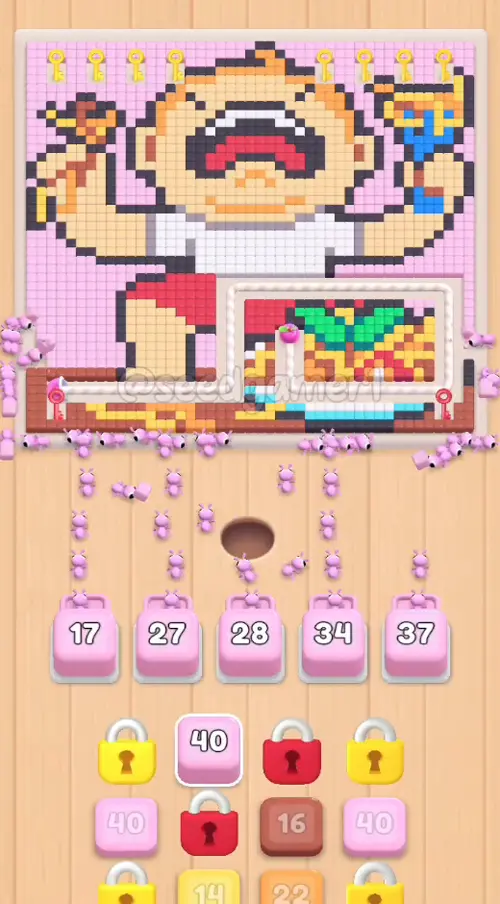
Phase 2 — The Board Fills Again (0:18 – 0:24)
Pink 38 and Pink 45 refill slots 1 and 2, then Rust, Mauve and Off-white take slots 3, 4 and 5. The Mauve 12 and Off-white 32 are the first two long freezes of the level. The Rust lands behind a passing Mauve block, so its first clear number is 15 on the next frame.
| # | Time | Color Block | Count |
|---|---|---|---|
| 7 | 0:19 | 🩷 Pink | 38 |
| 8 | 0:21 | 🩷 Pink | 45 |
| 9 | 0:23 | 🟫 Rust | 15 |
| 10 | 0:24 | 🟪 Mauve | 12 |
| 11 | 0:24 | ⬜ Off-white | 32 |
Phase 3 — Two Quick Blocks, Then Lockdown (0:27 – 0:31)
A Dark grey 17 clears slot 3 in three and a half seconds. Then Green 10, Tan 43 and Magenta 20 arrive. At 0:31 all five slots are full — Green 10, Tan 43, Magenta 20, Mauve 12, Off-white 32 — and four of them will not move for a long time.
| # | Time | Color Block | Count |
|---|---|---|---|
| 12 | 0:27 | ⬛ Dark grey | 17 |
| 13 | 0:31 | 🟩 Green | 10 |
| 14 | 0:31 | 🟤 Tan | 43 |
| 15 | 0:31 | 🟪 Magenta | 20 |
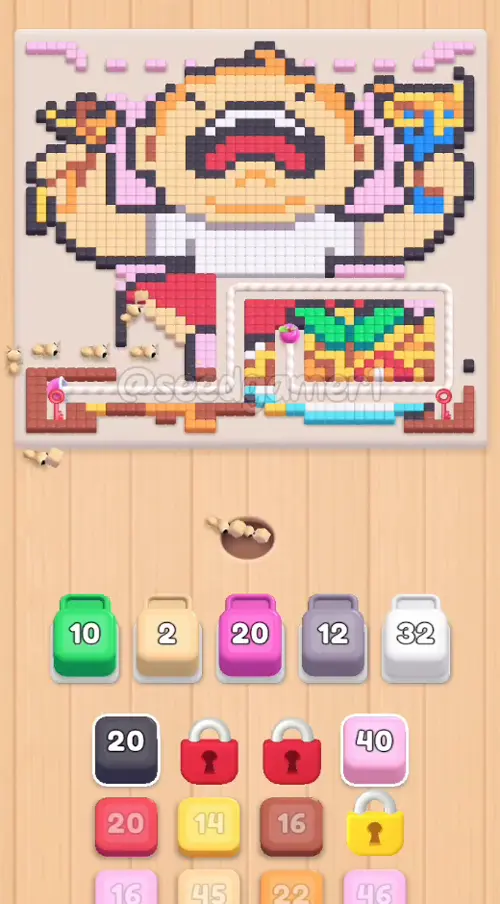
Phase 4 — Slot 2 Does All the Work (0:53 – 1:15)
Slot 2 frees at 0:50 and becomes the only working slot. Dark grey 18, Red 20, Pink 15 and Tan 25 pass through it in twenty seconds while the other four slots stay frozen. This is the stretch where a full board feels stuck but is still making progress.
| # | Time | Color Block | Count |
|---|---|---|---|
| 16 | 0:53 | ⬛ Dark grey | 18 |
| 17 | 0:57 | 🟥 Red | 20 |
| 18 | 1:11 | 🩷 Pink | 15 |
| 19 | 1:15 | 🟤 Tan | 25 |
Phase 5 — The 82 Dark Grey (1:24 – 1:50)
Pink 39, then the level's biggest block — Dark grey 82 — then Pink 46. The 82 is the block that breaks the picture's black outline open; it holds slot 2 for sixteen seconds and is the single largest bite of the level.
| # | Time | Color Block | Count |
|---|---|---|---|
| 20 | 1:24 | 🩷 Pink | 39 |
| 21 | 1:33 | ⬛ Dark grey | 82 |
| 22 | 1:50 | 🩷 Pink | 46 |
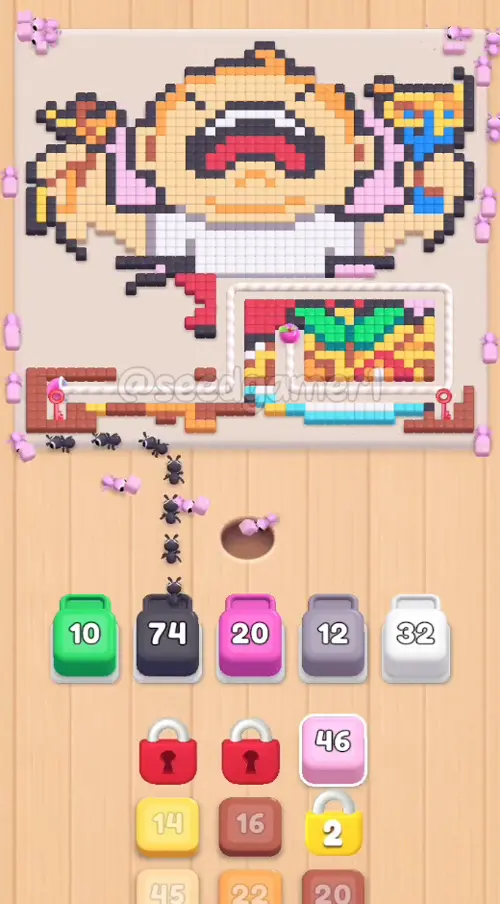
Phase 6 — The Right Side Wakes Up (1:57 – 2:10)
The Mauve 12 finally clears at 1:56 after 1:32, and the Off-white 32 at 1:58 after 1:35. Rust 20 and Tan 48 take slots 4 and 5. Then Orange 17, Dark grey 15 and Off-white 29 follow in a quick burst.
| # | Time | Color Block | Count |
|---|---|---|---|
| 23 | 1:57 | 🟫 Rust | 20 |
| 24 | 2:01 | 🟤 Tan | 48 |
| 25 | 2:03 | 🟧 Orange | 17 |
| 26 | 2:06 | ⬛ Dark grey | 15 |
| 27 | 2:10 | ⬜ Off-white | 29 |
Phase 7 — Fast Right-Side Churn (2:10 – 2:17)
Cyan 9 clears in two seconds, Yellow 13 in three, Tan 45 in ten and Orange 25 in seven. Slots 4 and 5 are turning over quickly while slots 1 and 3 remain frozen.
| # | Time | Color Block | Count |
|---|---|---|---|
| 28 | 2:10 | 🩵 Cyan | 9 |
| 29 | 2:14 | 🟨 Yellow | 13 |
| 30 | 2:17 | 🟤 Tan | 45 |
| 31 | 2:17 | 🟧 Orange | 25 |
Phase 8 — Slot 2 Returns (2:25 – 2:39)
Off-white 30, two Rust blocks, Orange 22, the big Tan 51 and Mauve 13. The Tan 51 is the second-largest block of the level and takes ten seconds; the Teal 12 that follows in Phase 10 will be the last block to hold slot 2 for a long stretch.
| # | Time | Color Block | Count |
|---|---|---|---|
| 32 | 2:25 | ⬜ Off-white | 30 |
| 33 | 2:28 | 🟫 Rust | 13 |
| 34 | 2:35 | 🟫 Rust | 15 |
| 35 | 2:36 | 🟧 Orange | 22 |
| 36 | 2:37 | 🟤 Tan | 51 |
| 37 | 2:39 | 🟪 Mauve | 13 |
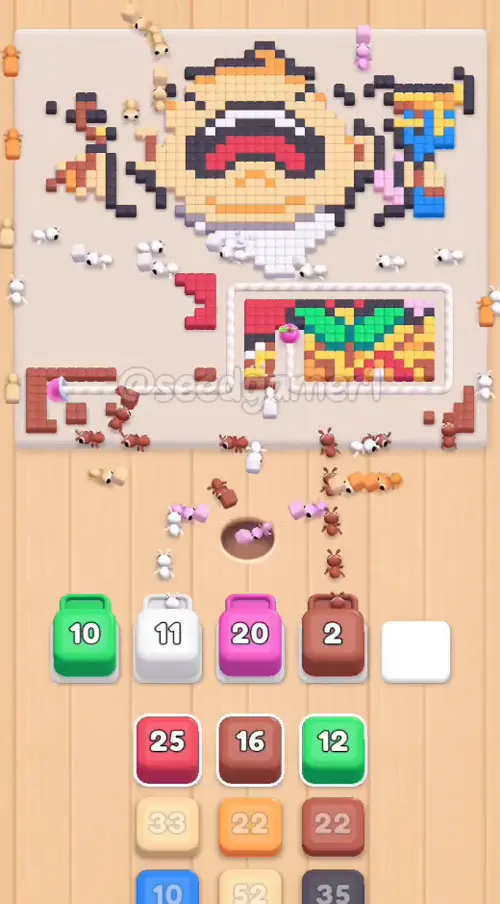
Phase 9 — The Long Wait, Then Slot 5 Locks (2:54 – 3:21)
Off-white 32 lands in slot 5 at 2:54 and will hold it until 4:31 — one minute and thirty-eight seconds. Dark grey 20, Red 24 and Tan 32 churn through slot 2 while the board waits for the two big frozen blocks: Green 10 in slot 1 and Magenta 20 in slot 3.
| # | Time | Color Block | Count |
|---|---|---|---|
| 38 | 2:54 | ⬜ Off-white | 32 |
| 39 | 3:09 | ⬛ Dark grey | 20 |
| 40 | 3:14 | 🟥 Red | 24 |
| 41 | 3:21 | 🟤 Tan | 32 |
Phase 10 — Magenta Unlocks First (3:24 – 3:32)
The Magenta 20 finally clears at 3:20 after 2:50; the Green 10 in slot 1 will follow at 3:37. Blue 10, Magenta 22, Dark grey 20, Teal 12, Blue 11 and Red 18 land in a rapid burst across the freed slots.
| # | Time | Color Block | Count |
|---|---|---|---|
| 42 | 3:24 | 🟦 Blue | 10 |
| 43 | 3:24 | 🟪 Magenta | 22 |
| 44 | 3:27 | ⬛ Dark grey | 20 |
| 45 | 3:29 | 💠 Teal | 12 |
| 46 | 3:32 | 🟦 Blue | 11 |
| 47 | 3:32 | 🟥 Red | 18 |
Phase 11 — Slot 1 Comes Back (3:38 – 3:49)
The Green 10 frees slot 1 at 3:37 after more than three minutes. Magenta 13, Rust 14, Dark grey 22 and Tan 38 follow. From here the whole board finally turns over quickly.
| # | Time | Color Block | Count |
|---|---|---|---|
| 48 | 3:38 | 🟪 Magenta | 13 |
| 49 | 3:45 | 🟫 Rust | 14 |
| 50 | 3:47 | ⬛ Dark grey | 22 |
| 51 | 3:49 | 🟤 Tan | 38 |
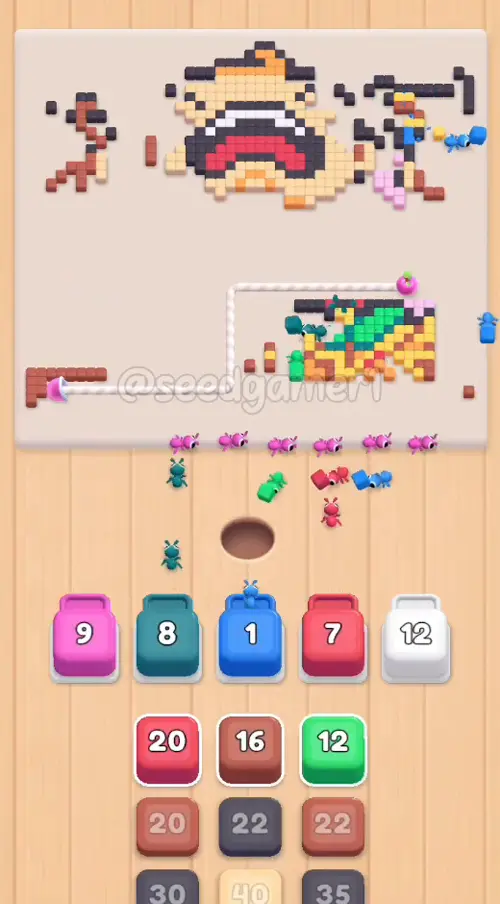
Phase 12 — Endgame Churn (3:55 – 4:07)
Pink 11, Magenta 18, Green 11, Yellow 13, Rust 21 and Dark grey 35. Most of these clear in three to eight seconds; the endgame is a steady left-to-right rotation rather than a stuck board.
| # | Time | Color Block | Count |
|---|---|---|---|
| 52 | 3:55 | 🩷 Pink | 11 |
| 53 | 3:57 | 🟪 Magenta | 18 |
| 54 | 4:01 | 🟩 Green | 11 |
| 55 | 4:04 | 🟨 Yellow | 13 |
| 56 | 4:07 | 🟫 Rust | 21 |
| 57 | 4:07 | ⬛ Dark grey | 35 |
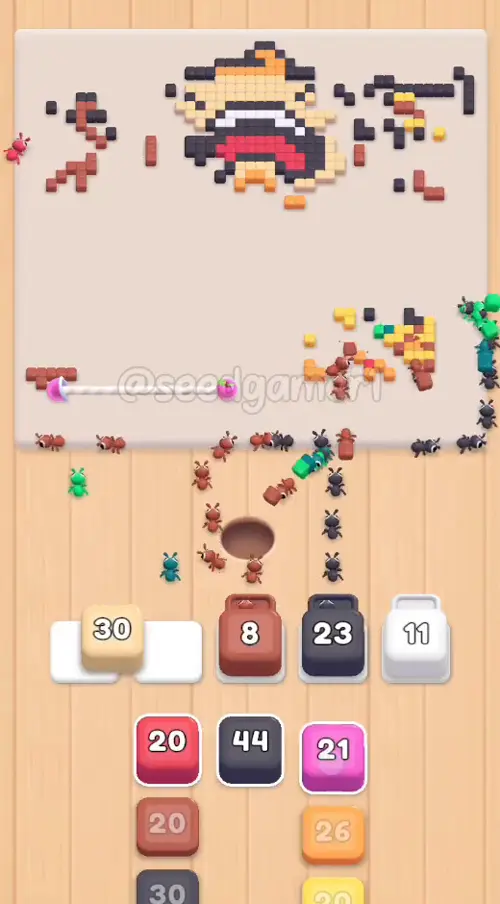
Phase 13 — Final Push (4:10 – 4:15)
Tan 30, Magenta 21, Red 18, Rust 20 and Dark grey 30. Slot 2 begins its final chain here: Magenta 21, Dark grey 30, Yellow 20 and Tan 23 arrive back to back with no empty frames between them.
| # | Time | Color Block | Count |
|---|---|---|---|
| 58 | 4:10 | 🟤 Tan | 30 |
| 59 | 4:10 | 🟪 Magenta | 21 |
| 60 | 4:12 | 🟥 Red | 18 |
| 61 | 4:15 | 🟫 Rust | 20 |
| 62 | 4:15 | ⬛ Dark grey | 30 |
Phase 14 — The Last Four Blocks (4:17 – 4:26)
Orange 24, Yellow 20, Dark grey 44 and Tan 23. The Dark grey 44 is the last large block; the Tan 23 is the last block of the level.
| # | Time | Color Block | Count |
|---|---|---|---|
| 63 | 4:17 | 🟧 Orange | 24 |
| 64 | 4:21 | 🟨 Yellow | 20 |
| 65 | 4:22 | ⬛ Dark grey | 44 |
| 66 | 4:26 | 🟤 Tan | 23 |
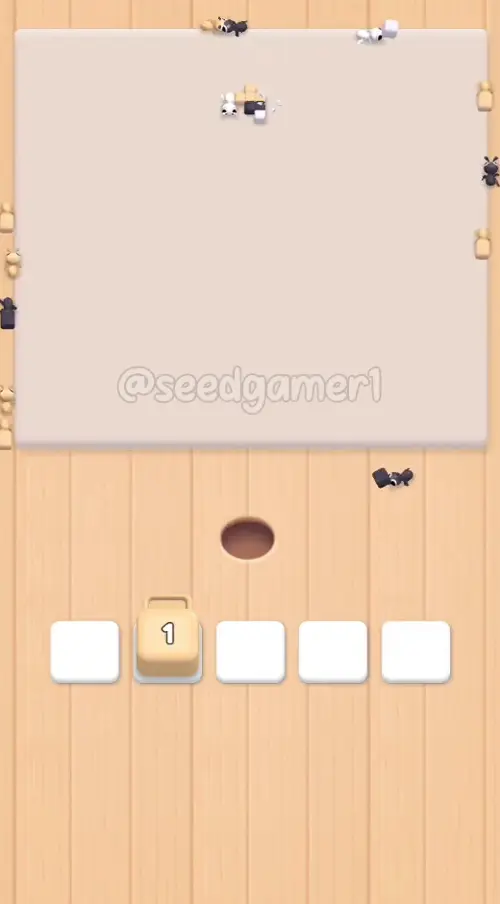
Finale — The Last Pixel
The Tan 23 counts down to 1 at 4:33. The picture is completely bare at 4:34, and the Level Complete screen appears at 4:37.
The very last pixel to fall is Tan.
Quick Reference (Plain Names and Counts)
Pink 39 → Pink 38 → Pink 39 → Pink 40 → Pink 40 → Pink 40 → Pink 38 → Pink 45 → Rust 15 → Mauve 12 → Off-white 32 → Dark grey 17 → Green 10 → Tan 43 → Magenta 20 → Dark grey 18 → Red 20 → Pink 15 → Tan 25 → Pink 39 → Dark grey 82 → Pink 46 → Rust 20 → Tan 48 → Orange 17 → Dark grey 15 → Off-white 29 → Cyan 9 → Yellow 13 → Tan 45 → Orange 25 → Off-white 30 → Rust 13 → Rust 15 → Orange 22 → Tan 51 → Mauve 13 → Off-white 32 → Dark grey 20 → Red 24 → Tan 32 → Blue 10 → Magenta 22 → Dark grey 20 → Teal 12 → Blue 11 → Red 18 → Magenta 13 → Rust 14 → Dark grey 22 → Tan 38 → Pink 11 → Magenta 18 → Green 11 → Yellow 13 → Rust 21 → Dark grey 35 → Tan 30 → Magenta 21 → Red 18 → Rust 20 → Dark grey 30 → Orange 24 → Yellow 20 → Dark grey 44 → Tan 23
Pro Tips
1. Keep all five slots loaded. A tap only happens when a slot is free. An empty slot is wasted time, even if the block you send will freeze later.
2. Feed slot 2 first whenever it is free. From 0:50 to 1:56 it is the only slot that keeps finishing blocks, while the other four are frozen.
3. Expect the opening lock-up: Mauve 12 (1:32), Off-white 32 (1:35), Magenta 20 (2:50) and Green 10 (3:07). Do not wait for them; refill whichever slot is free and let the frozen ones resolve on their own.
4. Put the two Off-white 32 blocks in late if you can. The one at 0:24 locks a slot for 1:35; the one at 2:54 locks a slot until 4:31. They are the slowest color in the level.
5. The big blocks are worth waiting for. Dark grey 82 (1:33), Tan 51 (2:36) and Dark grey 44 (4:22) take the largest single bites and open up the outline and the table area.
6. The last pixel is Tan. The final Tan 23 at 4:26 is the block that finishes the board at 4:34; nothing after it is needed.
7. All timestamps are video time at 3x speed. If you play at normal speed, multiply the intervals by three.
Food Hunt Level 1148 — frequently asked questions
- What colours are on the Food Hunt Level 1148 board?
- The board image breaks down into 9 main colours, each covering at least 2% of it: pale orange (#F7D6A8, 20.0% of the board), dark grey (#554955, 14.3% of the board), pale pink (#F4C2E7, 13.5% of the board), white (#F5F0F4, 10.3% of the board), orange (#F7BE64, 8.5% of the board), grey (#B69AA3, 8.0% of the board), red (#B46E5A, 6.8% of the board), pale red (#E34962, 4.9% of the board) and cyan (#2EADBA, 3.6% of the board). The cream around the picture reads as the board's empty background — it frames the artwork rather than forming part of it.
- Which colour should I clear first in Food Hunt Level 1148?
- pale orange covers the most of the board at 20.0%, and dark grey is next at 14.3%. The step-by-step walkthrough above is this board's actual tap order; the colour shares here are only what each colour costs to clear.
- What difficulty is Level 1148 in Food Hunt: Pixel Puzzle?
- Level 1148 is rated Expert difficulty in Food Hunt: Pixel Puzzle.
- Is there a video walkthrough for this Food Hunt level?
- Yes — the walkthrough video on this page plays the full clear of this board, so you can follow the tap order block by block. The board image next to it shows what the finished picture is made of.
More expert walkthroughs
View all →
Featured walkthroughs
The levels players search for most - each with a full video guide.