Food Hunt Level 1119 Walkthrough & Answers
ExpertLevel 1119 video solution · published September 16, 2026
Watch on YouTube →- Difficulty
- Expert
- Colours on the board
- 9
- Biggest colour
- dark grey 17.3%
- Clear from the start
- 0 - all walled off
- This page has
- Video + step-by-step
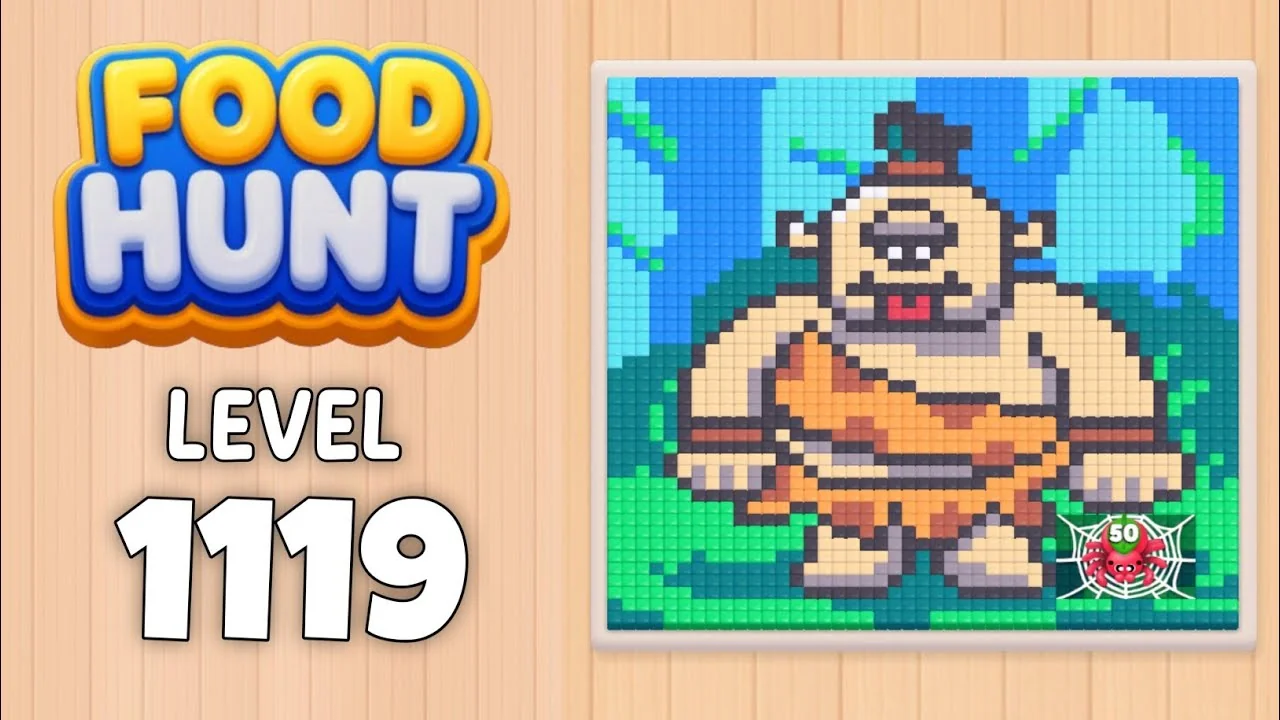
Samurai in the Bamboo Forest
How do you beat level 1119? Watch the video or follow the step-by-step picture and text guide to complete it!
Level board
Step-by-step walkthrough
Prefer screenshots to video? Every phase of the clear is below in order, with the block counts and the frames they were taken from — keep it open next to the game and follow along tap by tap.
Level: 1119 - a big samurai wrestler in an orange robe, black topknot and grey-purple belt, standing in a green bamboo valley under a bright blue sky. 77 blocks clear the board.
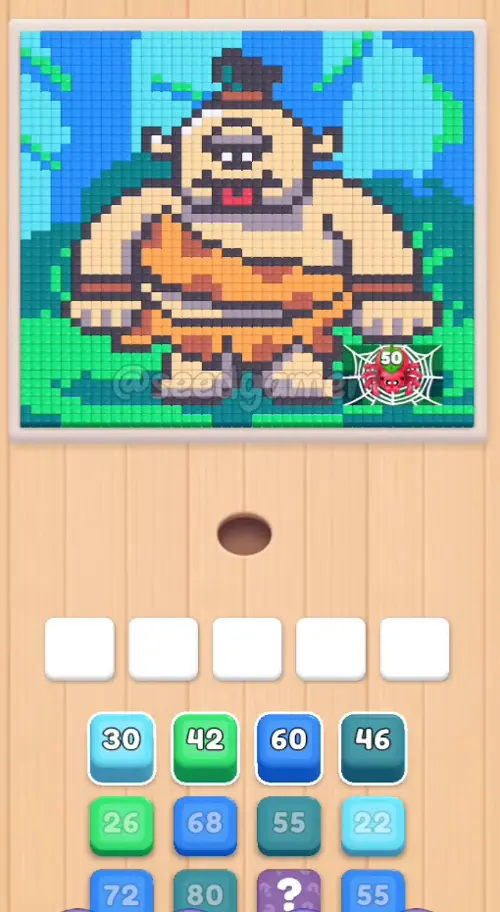
Colors in this level: 🟥 Red (the mouth and the red trim on the robe) · 💠 Teal (the dark blue-green bamboo shade) · 🟨 Sand (the skin and the pale parts of the robe) · 🟦 Blue (the sky) · ⬛ Dark grey (the outline, the eyes and the topknot) · 🩵 Cyan (the pale patches in the sky) · 🟪 Mauve (the grey-purple belt and shading) · 🟩 Green (the bamboo leaves) · 🟩 Lime (the brighter leaf-green blocks) · 🟫 Rust (the sword and the robe shadow) · 🟧 Orange (the robe) · ⬜ White (the highlights and the single-pixel leftovers)
How the Level Works
1. Tap a block in the bottom queue. It flies into the leftmost free slot. You cannot choose the slot, and no tap is possible while all five slots are full.
2. Ants of that colour eat every reachable matching pixel. The number on the block counts down; at 0 the block disappears and frees its slot.
3. A block only eats pixels it can reach. Cells walled in by a different colour stay put, which is why a Red 2 can sit in slot 1 for three and a half minutes.
4. Same-colour replacements leave no empty frame. When an old block clears and the same colour immediately takes its place, the only tell is the number jumping back up.
5. The queue narrows as it empties. It starts four columns wide, narrows to three columns around 2:15 and to two shortly after, and runs as a single column from about 4:07; the remaining columns re-centre each time.
6. Count is the value on the first fully seated frame. Ants start eating during the flight, so the next frame is often 1-3 lower.
7. The blocks are two greens. The plain mint-green blocks are Green; the brighter, leaf-patterned ones at 0:40, 1:27 and 3:03 are Lime.
Complete Block Order
All times are video time at 3x speed, shown to the nearest 0.5 second.
Phase 1 - Opening Five (0:03-0:04.5)
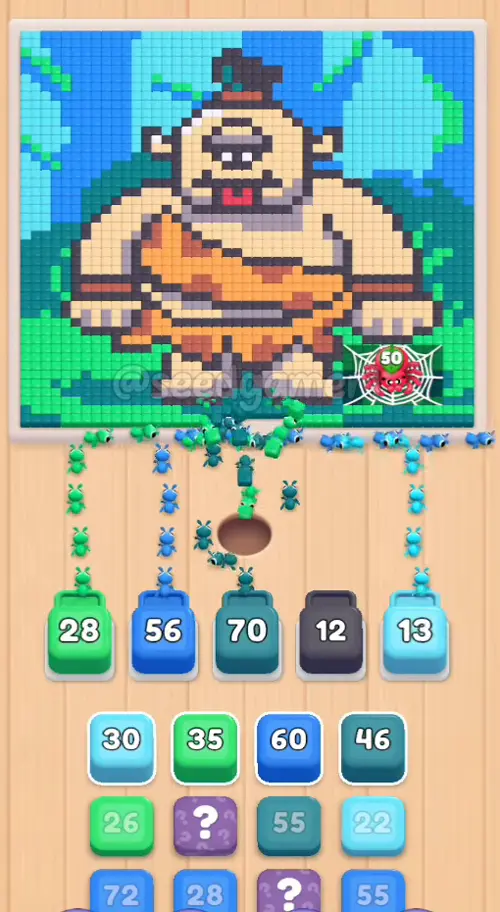
Five quick taps fill the row. Green 41 opens in slot 1, Blue 67 and Teal 80 follow at 0:03.5, Dark grey 12 takes slot 4 and Cyan 18 closes the row at 0:04.5.
| # | Time | Color Block | Count |
|---|---|---|---|
| 1 | 0:03 | 🟩 Green | 41 |
| 2 | 0:03.5 | 🟦 Blue | 67 |
| 3 | 0:03.5 | 💠 Teal | 80 |
| 4 | 0:04 | ⬛ Dark grey | 12 |
| 5 | 0:04.5 | 🩵 Cyan | 18 |
Phase 2 - First Refills (0:10-0:11.5)
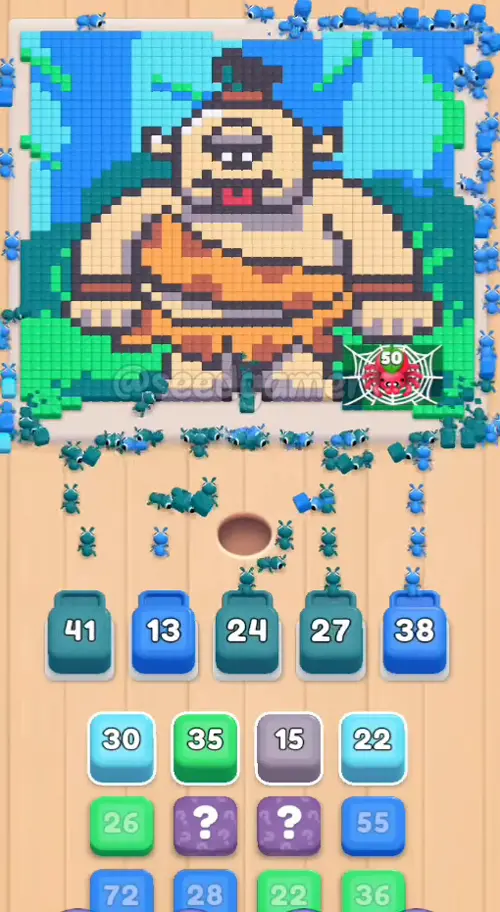
Blue 59 enters slot 5 at 0:10, then Teal 45 and Teal 54 refill slots 4 and 1.
| # | Time | Color Block | Count |
|---|---|---|---|
| 6 | 0:10 | 🟦 Blue | 59 |
| 7 | 0:11 | 💠 Teal | 45 |
| 8 | 0:11.5 | 💠 Teal | 54 |
Phase 3 - Second Wave (0:18-0:30)
Cyan 30, Green 26 and Blue 72 keep the row moving, then Green 34 and Mauve 15 arrive at 0:28 and 0:30.
| # | Time | Color Block | Count |
|---|---|---|---|
| 9 | 0:18 | 🩵 Cyan | 30 |
| 10 | 0:23.5 | 🟩 Green | 26 |
| 11 | 0:24 | 🟦 Blue | 72 |
| 12 | 0:28 | 🟩 Green | 34 |
| 13 | 0:30 | 🟪 Mauve | 15 |
Phase 4 - Third Refill (0:34.5-0:46.5)
Blue 27, Rust 10 and Sand 20 take the first three slots, followed by Lime 11, Sand 20, Dark grey 25 and Green 29.
| # | Time | Color Block | Count |
|---|---|---|---|
| 14 | 0:34.5 | 🟦 Blue | 27 |
| 15 | 0:35 | 🟫 Rust | 10 |
| 16 | 0:35.5 | 🟨 Sand | 20 |
| 17 | 0:40.5 | 🟩 Lime | 11 |
| 18 | 0:44 | 🟨 Sand | 20 |
| 19 | 0:46 | ⬛ Dark grey | 25 |
| 20 | 0:46.5 | 🟩 Green | 29 |
Phase 5 - The First Red Freeze (0:55-1:02)
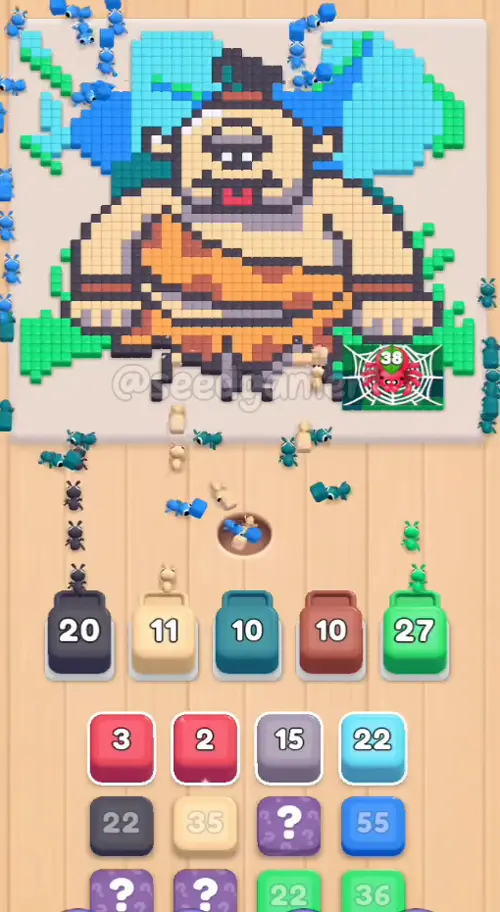
Red 2 and Sand 35 land together at 0:55, then Cyan 24, Mauve 12 and Dark grey 30. The two red blocks that arrive at 0:55 and 1:20 sit in their slots for about three and a half minutes: their few red pixels are walled in by the outline.
| # | Time | Color Block | Count |
|---|---|---|---|
| 21 | 0:55 | 🟥 Red | 2 |
| 22 | 0:55 | 🟨 Sand | 35 |
| 23 | 0:55.5 | 🩵 Cyan | 24 |
| 24 | 1:01.5 | 🟪 Mauve | 12 |
| 25 | 1:02 | ⬛ Dark grey | 30 |
Phase 6 - First Big Swap (1:20.5-1:31)
Red 3, Dark grey 20 and Green 26 arrive together, then Rust 7, Orange 17, Lime 22 and one more Dark grey 20.
| # | Time | Color Block | Count |
|---|---|---|---|
| 26 | 1:20.5 | 🟥 Red | 3 |
| 27 | 1:20.5 | ⬛ Dark grey | 20 |
| 28 | 1:21 | 🟩 Green | 26 |
| 29 | 1:25 | 🟫 Rust | 7 |
| 30 | 1:26.5 | 🟧 Orange | 17 |
| 31 | 1:27 | 🟩 Lime | 22 |
| 32 | 1:31 | ⬛ Dark grey | 20 |
Phase 7 - Midgame Refills (1:36-1:53.5)
Cyan 20 and Blue 54 land at 1:36, Green 36 at 1:37.5, then Mauve 15, Sand 28, Cyan 31 and Orange 20.
| # | Time | Color Block | Count |
|---|---|---|---|
| 33 | 1:36 | 🩵 Cyan | 20 |
| 34 | 1:36 | 🟦 Blue | 54 |
| 35 | 1:37.5 | 🟩 Green | 36 |
| 36 | 1:42.5 | 🟪 Mauve | 15 |
| 37 | 1:45 | 🟨 Sand | 28 |
| 38 | 1:47 | 🩵 Cyan | 31 |
| 39 | 1:53.5 | 🟧 Orange | 20 |
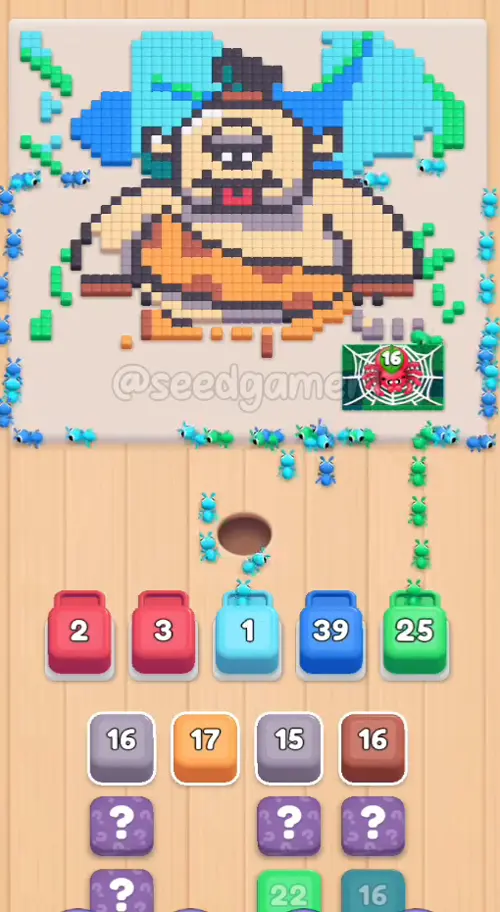
Phase 8 - Long Holds Begin (2:03.5-2:27)
Rust 15, Sand 25 and Dark grey 26 open the phase, Cyan 43 refills slot 5 at 2:15, and two Oranges (16 and 17) close it.
| # | Time | Color Block | Count |
|---|---|---|---|
| 40 | 2:03.5 | 🟫 Rust | 15 |
| 41 | 2:13 | 🟨 Sand | 25 |
| 42 | 2:13.5 | ⬛ Dark grey | 26 |
| 43 | 2:15 | 🩵 Cyan | 43 |
| 44 | 2:20 | 🟧 Orange | 16 |
| 45 | 2:27 | 🟧 Orange | 17 |
Phase 9 - Three-Color Rotation (2:32.5-3:03)
Teal 16 and Dark grey 25 take slots 3 and 4, Mauve 15 and Sand 18 follow, then Green 15, Blue 26 and Lime 14.
| # | Time | Color Block | Count |
|---|---|---|---|
| 46 | 2:32.5 | 💠 Teal | 16 |
| 47 | 2:33 | ⬛ Dark grey | 25 |
| 48 | 2:43.5 | 🟪 Mauve | 15 |
| 49 | 2:44.5 | 🟨 Sand | 18 |
| 50 | 2:54.5 | 🟩 Green | 15 |
| 51 | 3:02.5 | 🟦 Blue | 26 |
| 52 | 3:03 | 🟩 Lime | 14 |
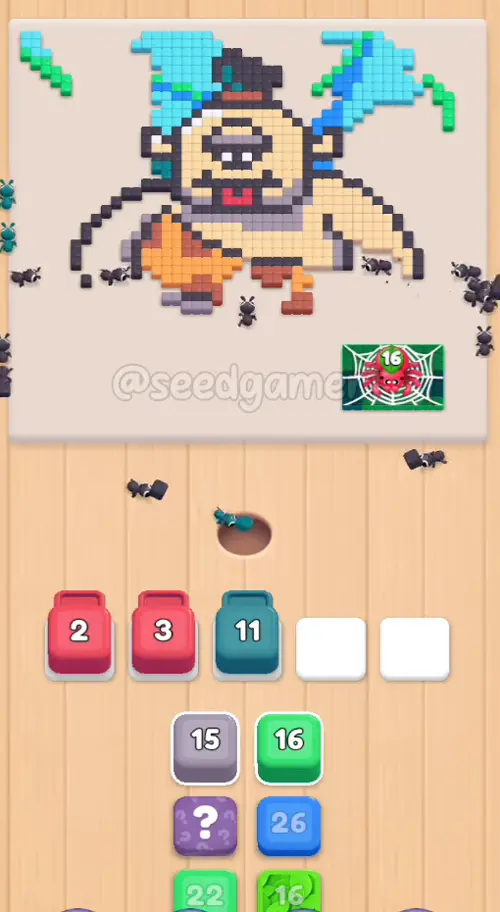
Phase 10 - Second Half (3:12-3:47)
Sand 34 and Cyan 25 arrive at 3:12 and 3:13, Mauve 16 and Green 21 at 3:29 and 3:32.5, Dark grey 20 at 3:37 and Rust 15 at 3:47.
| # | Time | Color Block | Count |
|---|---|---|---|
| 53 | 3:12 | 🟨 Sand | 34 |
| 54 | 3:13 | 🩵 Cyan | 25 |
| 55 | 3:29 | 🟪 Mauve | 16 |
| 56 | 3:32.5 | 🟩 Green | 21 |
| 57 | 3:37 | ⬛ Dark grey | 20 |
| 58 | 3:47 | 🟫 Rust | 15 |
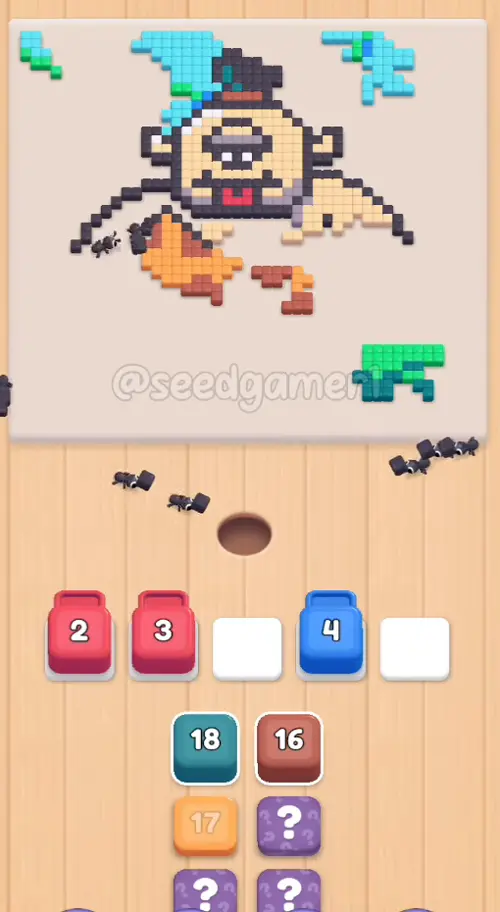
Phase 11 - A White 1 And The Three-Column Queue (4:07-4:20)
White 1 lands in slot 3 at 4:07 and holds a single pixel for about a minute and a half. Dark grey 28 follows at 4:07.5, Sand 33 refills slot 1 at 4:17.5, and Teal 18 and Orange 17 fill slots 2 and 5.
| # | Time | Color Block | Count |
|---|---|---|---|
| 59 | 4:07 | ⬜ White | 1 |
| 60 | 4:07.5 | ⬛ Dark grey | 28 |
| 61 | 4:17.5 | 🟨 Sand | 33 |
| 62 | 4:19.5 | 💠 Teal | 18 |
| 63 | 4:20 | 🟧 Orange | 17 |
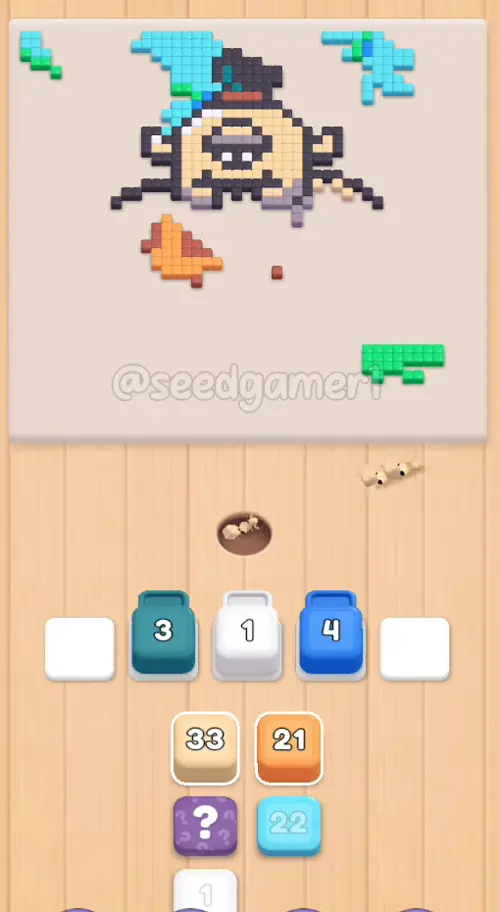
Phase 12 - Late Middle (4:44.5-5:17)
Orange 18 and Cyan 21 land together at 4:44.5, then Sand 33, Green 32, a second White 1, Cyan 27 and Dark grey 32.
| # | Time | Color Block | Count |
|---|---|---|---|
| 64 | 4:44.5 | 🟧 Orange | 18 |
| 65 | 4:44.5 | 🩵 Cyan | 21 |
| 66 | 4:56 | 🟨 Sand | 33 |
| 67 | 4:57 | 🟩 Green | 32 |
| 68 | 5:10.5 | ⬜ White | 1 |
| 69 | 5:11 | 🩵 Cyan | 27 |
| 70 | 5:17 | ⬛ Dark grey | 32 |
Phase 13 - Finale (5:32.5-5:53)
Rust 15, Dark grey 46, Sand 36, Cyan 30, Mauve 17, White 4 and finally Dark grey 32 at 5:53, the last tap of the level.
| # | Time | Color Block | Count |
|---|---|---|---|
| 71 | 5:32.5 | 🟫 Rust | 15 |
| 72 | 5:33.5 | ⬛ Dark grey | 46 |
| 73 | 5:36.5 | 🟨 Sand | 36 |
| 74 | 5:39.5 | 🩵 Cyan | 30 |
| 75 | 5:45.5 | 🟪 Mauve | 17 |
| 76 | 5:51.5 | ⬜ White | 4 |
| 77 | 5:53 | ⬛ Dark grey | 32 |
Finale and Clear
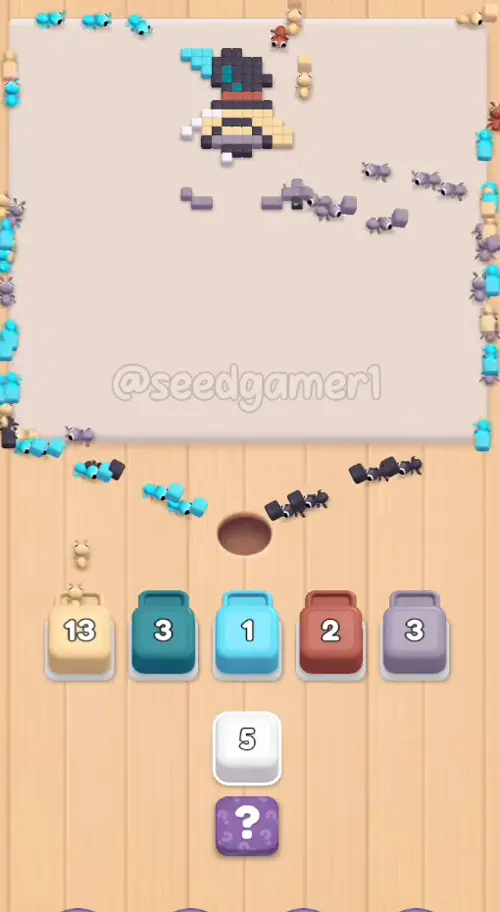
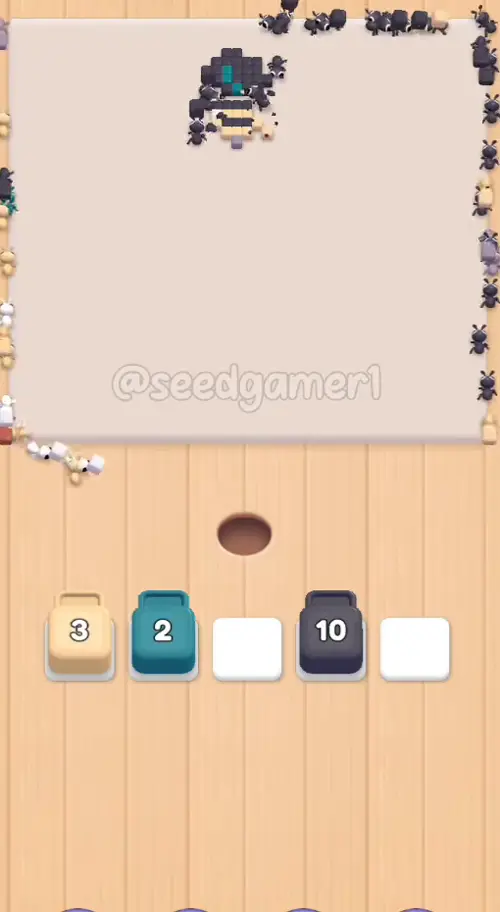
The last tap is Dark grey 32 at 5:53 in slot 4. White 4, which landed in slot 3 at 5:51.5, clears its single highlight pixel in a couple of seconds, so the board is left to the final Dark grey block, which eats the outline and the topknot. That makes the last pixel Dark grey.
The board is bare at about 5:59 and the Level Complete screen appears at 6:02.
Quick Reference - One-Line Order
Green 41 -> Blue 67 -> Teal 80 -> Dark grey 12 -> Cyan 18 -> Blue 59 -> Teal 45 -> Teal 54 -> Cyan 30 -> Green 26 -> Blue 72 -> Green 34 -> Mauve 15 -> Blue 27 -> Rust 10 -> Sand 20 -> Lime 11 -> Sand 20 -> Dark grey 25 -> Green 29 -> Red 2 -> Sand 35 -> Cyan 24 -> Mauve 12 -> Dark grey 30 -> Red 3 -> Dark grey 20 -> Green 26 -> Rust 7 -> Orange 17 -> Lime 22 -> Dark grey 20 -> Cyan 20 -> Blue 54 -> Green 36 -> Mauve 15 -> Sand 28 -> Cyan 31 -> Orange 20 -> Rust 15 -> Sand 25 -> Dark grey 26 -> Cyan 43 -> Orange 16 -> Orange 17 -> Teal 16 -> Dark grey 25 -> Mauve 15 -> Sand 18 -> Green 15 -> Blue 26 -> Lime 14 -> Sand 34 -> Cyan 25 -> Mauve 16 -> Green 21 -> Dark grey 20 -> Rust 15 -> White 1 -> Dark grey 28 -> Sand 33 -> Teal 18 -> Orange 17 -> Orange 18 -> Cyan 21 -> Sand 33 -> Green 32 -> White 1 -> Cyan 27 -> Dark grey 32 -> Rust 15 -> Dark grey 46 -> Sand 36 -> Cyan 30 -> Mauve 17 -> White 4 -> Dark grey 32
Pro Tips
1. Keep all five slots busy from 0:03. The opening five taps are: Green 41, Blue 67, Teal 80, Dark grey 12, Cyan 18. Nothing else can happen until a slot frees up, so feed the row left to right.
2. Do not wait for the red blocks. Red 2 lands at 0:55 in slot 1 and Red 3 at 1:20.5 in slot 2, and both sit there until about 4:14 because the red mouth pixels are surrounded by outline. Keep tapping the other three slots.
3. The White 1 blocks are single-pixel placeholders. One lands at 4:07 (slot 3) and another at 5:10 (slot 4); both hold one blocked pixel for minutes. They are not a bug and they are not wasted taps.
4. The biggest block of the finale is Dark grey 46 at 5:33.5. It eats a large slice of the remaining outline; the five small blocks after it (Sand 36, Cyan 30, Mauve 17, White 4, Dark grey 32) are clean-up, so keep the slots turning rather than waiting for a big win.
5. Watch the queue for the mystery block. The ? block in the queue shows its colour only when it lands. If a slot suddenly receives a colour you did not tap, that is the mystery block.
6. The queue re-centres as it shrinks. It starts four columns wide, narrows to three and then two in the second half, and is a single column from about 4:07. Tap whatever the leftmost column shows next.
7. The last pixel is Dark grey. The final Dark grey 32 at 5:53 clears the topknot at about 5:59.
Food Hunt Level 1119 — frequently asked questions
- What colours are on the Food Hunt Level 1119 board?
- The board image breaks down into 9 main colours, each covering at least 2% of it: dark grey (#514953, 17.3% of the board), pale orange (#F5D8AD, 17.3% of the board), dark cyan (#19AC87, 15.8% of the board), cyan (#52D2E7, 13.9% of the board), blue (#2991F5, 11.4% of the board), grey (#A39798, 9.5% of the board), orange (#F4A55B, 6.1% of the board), red (#B86056, 5.8% of the board) and deep cyan (#21625C, 2.9% of the board).
- Which colour should I clear first in Food Hunt Level 1119?
- dark grey covers the most of the board at 17.3%, and pale orange is next at 17.3%. The step-by-step walkthrough above is this board's actual tap order; the colour shares here are only what each colour costs to clear.
- What difficulty is Level 1119 in Food Hunt: Pixel Puzzle?
- Level 1119 is rated Expert difficulty in Food Hunt: Pixel Puzzle.
- Is there a video walkthrough for this Food Hunt level?
- Yes — the walkthrough video on this page plays the full clear of this board, so you can follow the tap order block by block. The board image next to it shows what the finished picture is made of.
More expert walkthroughs
View all →
Featured walkthroughs
The levels players search for most - each with a full video guide.