Food Hunt Level 100 Walkthrough
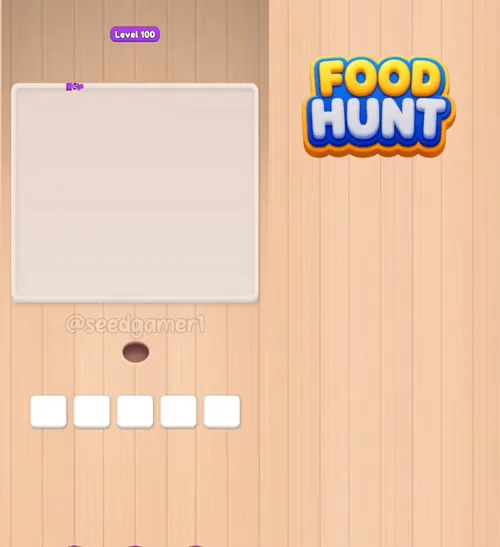
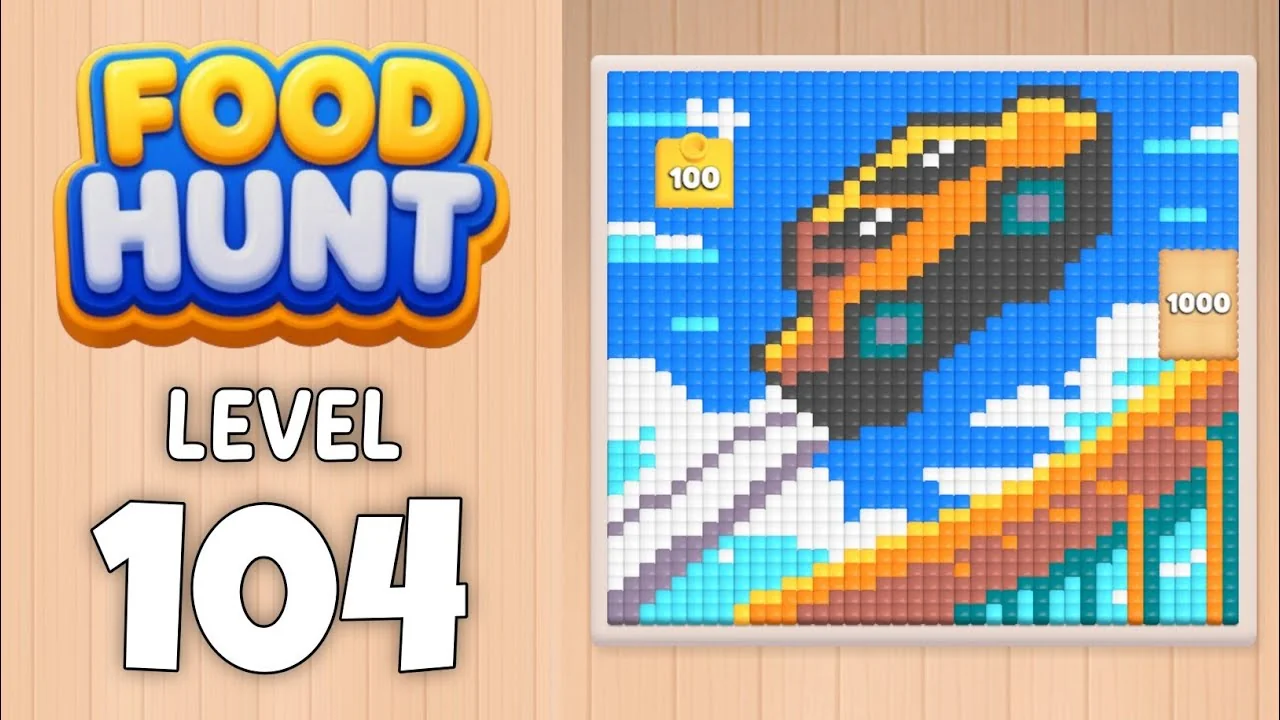
IntermediateStuck on Food Hunt level 100? Follow the full 36-block clear of the Pharaoh Cat board: open the edges, clear the big central areas, then grind out the slow detail colors.
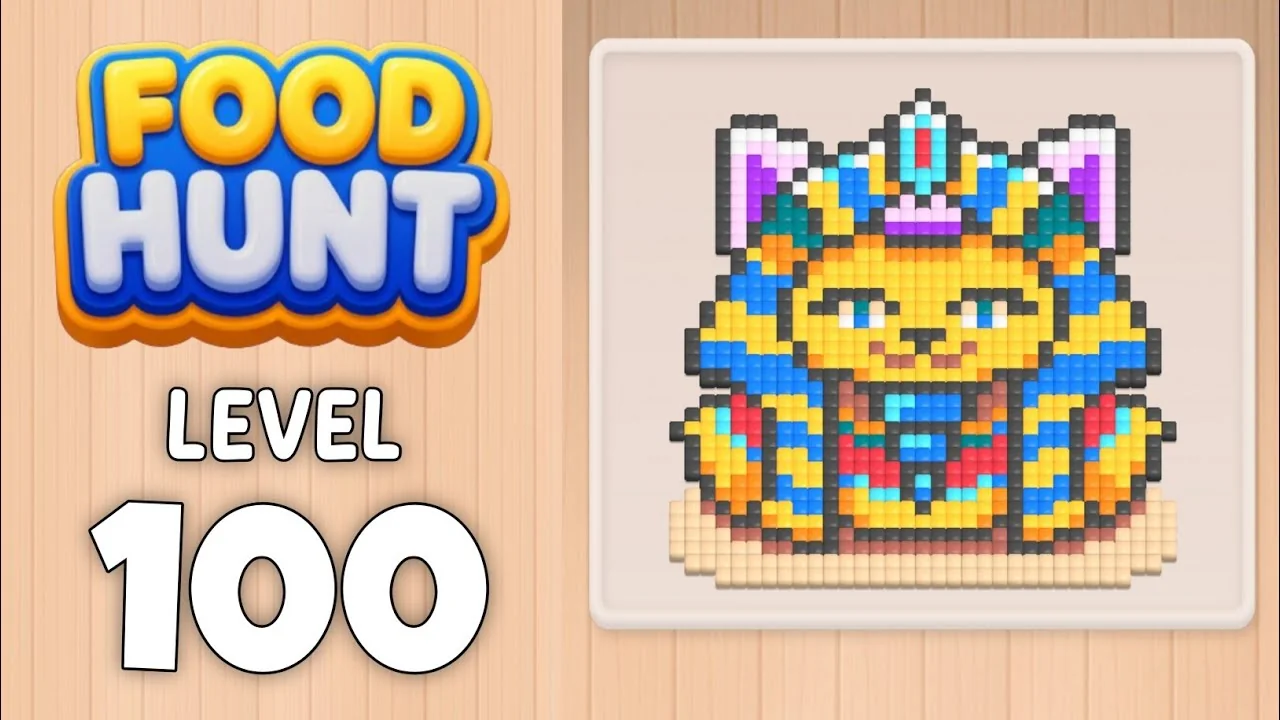
Level board
Step-by-step walkthrough
Prefer screenshots to video? Every phase of the clear is below in order, with the block counts and the frames they were taken from — keep it open next to the game and follow along tap by tap.
Level 100 is where Food Hunt: Pixel Puzzle stops being a warm-up — and this board earns its place as the milestone. The target is an Egyptian Pharaoh Cat in pixel art: a gold face and headdress wrapped in blue stripes, a purple crown jewel, a cyan and red collar, and thick dark outlines holding the whole picture together. This guide is compiled from a frame-by-frame analysis of a clean one-run clear (36 blocks fed, roughly 987 pixels eaten, about 2 minutes 20 seconds at 2x speed), so you can follow the exact order that works.
A quick mechanics recap first. Tap a color block in the bottom queue to send it into one of the 5 slots above. Ants of that color pour out and eat every reachable pixel of the matching color on the picture, and the number on the block counts down as pixels are eaten. When a block hits 0 it disappears and frees its slot. Eat the entire picture to win. There is no move limit — the order only affects speed — but pixels can be blocked by other colors, so some blocks pause ('stuck') until neighboring colors open the way. That is normal, not a mistake.
The strategy for this board has seven phases: open the edges, clear the big central areas, refill with detail colors, grind the crown and collar, sweep the slow colors, finish the top of the headdress, and mop up the last pixels. Here is the full sequence.
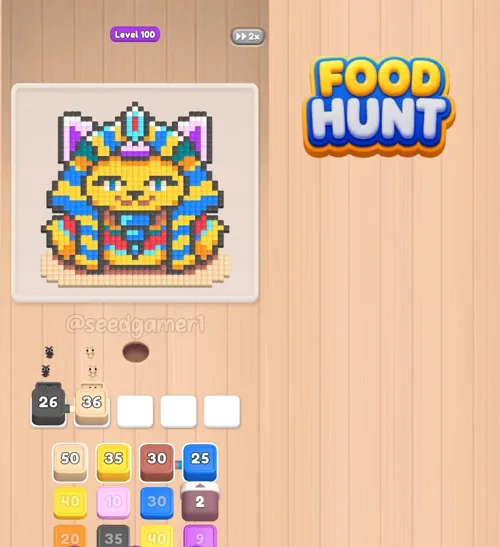
Phase 1 — open the edges (0:04–0:13). Send the big outline and base blocks first so the ants always have reachable pixels: Dark grey ×30 for the black outlines of the whole picture, then Beige ×40 and Beige ×50 for the sandy base platform, Yellow ×40 for the face and headdress gold, Brown ×30 for the chest and paw shading, and Blue ×25 for the blue headdress stripes.
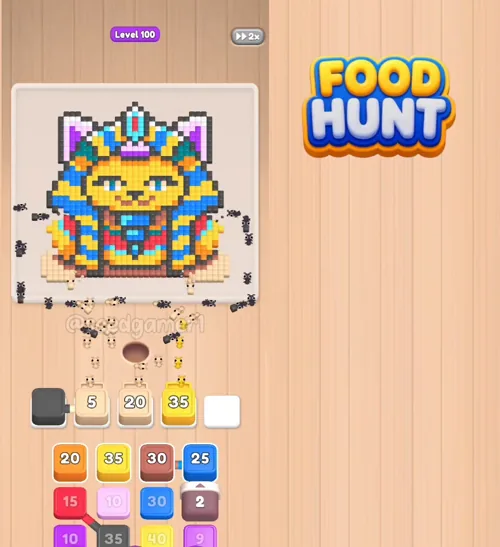
Phase 2 — big central areas (0:21–0:45). Refill every slot as it frees: Orange ×20 (cheek and side panels), Blue ×30 for the remaining blue stripes, Yellow ×40 for the main face gold, Dark grey ×35 for leftover outlines, Orange ×20 again, Blue ×35 for the last big blue batch, and Dark grey ×40 for the deep outlines around the head. One warning: the Brown ×30 from Phase 1 stalls at ×5 for a long time because its last pixels are buried. Just leave it in its slot — it finishes on its own around 0:55.
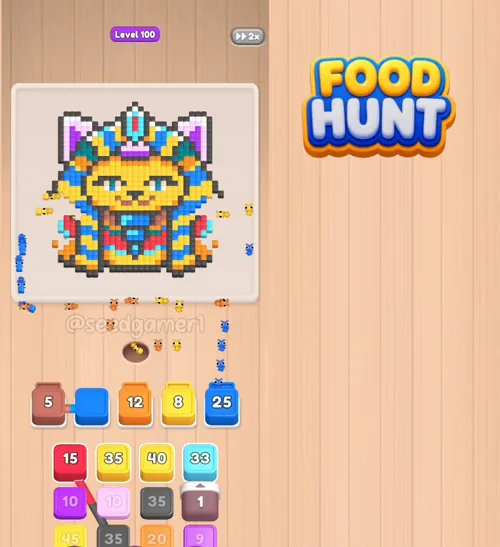
While the big blocks drain, the mid-game looks slow but the slots keep recycling. This is the stretch where discipline matters: do not tap a scattered color early just because a slot is free. Keep the big connected areas coming and let the buried blocks resolve themselves.
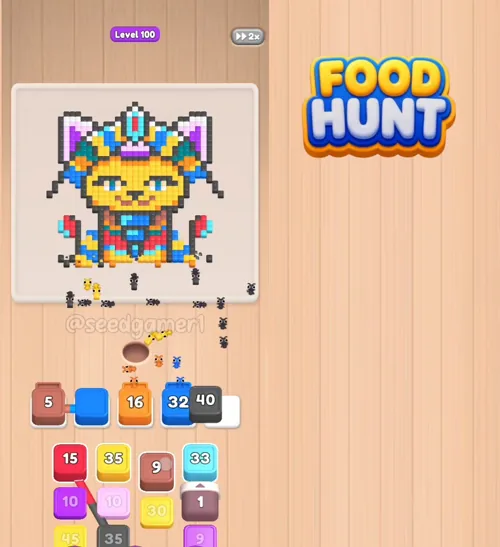
Phase 3 — detail colors (0:56–0:57). As soon as slots free up, refill all five at once: Yellow ×35 for the remaining face gold, Pink ×10 for the inner-ear pink (slow — it is a few isolated pixels), Red ×15 for the red collar cells, and Dark grey ×35 for the head outlines.
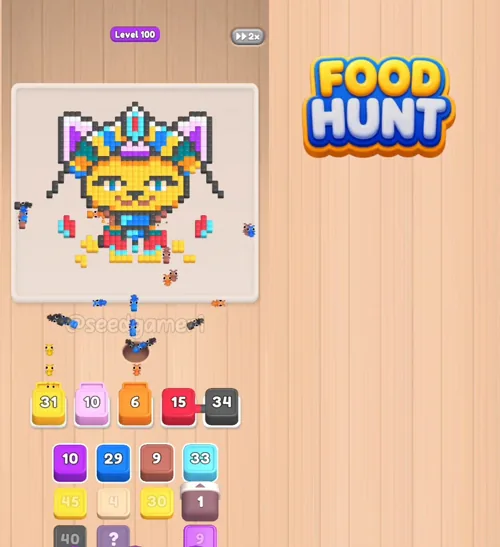
Phase 4 — crown and collar (1:07–1:21). Purple ×10 for the ear purple and the crown jewel, Yellow ×45 for the big gold crown area, Dark grey ×40 for the final big outline batch, Cyan ×33 for the cyan collar decoration, and Red ×16 for the last red cells. Pink ×10 and Purple ×10 will look stuck for 20–40 seconds. Do not panic — they drain once the surrounding colors disappear.
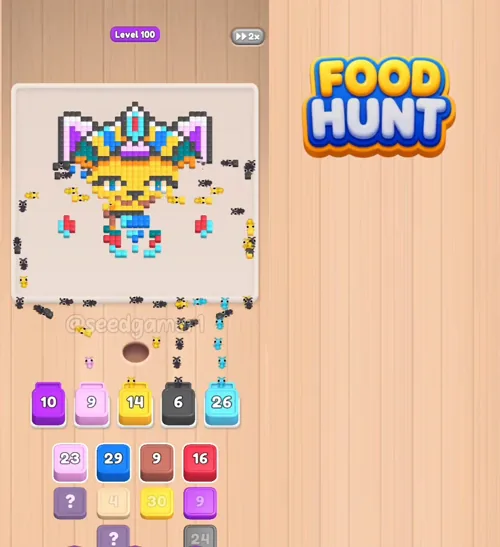
Phase 5 — slow grinders (1:27–1:41). Brown ×9 for the last brown bits, Yellow ×30 for the scattered gold, Blue ×29 for the last blue cells, Beige ×4 for the final sand cells, White ×21 for the eye highlights — place it now, not earlier — and Dark grey ×45, the biggest outline block, which should just keep running.
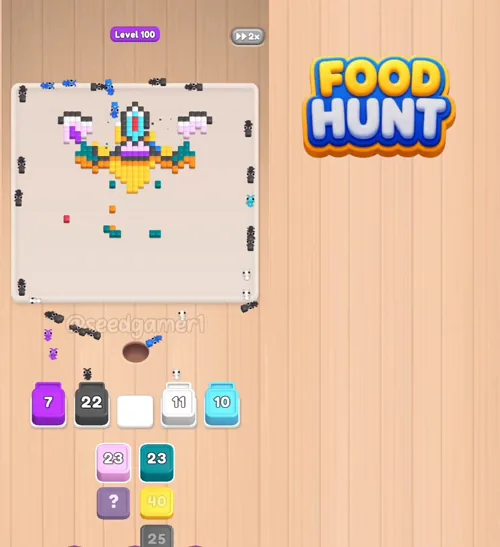
Phase 6 — top of the headdress (1:53–1:59). Purple ×9 for the purple headdress tips, Dark grey ×24 for the outline leftovers, Teal ×23 for the teal jewels on the headdress, and Yellow ×40 for the gold top of the head.
Phase 7 — final sweep (2:07–2:21). Pink ×23 for the pink headdress tips, Orange ×27 for the final orange (revealed from a '?' mystery block), Dark grey ×25 for the very last outlines, and Red ×4 for the last red cells. The very last pixel to fall is Purple, around 2:21 — once its counter hits zero, the board is empty and the level is complete.
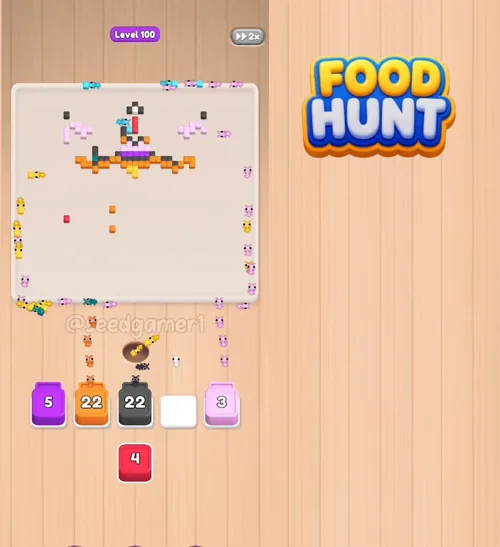
Quick reference — the full one-line order: Dark grey 30 → Beige 40 → Beige 50 → Yellow 40 → Brown 30 → Blue 25 → Orange 20 → Blue 30 → Yellow 40 → Dark grey 35 → Orange 20 → Blue 35 → Dark grey 40 → Yellow 35 → Pink 10 → Red 15 → Dark grey 35 → Purple 10 → Yellow 45 → Dark grey 40 → Cyan 33 → Red 16 → Brown 9 → Yellow 30 → Blue 29 → Beige 4 → White 21 → Dark grey 45 → Purple 9 → Dark grey 24 → Teal 23 → Yellow 40 → Pink 23 → Orange 27 → Dark grey 25 → Red 4.
Pro tips to carry into every board after this one. Keep all 5 slots full — an empty slot means idle ants, so the moment a block finishes, tap the next one. Big blocks first: ×40–×50 blocks sit on large connected areas, drain fast, and recycle slots quickly. Stuck blocks are normal — Brown ×30 (stalls at ×5), Pink ×10, Purple ×10 and White ×21 all pause while their pixels are buried, and they resolve automatically as neighbors clear, so never waste a slot re-tapping them. Do not feed White early — the eye highlights barely move while dark pixels surround them, and mid-game is the right time. Purple is the finale: its pixels are the most isolated on this board, and the last purple cell is literally the last pixel of the level. And remember there is no fail state — a wrong order only costs time, but following the order above gives a clean one-run clear in about 2 minutes 20 seconds.
More intermediate walkthroughs
View all →
Featured walkthroughs
The levels players search for most - each with a full video guide.